Editor’s Note: Creating the Photograph is a series that we’re starting where we interview photographers all about how they created an image. Want to be featured? Email chrisgampat[at]thephoblographer[dot]com
Aaron Nace is one of the head honchos over at Phlearn: arguably one of the best photography learning website ever. Since seeing his video on how to do Terry Richardson’s lighting, I was hooked on the creative content they produce. It was by chance that I found his image, “Night Flight” on 500px. Knowing what the man is capable of, I was eager to know how he shot it.
Here’s his story. And if you’re interested check out more in our Creating the Photograph series.
Concept
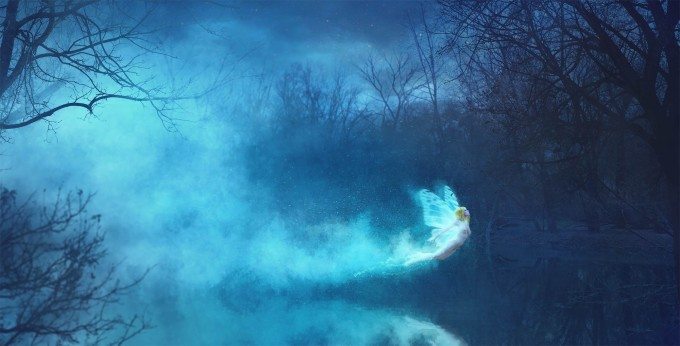
When I created this image I had just moved from North Carolina to Chicago and I was really missing the outdoors. I wanted to create an image that I felt got me back to my roots and captured the magic of nature. Nothing better to do that than a nature fairy.
I have always been drawn to fantasies and fairy tales, and that has become very apparent in my work. I love creating images that take you to a place slightly outside of reality.
I wanted to have this fairy flying over water that was reflecting the background to make it look as though it were really in a fantasy and there was no real ground.
Gear Used
This photo was taken with a Canon 5D Mk II and a 24-105mm f4.0 IS lens at f/14 ⅓ of a second. I wanted to make sure everything was in focus, but needed a lot of light to enter the camera. It was close to sunset at the time of the shoot so it was necessary to use a long shutter speed.
Only one light was used in this image, a Paul C. Buff Einstien with a 7” reflector. It was powered by a lithium ion Vagabond battery pack and fired via Pocketwizard Plus II. It was placed at half power and fired from the shore onto the model.
The Shoot
This image was shot on location at a forest preserve outside of Chicago. Most of my shoots involve a large team, but for this one I wanted to keep it low key.
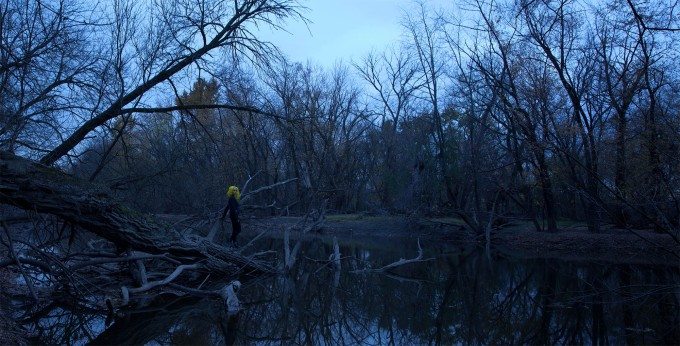
Once the location had been set the camera was placed on a tripod and didn’t move for the duration of the shoot. I keep the camera in the same place so I can capture multiple exposures and combine them later in post. In this case I also captured frames to the left and right to extend the image.
The lighting for the shot is very simple but was changed quite a bit in Photoshop. I placed a Paul C. Buff Einstien on the shore to the left of the camera and shot through a 7” reflector.
After the lighting and camera were placed, our model disrobed and got into place. She was photographed in several poses with the goal being to make it look like she was flying.
The shoot itself was quite simple as you can see from the original image.
Post Production
The final image is the result of a lot of post production. You can see traces of the original image in the final but for the most part it has been altered. I wanted to create a sense of depth in the image, feeling that it was a little flat to begin with. This required cutting out and removing the entire foreground.
Once the foreground was removed, I added a new mid ground of “fairy dust” then added in a new foreground. This sounds simple but in practice it requires many hours of work in Photoshop. The final image is a result of 10+ hours in post.
The included video is perhaps the best way to show the many steps required to produce the final image. In the end it is more of a painting than a photograph.
Before and After


For even more tutorials, we recommend that you check out Phlearn and also have a look at Aaron’s portfolio.
Please Support The Phoblographer
We love to bring you guys the latest and greatest news and gear related stuff. However, we can’t keep doing that unless we have your continued support. If you would like to purchase any of the items mentioned, please do so by clicking our links first and then purchasing the items as we then get a small portion of the sale to help run the website.

