Last Updated on 04/19/2013 by Chris Gampat
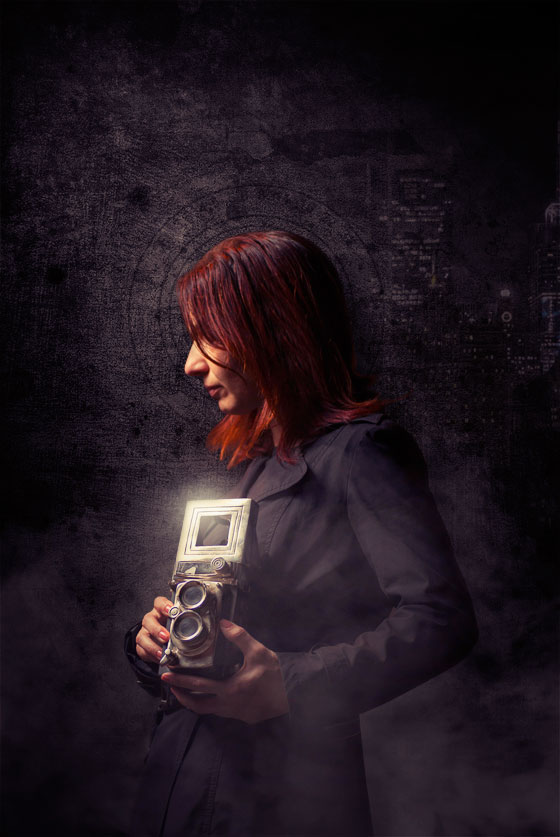
Photo by Stratos Agianoglou, All images used with permission
Editor’s Note: Creating the Photograph is a new series that we’re starting where we interview photographers all about the photo that they shot and talk to them about how it was achieved. The results are some knowledge passed onto you. Want to be featured? Email chrisgampat[at]thephoblographer[dot]com
Stratos Agianoglou is an award winning photographer and graphic designer who is the focus of this week’s Creating the Photograph. His work has been published in well respected Design and Photography magazines and portals from around the world such as Desktopography, Photography Week, Fotografos Magazine, Dasein, NewWebPick and more. His work has also been exhibited in Greece, London and New York. His work resembles that of Frank Doorhof but has a mystical feel to it–and with that in mind we asked him to talk to us about how he created the photo above.
Here’s his story. And if you’re interested check out more in our Creating the Photograph series.
Hello everyone
Stratos here and I am about to give you a breakdown of the shot you see here, which is actually a composite.
The Concept
We had recently bought a new set of wireless triggers and we were looking for a chance to try them out. So a few nights later we went out with Korina (the girl you can se in the photo) dressed in such way that would remind you of a character from a noir or vintage film. We also brought with us an old camera just in case we needed a prop to enhance the scene. As you can tell, it came in very handy.
The Gear
Here’s a list of the gear we used that night:
- D7000
- Tamron 17-50mm f2.8
- Nissin 622 Mark II strobe
- Pixel Soldier remote radio triggers
- Reflective umbrella / light stand.
The Shoot
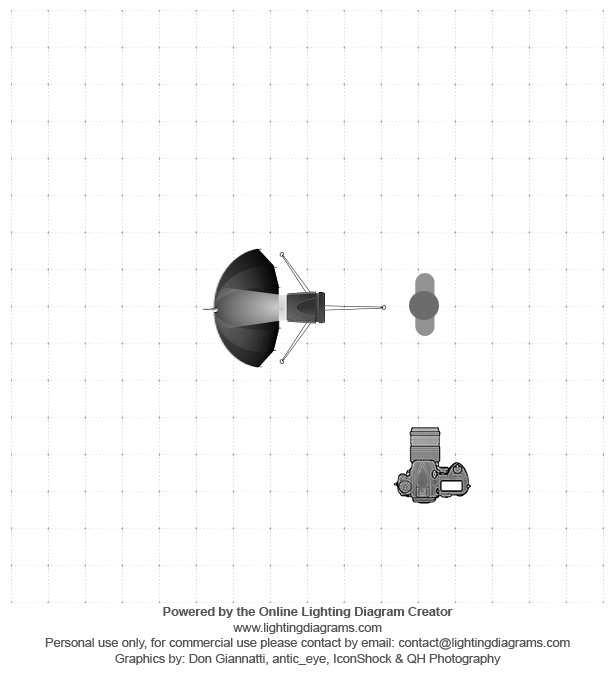
I was going for a nostalgic / noir feeling so I asked the girl to wear something relevant (the black coat worked like a charm), and I also used the lighting setup in such a way to give some kind of drama to the original photo. I placed the light high and in front of her, while pointing downwards, and I had the umbrella semi closed in order to create a softbox like effect with a quick falloff. You can see the simple yet effective lighting setup in the diagram below.
We also made sure that the background was distraction-free, without any text or elements that were creeping into the frame, just in case we wanted to use the original shot as-is.
Post Production
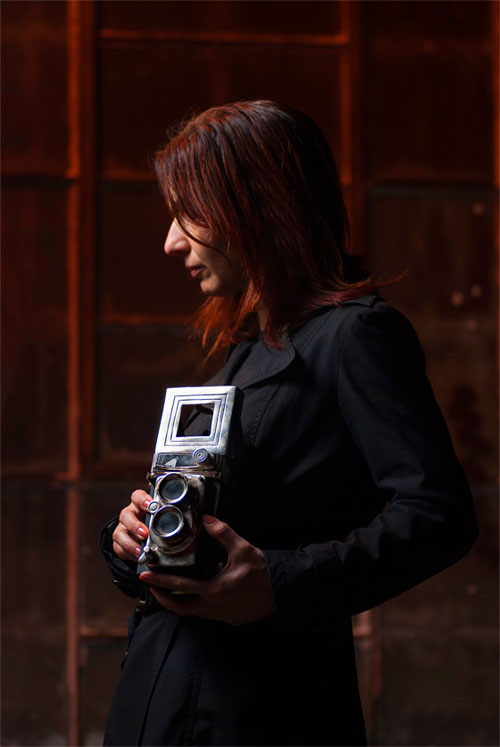
I opened the shot in Photoshop using ACR in order to do some color correction and then I hit Open in Photoshop in order to go on with the procedure. Right after that I used the Pen tool in order to isolate my subject from its environment. You will notice that I feathered my clipping path in order for the subject to blend nicely with the background.
This is what I got.

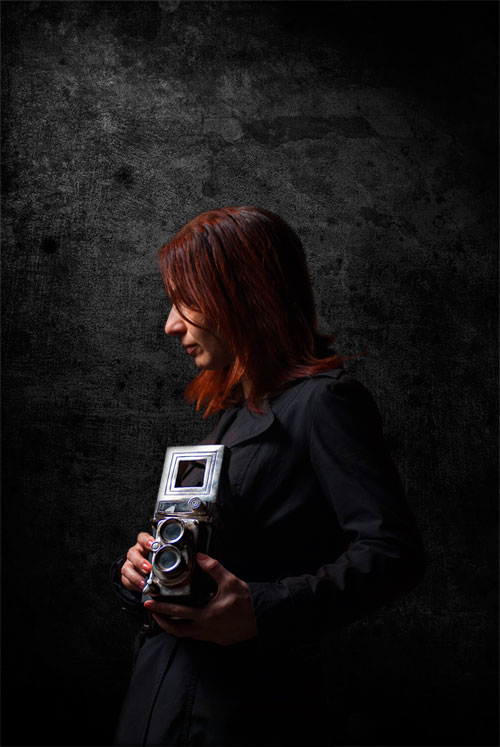
Once I had the subject isolated I threw behind it a grudge black wall texture which helped me set the right mood to the overall composite. Since though the wall texture was flat lighted I used Photoshop’s Lighting Effects filter (Filter – Render – Lighting Effects) to create a directional light coming from the top left corner. Here’s what I got.
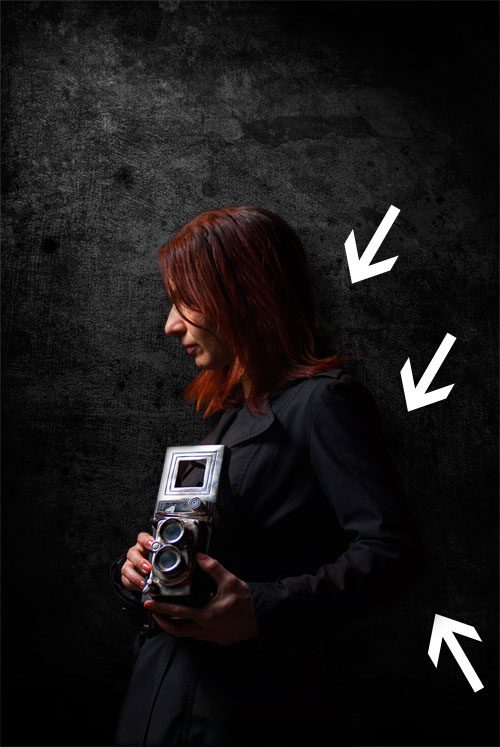
Once this was out of the way I duplicated the layer with the girl, locked the transparency and filled it with black. I then unlocked the transparency and used Gaussian blur to blur it. I finally brought the black layer right under the layer with the girl and at the same time above the layer with the wall texture. Once the layer was in place I moved a bit to the right. This gave a nice shadow effect that separated my main subject from the wall background texture. Below you can see the before and after (the big difference is where the arrows point).
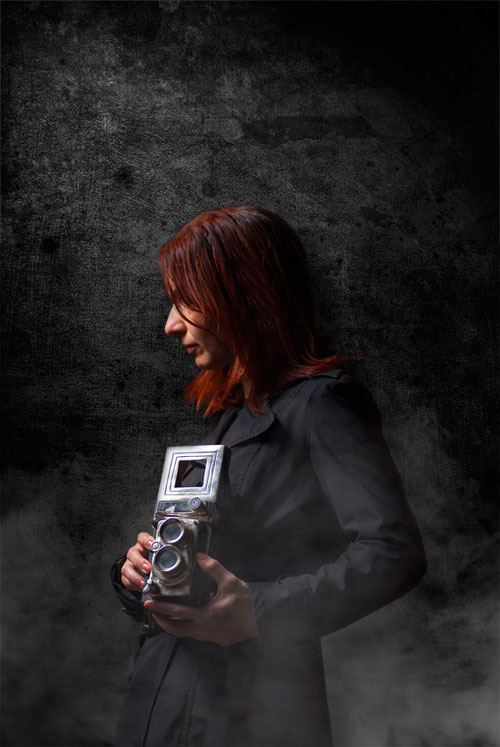
After that I threw a photo with smoke on a black background, behind my subject and set the layer opacity to Screen in order to get rid of the black solid color on the fog photo and also to allow the smoke to blend better with the background. I then duplicated the smoke layer and threw the copy right above the subject layer in order for the girl to appear as if she is in a mist / fog.
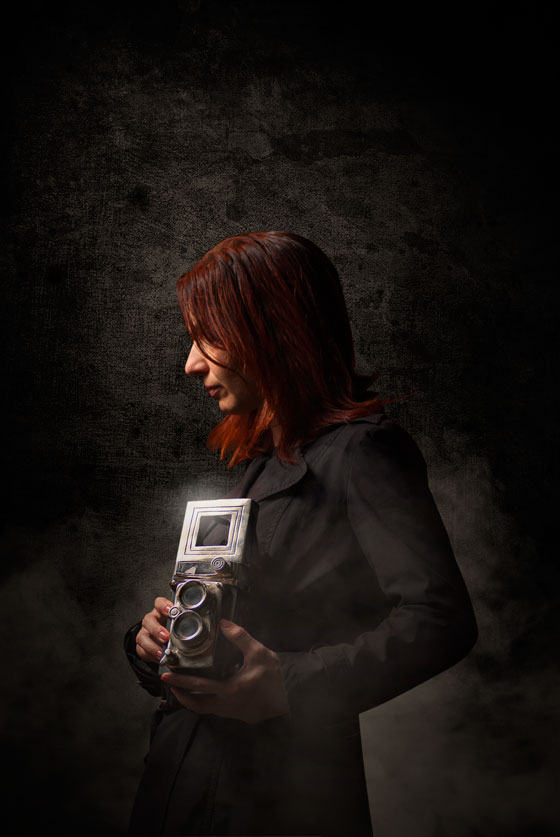
I decided that I wanted a warmer tone for the overall composite so on top of all layers I threw a Color Filter Smart Layer, picked an orange color and set the opacity to 45 percent.
This gave the composite a much warmer look.

After that I added a vignette to the photo. I created a new layer on top of all others and filled it with solid black. I then created a layer mask and I used the circular gradient tool in order to mask out the black from the center while maintaining some black on the edges. Once that was done I lowered the black filled layer’s opacity to 75%.
In order to create a little more depth I threw in a monochrome city nightscape photo and left visible only a portion of if using a combination of mask and blending modes. You can see it on the top right corner. I also added a few more details such as the circles around the girl’s head.
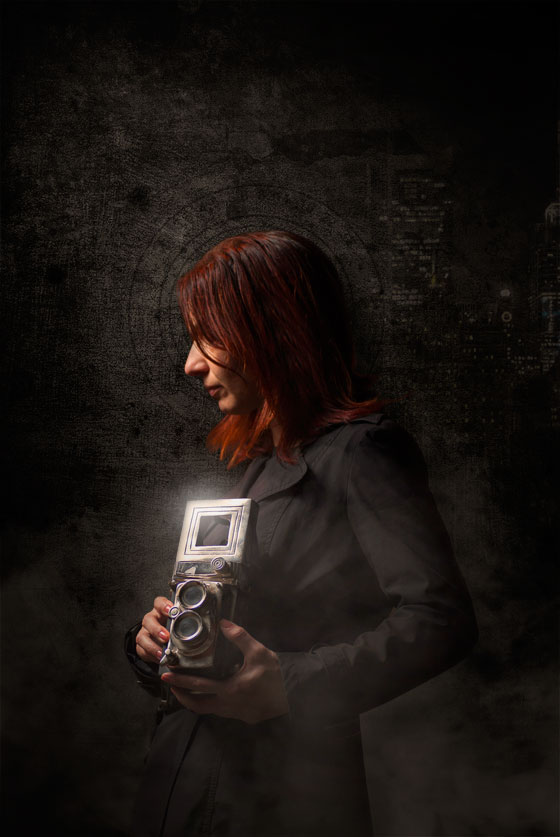
As a final touch, I decided to create a cross process effect using a Curves Adjustment Layer that was on top of everything else, and I also added a little glow on the shining parts of the camera.
And that was just about it.
Stratos Agianoglou can be reached at his website, Blog, or emailed at info[at]lightpulse[dot]gr.
Before and After
Please Support The Phoblographer
We love to bring you guys the latest and greatest news and gear related stuff. However, we can’t keep doing that unless we have your continued support. If you would like to purchase any of the items mentioned, please do so by clicking our links first and then purchasing the items as we then get a small portion of the sale to help run the website.
Also, please follow us on Facebook, Flickr and Twitter.
Get rid of the ads!
Did you enjoy reading this article as much as we enjoyed writing it? There's a way to support us and our reporting, getting ad-free navigation and more as a bonus. Subscribe to us for less than a coffee per month —just $3.99— or take advantage of our yearly subscription with a hefty discount for only $25.- An ad-free experience
- A free mystery box for Lightroom or Capture One
- All the books in our store
- 20% discount on Capture One
- 30% discount on Imalume Photo Theft Protection
- 20% off Herbs and Kettle Tea Company.
- 20% off your order from MPIX printing services.
- 5% off Viltrox Products via their eCommerce store.
- 10% off all film developing, printing and scanning services from Blue Moon Camera and Machine
- 15% off 7Artisans products: The lens and accessory maker is offering a sweet discount for Phoblographer's readers.