
Today’s photography cheat sheet will definitely come in handy for beginners wondering how to fix their snaps in camera.
Today’s digital cameras allow everyone to take decent photos, but for those who want to break free from shooting in Auto mode, taking full control of all the camera settings may seem daunting. At some point in every beginner’s manual photography journey, overexposed, underexposed, and blurry photos will be the norm. The goal, therefore, is to be able to fix or avoid these shots in-camera, instead of relying on Photoshop to correct them. Today’s photography cheat sheet is a quick troubleshooting guide that will allow you to do just that.
In the printable cheat sheet below, by Alise of Mommatography, we have a bunch of easy tips for troubleshooting three of the most common problems beginners encounter. Part of great photography is getting proper exposures in-camera because not all poorly exposed or blurry photos can be “saved” in Photoshop or Lightroom. Also, getting the exposures right in-camera will save you time and make your workflow more streamlined.
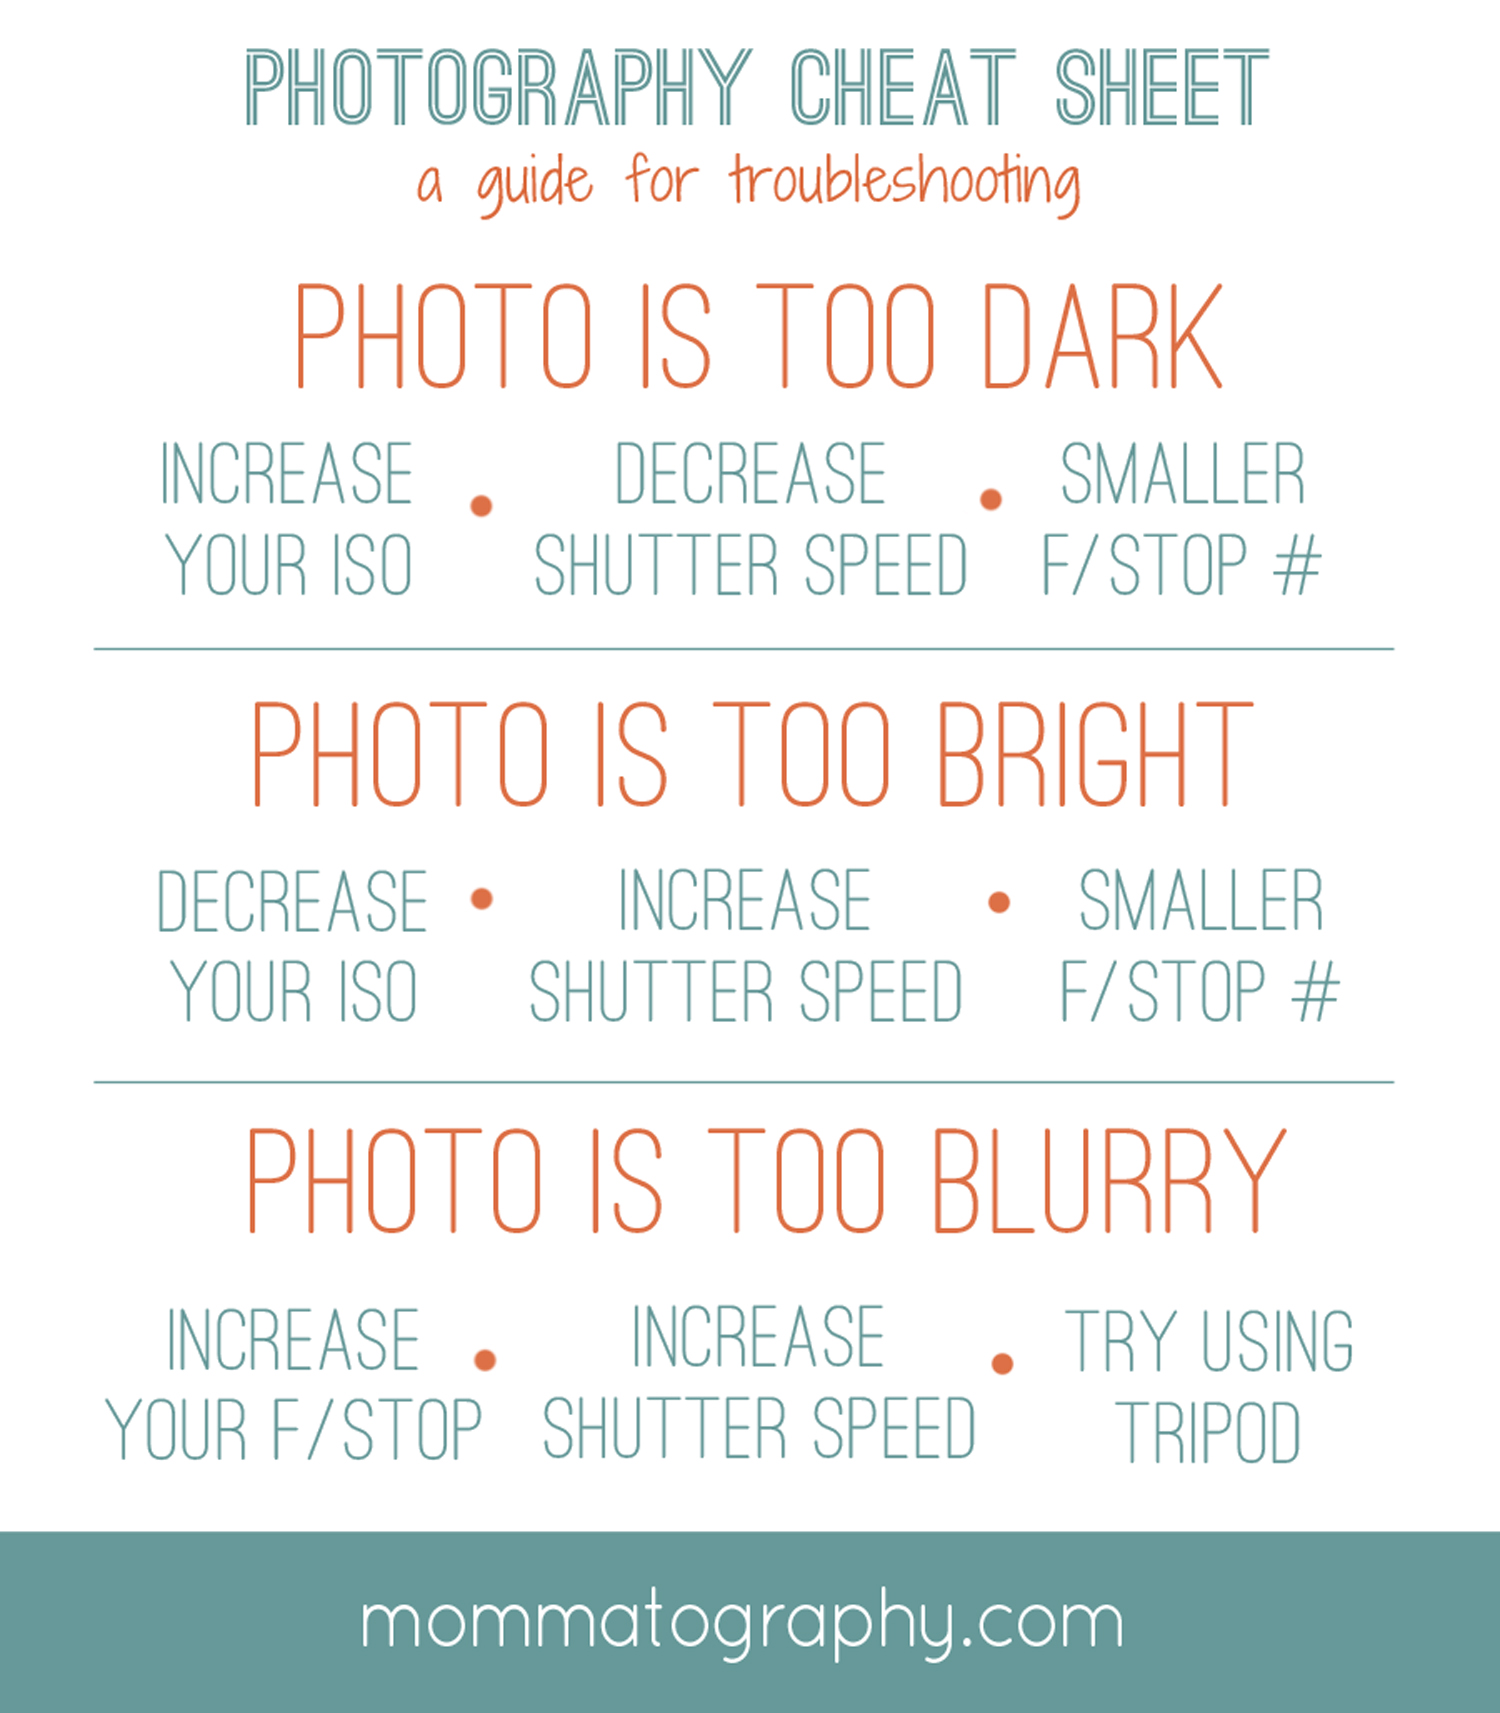
First, the cheat sheet mentions what you can do when your photo is looks too dark: either increase the ISO, decrease the shutter speed, or use a lower f-stop (wider aperture). The first will brighten your photo while the latter two will let more light into your camera.
Conversely, if your photo looks too bright and washed out, you can either decrease the ISO, increase the shutter speed, or use a higher f-stop (smaller aperture must be what the cheat sheet meant) to achieve the opposite result.
Lastly, if your photo is too blurry, that means either the aperture needs to be smaller so more of the scene will be in focus, or you need to increase your shutter speed to freeze movement. In some cases, you’ll also need to prop your camera on a tripod to avoid camera shake.
Liked these photography tips and tricks? Don’t forget to check out our photography cheat sheet collection to find more that will come in handy for your next shoot and projects!
Get rid of the ads!
Did you enjoy reading this article as much as we enjoyed writing it? There's a way to support us and our reporting, getting ad-free navigation and more as a bonus. Subscribe to us for less than a coffee per month —just $3.99— or take advantage of our yearly subscription with a hefty discount for only $25.- An ad-free experience
- A free mystery box for Lightroom or Capture One
- All the books in our store
- 20% discount on Capture One
- 30% discount on Imalume Photo Theft Protection
- 20% off Herbs and Kettle Tea Company.