
Improve your composition for landscape photography with some tips on format and orientation from today’s photography cheat sheet.
When you’re shooting landscape photography, it can be challenging to decide whether a scene looks better in horizontal or vertical orientation. You may also think about shooting in Instagram-ready square format, or go for a broader capture with panoramic format. If you need some help deciding, the tips from today’s featured photography cheat sheet should be able to give you some ideas.
Which format looks best for your landscape photos? How does it affect the composition? What about square or panorama mode? These are just some of the potential questions you may have when deciding on the best way to compose your photos, especially for landscape photography. The cheat sheet below by Digital Camera World provides some tips that could help you in your next practice.
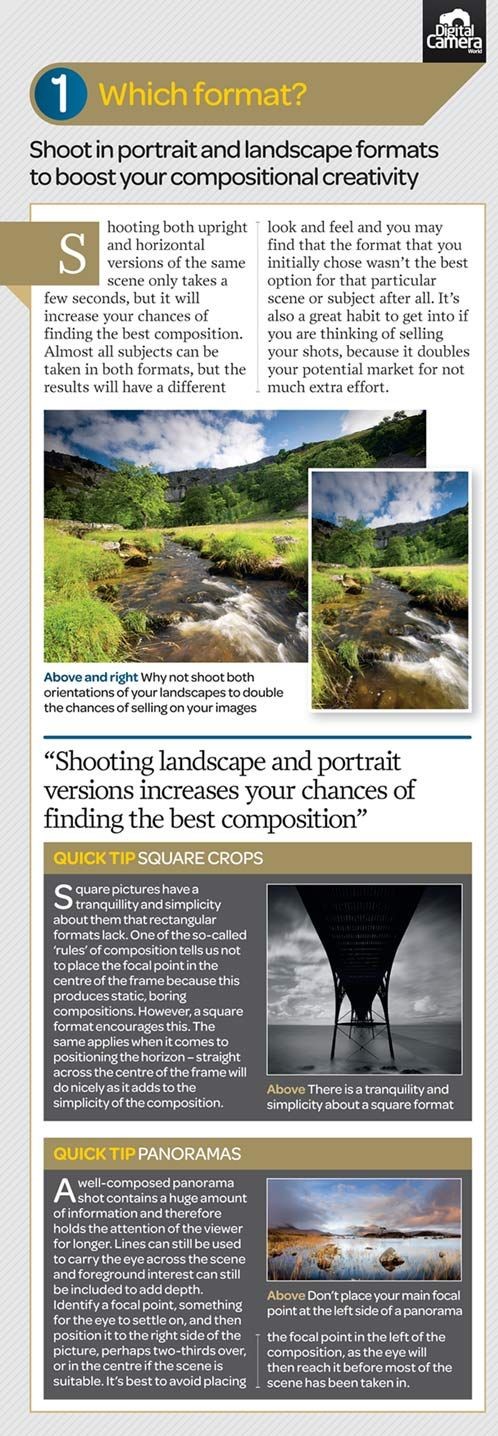
The first tip is something quick that you can easily integrate into your workflow: simply shoot in both vertical and horizontal orientations. This will increase your chances of getting the composition that works best when you’re finally deciding on the final result or output. “Almost all subjects can be taken in both formats, but the results will have a different look and feel and you may find that the format you initially chose wasn’t the best option for that particular scene or subject after all,” the cheat sheet noted.
Apart from the two common formats, you may also want to try experimenting in square and panoramic formats. Square photos tend to exude tranquility and simplicity that is typically unseen in rectangular formats. While placing subjects smack in the middle of the frame isn’t recommended because it tends to produce boring compositions, the square format encourages this and creates a simple yet effective image.
As for panoramas, it’s not as simple as taking a sweeping shot. Well-composed panoramic snaps should contain more information to keep the viewer’s attention for longer. The same composition rules apply — use leading lines to carry the eyes across the scene and add foreground interest to add depth to the shot. However, this focal point should not be on the left side of the composition, as your viewer will see it straight away and focus their attention on it before they’ve even had a look at most of the scene. Lead your viewers’ eye from left to right, ending with the focal point on the right side of the frame.
Looking for more photography tips and tricks like this? Don’t forget to check out our photography cheat sheet collection to find more that will come in handy for your next shoot and projects!
Get rid of the ads!
Did you enjoy reading this article as much as we enjoyed writing it? There's a way to support us and our reporting, getting ad-free navigation and more as a bonus. Subscribe to us for less than a coffee per month —just $3.99— or take advantage of our yearly subscription with a hefty discount for only $25.- An ad-free experience
- A free mystery box for Lightroom or Capture One
- All the books in our store
- 20% discount on Capture One
- 30% discount on Imalume Photo Theft Protection
- 20% off Herbs and Kettle Tea Company.
- 20% off your order from MPIX printing services.
- 5% off Viltrox Products via their eCommerce store.
- 10% off all film developing, printing and scanning services from Blue Moon Camera and Machine
- 15% off 7Artisans products: The lens and accessory maker is offering a sweet discount for Phoblographer's readers.