
If you just got your first DSLR or Mirrorless camera and are now scratching your head over the symbols on the dials and the screen, we have a couple of cheat sheets to help.
It’s been a decade since we put together this noob’s guide to the symbols in your camera, and we thought it’s about time we made a follow-up to that. In today’s photography cheat sheet feature, we bring a bunch of visual guides you can use as a reference to complement the noob’s guide mentioned above. It may seem too much to memorize at first, but with enough practice, all these symbols and controls will become second nature to you.
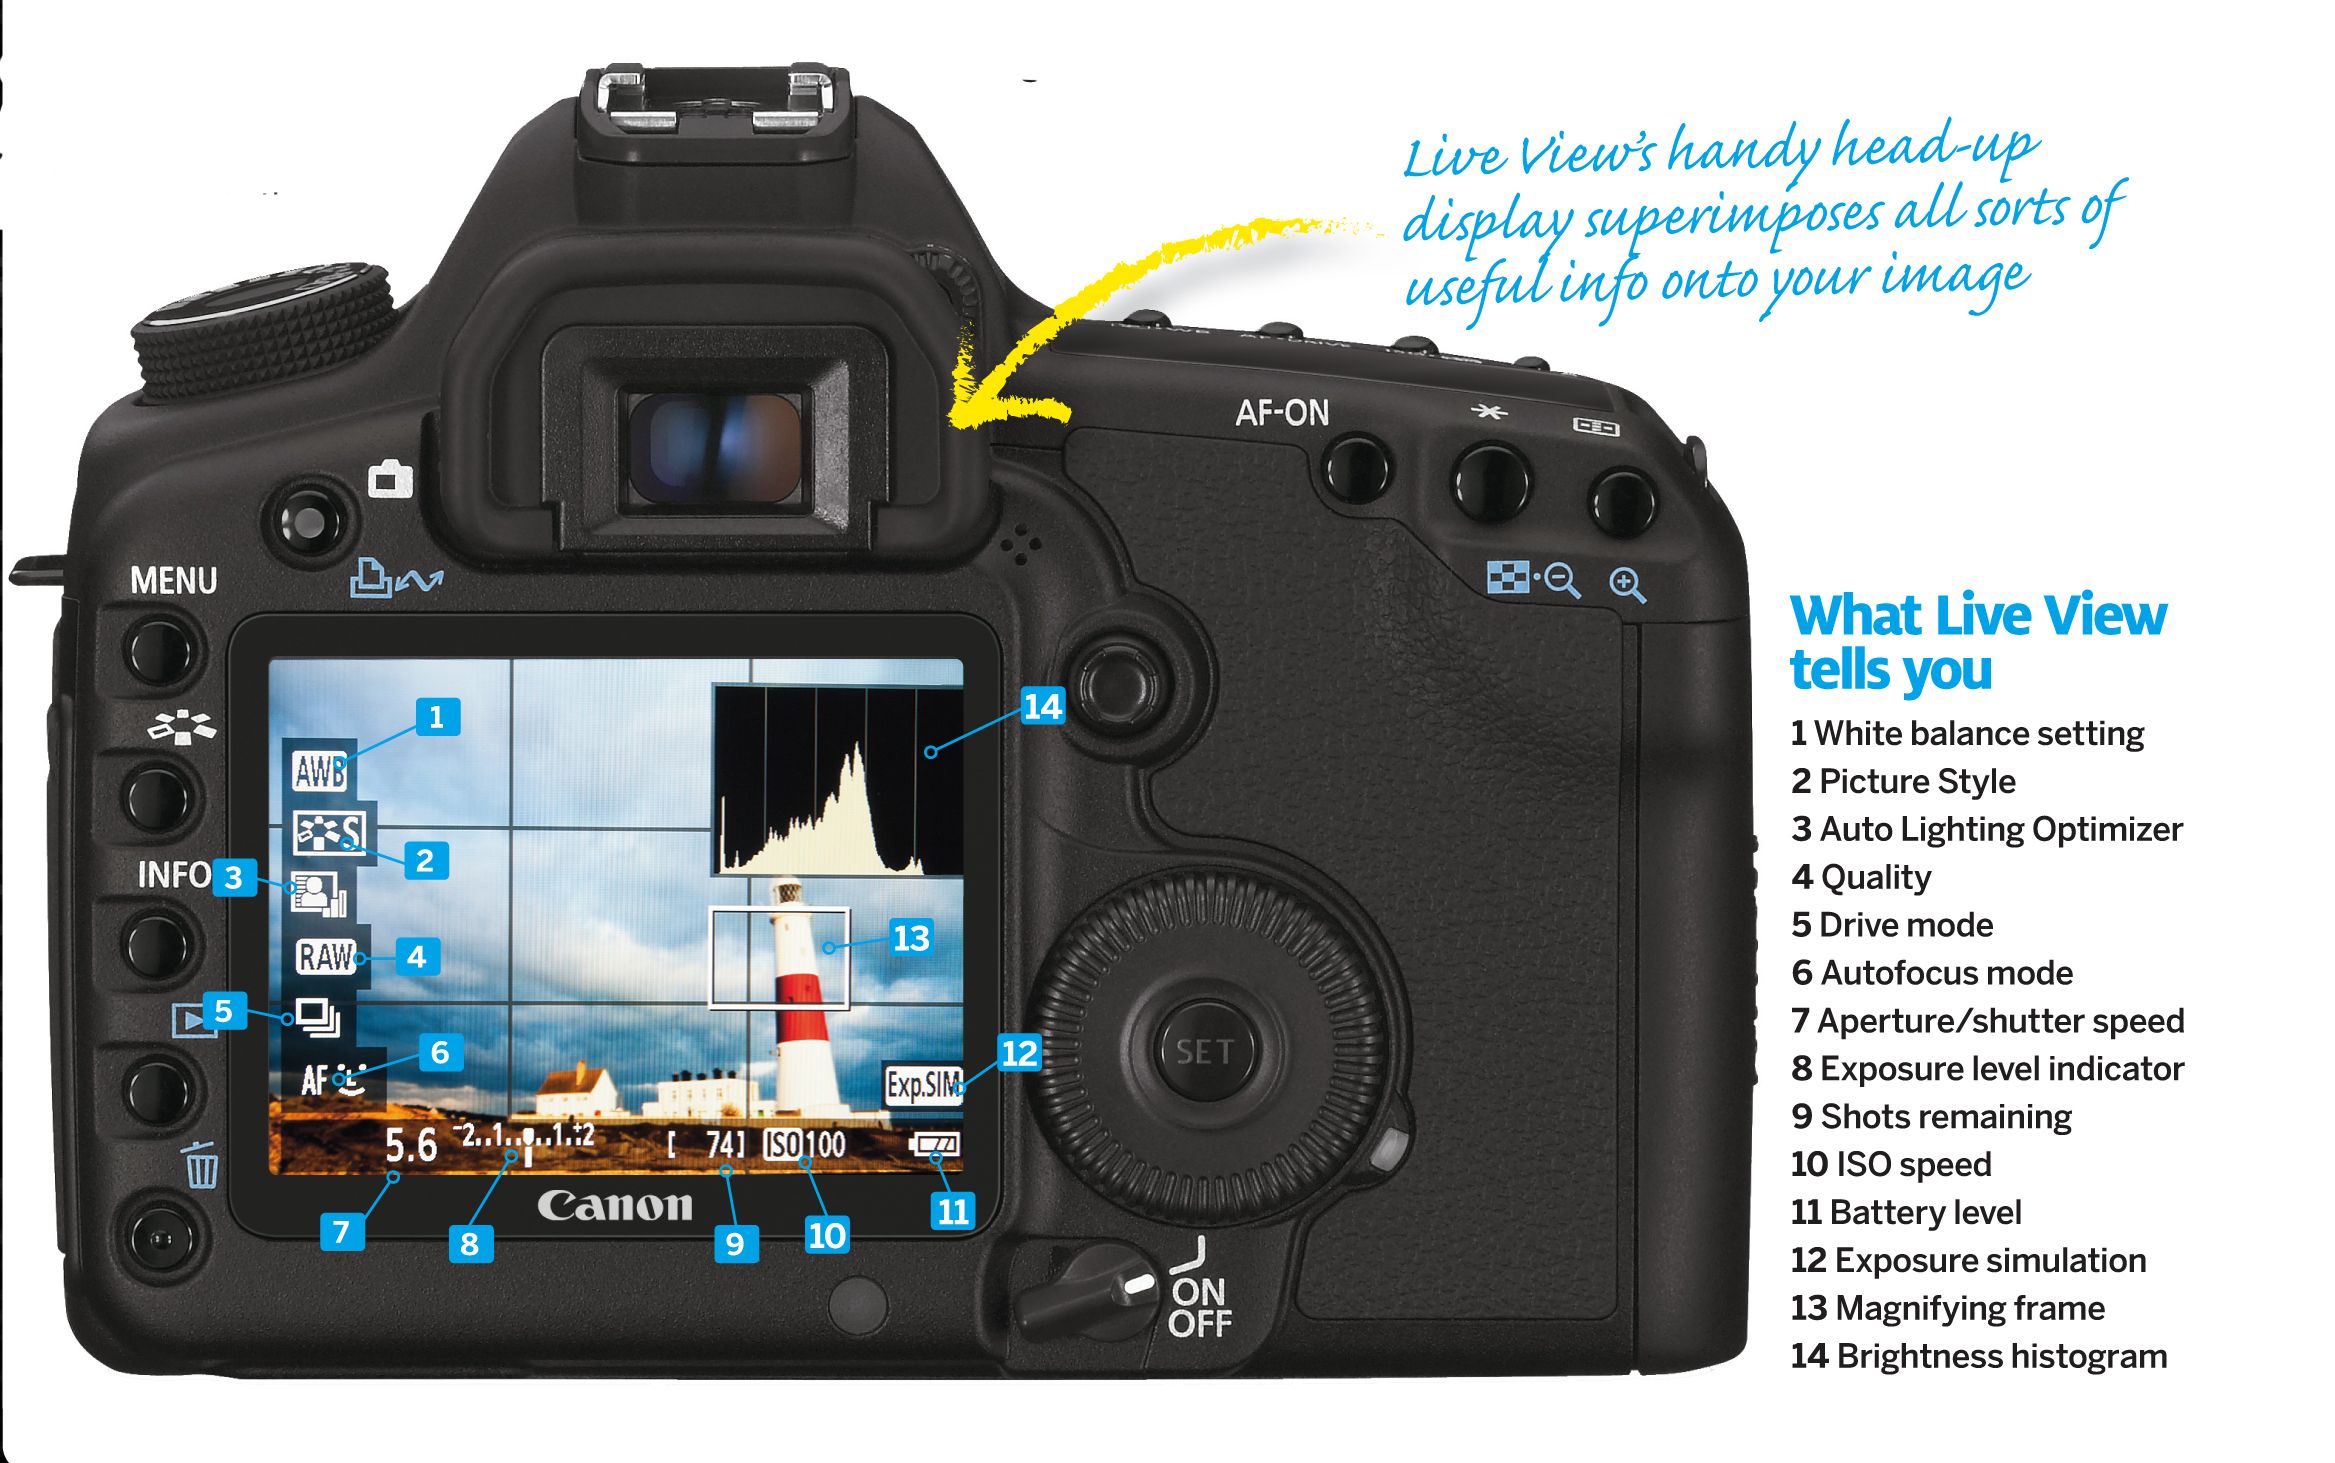
First, we have a cheat sheet from nirvant.info showing what you’ll typically see in a Canon DSLR camera’s screen on Live View mode. There may be minor variations with your model or the brand/manufacturer of your camera, but this should still apply for some core controls. These include ISO, shutter speed, aperture, exposure value indicator, picture quality, histogram, and white balance setting. Your camera may also have options for customizing the Live View display, so do explore the menus and check what’s available for you.
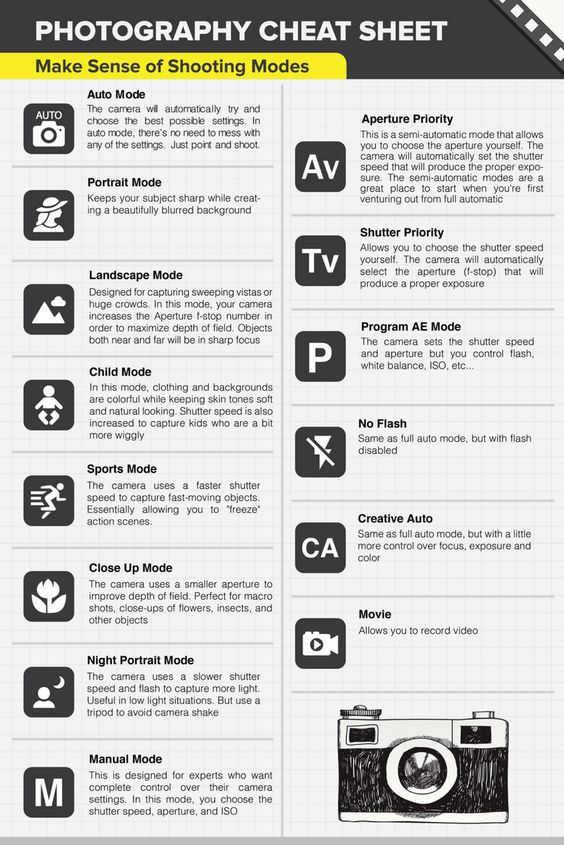
Next up is a photography cheat sheet put together by Photography Pixel to help you make sense of the different shooting modes of your camera. As with the Live View cheat sheet, the name and design of the icons may vary slightly but they essentially function the same as described. The shooting modes are typically found on the dial on top of your camera, to allow you quickly switch between shooting modes as your scenes, subjects, and shooting conditions require. Some, like Aperture Priority and Shutter Priority, are especially useful for more technical or creative shots that require precise controls. If you want your camera to take care of the shots for you, choose Auto; if you want to take full control of how your photos will turn out, go Manual.
Want more useful guides and reference materials like these? Don’t forget to check out our growing collection of photography cheat sheets!
Get rid of the ads!
Did you enjoy reading this article as much as we enjoyed writing it? There's a way to support us and our reporting, getting ad-free navigation and more as a bonus. Subscribe to us for less than a coffee per month —just $3.99— or take advantage of our yearly subscription with a hefty discount for only $25.- An ad-free experience
- A free mystery box for Lightroom or Capture One
- All the books in our store
- 20% discount on Capture One
- 30% discount on Imalume Photo Theft Protection
- 20% off Herbs and Kettle Tea Company.
- 20% off your order from MPIX printing services.
- 5% off Viltrox Products via their eCommerce store.
- 10% off all film developing, printing and scanning services from Blue Moon Camera and Machine
- 15% off 7Artisans products: The lens and accessory maker is offering a sweet discount for Phoblographer's readers.