
The BenQ SW240 is the company’s latest affordable option for the photographer; but how is it?
Only a couple of years ago a high-end monitor with a built-in calibration and profile system which was also capable of displaying the entire Adobe RGB (1998) gamut cost serious money. And then BenQ upended that game with the SW series monitors. If you are in the market for a high-performance monitor, performance wise the BenQ SW models are right up there with the Eizo ColorEdge and NEC PA monitors but cost substantially less.
Unboxing and assembly of the SW240 is simple and takes less than five minutes. After removing the contents from the box, start assembly by laying out the protective shipping cover for the monitor on a flat surface and place the monitor face down on it. Although the pictograph instructions suggest you next connect the stand to the monitor, the base to the stand, and then the cables to the monitor, here’s a tip that will make things easier for you: connect the cables and power cord first. This is because the ports for the cables face downwards on the bottom of an overhang on the back of the monitor. With cables and AC cable connected, snap the stand to the display, thread the cables through the donut hole in the stand and then lock the stand to the base. Stand the monitor upright and connect to your computer and the wall outlet and you are ready to go. With the stand connected the weight (not including cables) is 16.75 lbs. and the light weight and the built-in stand wide handle which makes it easy to transport or just move from room to room. If you like a vertical screen no problem, it the monitor pivots 90 degrees clockwise. It can also swivel on the base through a ninety-degree arc.
Table of Contents
Pros and Cons
Pros
- Large color gamut.
- Small size makes it easy to use in tight spaces or to take on location.
- Easy to calibrate and profile with BenQ’s Palette Master Element software and on board ‘color chip” (but a colorimeter is required.)
- Controls are straightforward and easy to access
- Matte screen.
- Price: $399.00 USD (as of July 3, 2018)
Cons
- No Hotkey puck
- Unlike the SW271 and SW320 you cannot use it with two computers at once
Equipment Used
- Apple mid-2015 15-inch Retina MacBook Pro
- X-rite i1 Display Pro
Tech Specs
- Screen dimensions (rounded to nearest 1/100th inch):
- 41 x 12.76 inches (24.1-inch diagonal)
- Screen dimension in pixels:
- 1920×1200 pixels (WUXA standard)
- Screen Resolution: 94 ppi
- Aspect Ratio: 16:10
- 10-bit IPS type LED backlit panel
- Native contrast ratio: 1000:1
- Maximum Brightness: 250 nits (cd/m2
- Gamma Range: 1.6 – 2.6
- Color Modes:
- Adobe RGB (1998)/ sRGB / Rec 709/ DCI-P3 / B&W / Darkroom/ DICOM /Calibration 1 /Calibration 2 / Calibration 3 / Custom 1 / Custom 2
- Color temperature settings:
- Presets: 5000°K, 6500°K, 9300°K, or custom user programmable
- Screen Coating: anti-glare matte.
- Inputs
- DVI
- HDMI
- Display Port 1.2
- USB 3.0 (required)
- Media reader: SD/SDHC/SDXC/MMC
- Other connectivity
- 2x USB 3.0
- Mini-phone headphone jack
- Power
- 110-240v
- Power consumption (on): 55W
- Power consumption (sleep and standby modes): 0.55W
- EnergyStar Rating: 7.0
- Physical specs:
- Weight (with stand and base): 14.77 lbs.
- Dimensions (rounded up the nearest half- inch)
- Landscape Orientation
- Height (on stand and base and monitor at lowest point): 17 inches
- Height (on stand and base and monitor at highest point): 21.5 inches
- Width): 21 inches
- Depth: 12 inches
- Vertical Orientation
- Height: 5 inches
- Width: 14.5 inches
- Depth: 12 inches
- Tilt angle: -5˚to +20˚
- Lateral swivel: 45˚ / 45 (L/R)
- Landscape Orientation
- Special features
- Custom profiling using internal BenQ Palette Master Element calibration and profiling firmware (requires Xrite i1 Display Pro colorimeter, i1 Pro or i1 Pro 2 spectrophotometer, or DataColor Spyder 4 or 5 colorimeter
- Matrix, 8-bit LUT, or 14-bit 3D-LUT
Ergonomics
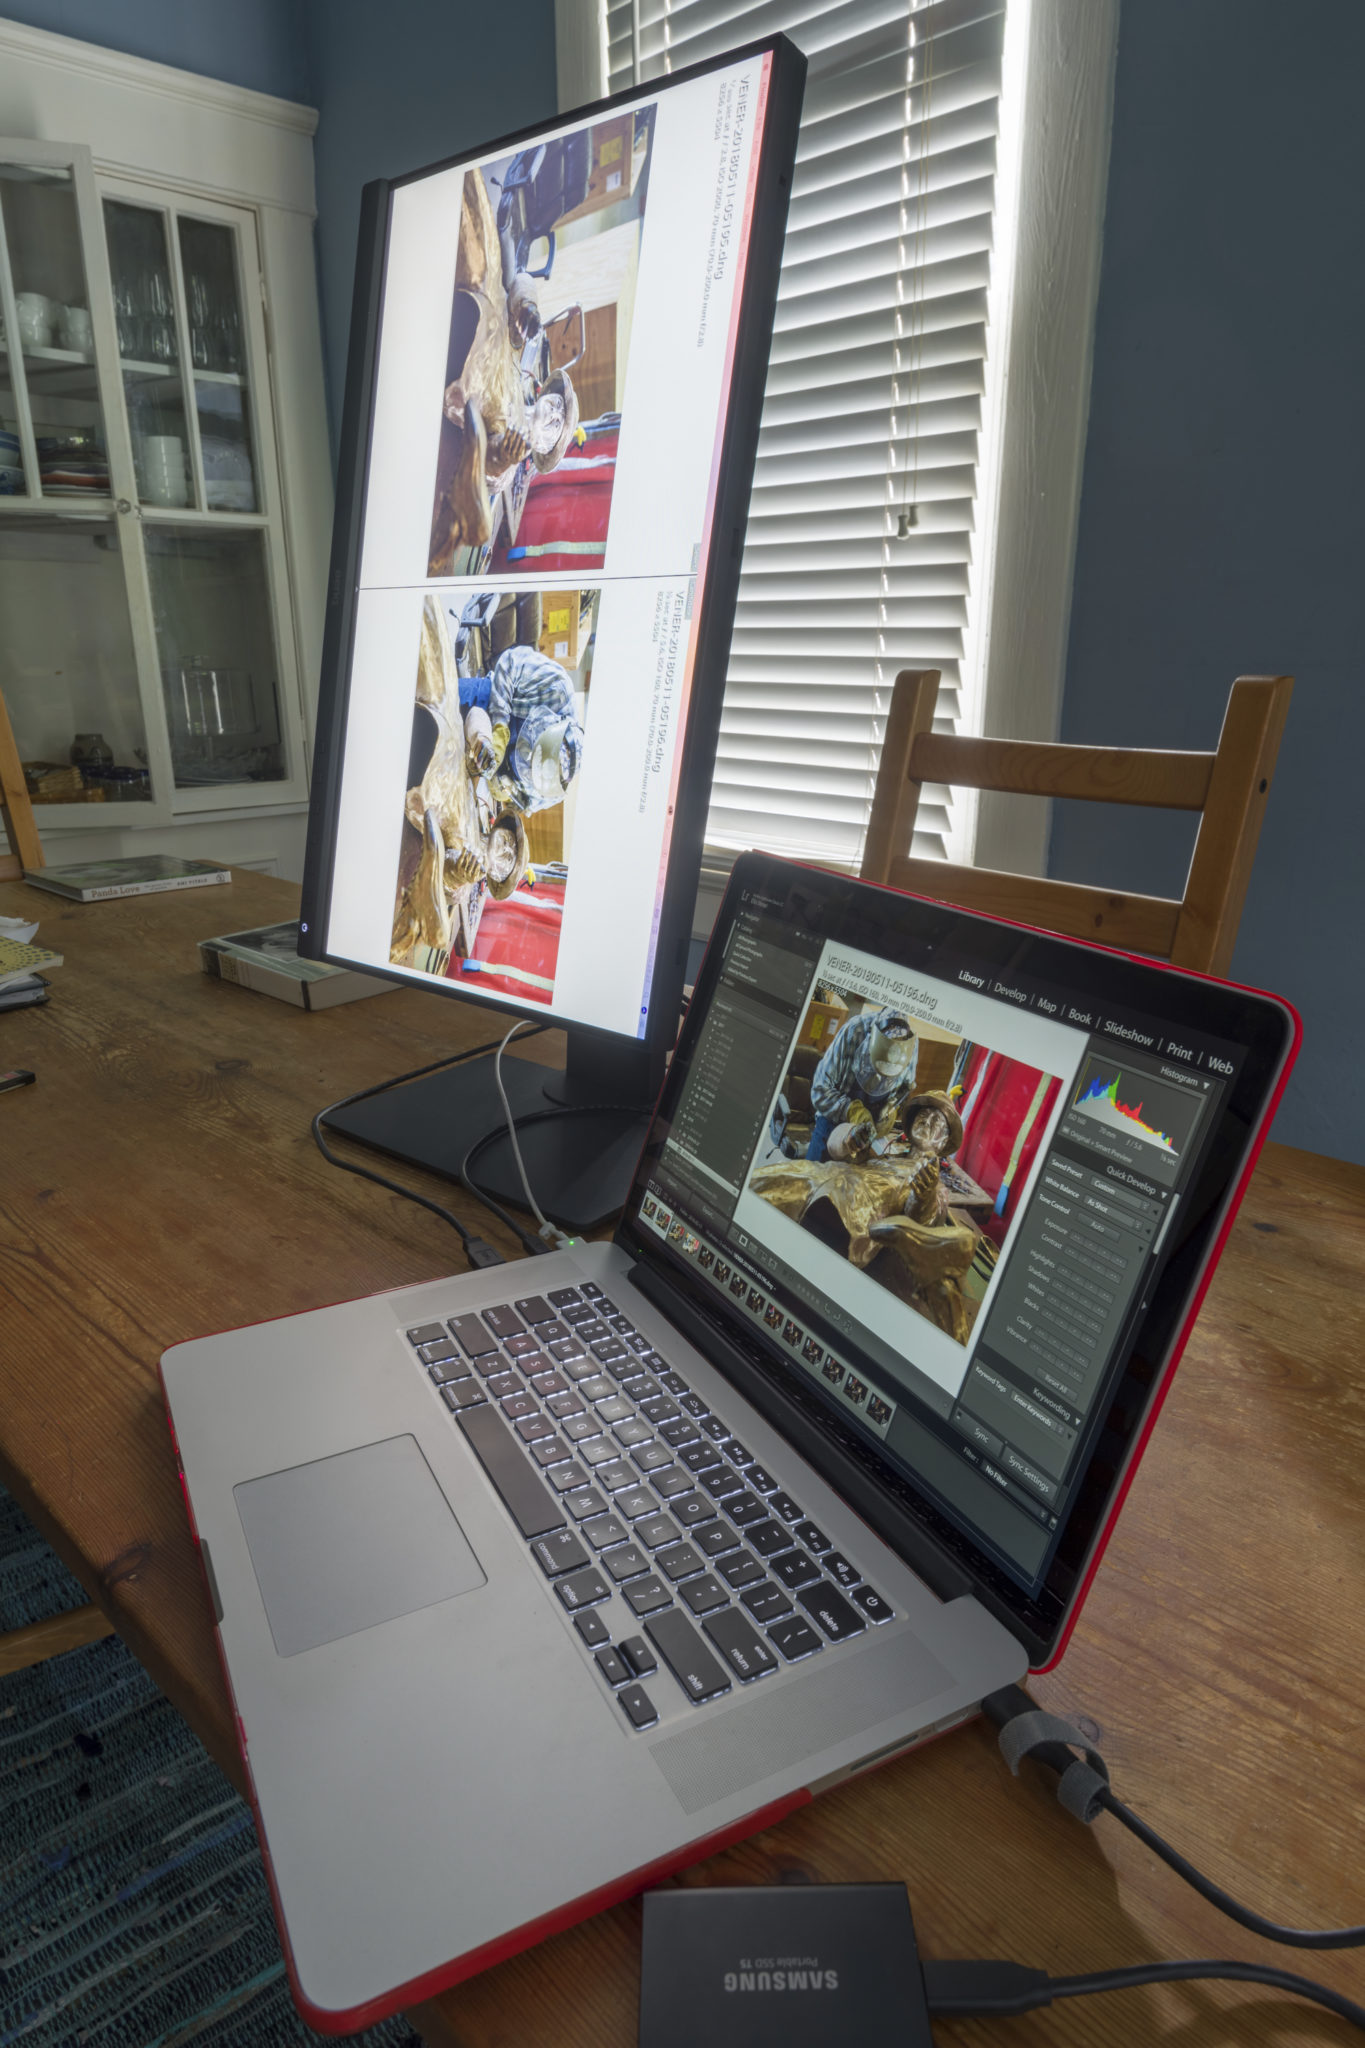
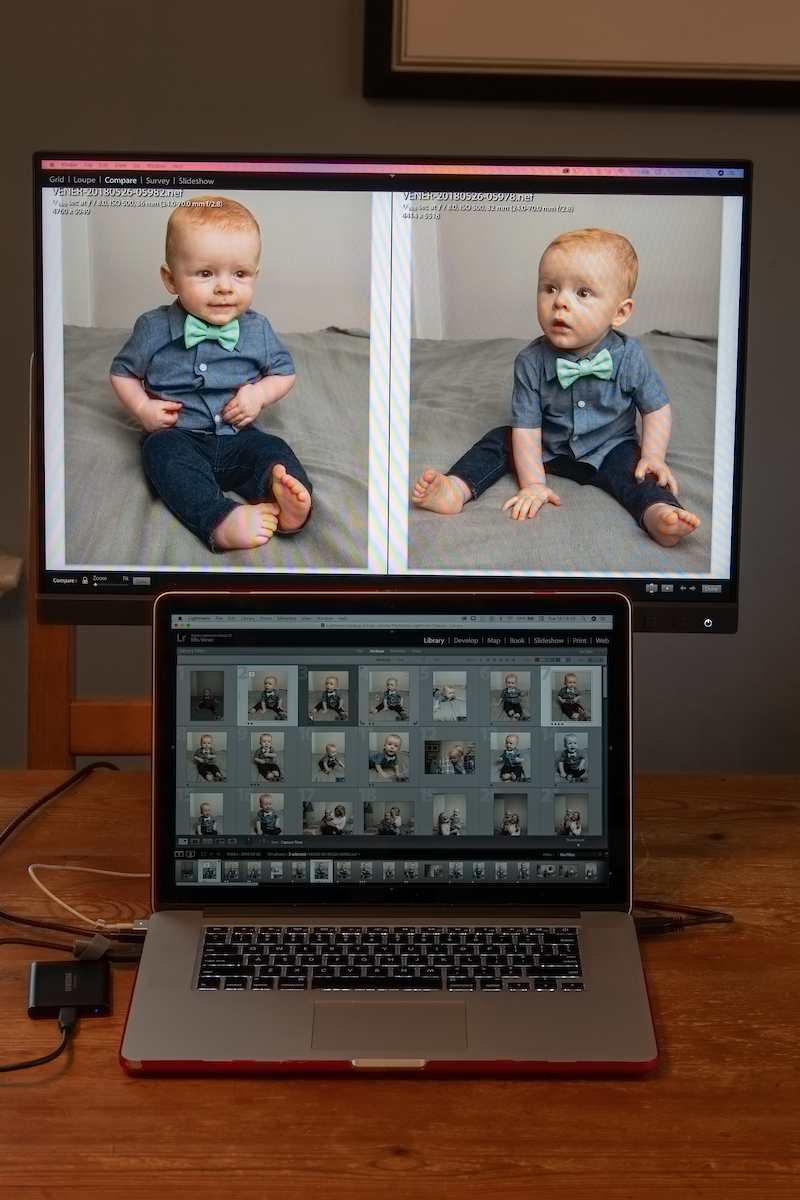
While I love the size and resolution of the SW271, it is a big unit and sometimes smaller is better. Not everyone has a lot of desk space and as most of my assignment work is at a client or at a subject’s location I was looking for a moderately priced monitor that is easier to bring with me (when the job justifies it) to use with my MacBook Pro. That the SW240 matches the color performance of the SW271 is just icing on the cake. With the SW271 at the top of its stand column the MBP fits right underneath it and using the MacOS’s System Preferences > Displays feature, I arrange the screens so the BenQ is on top.
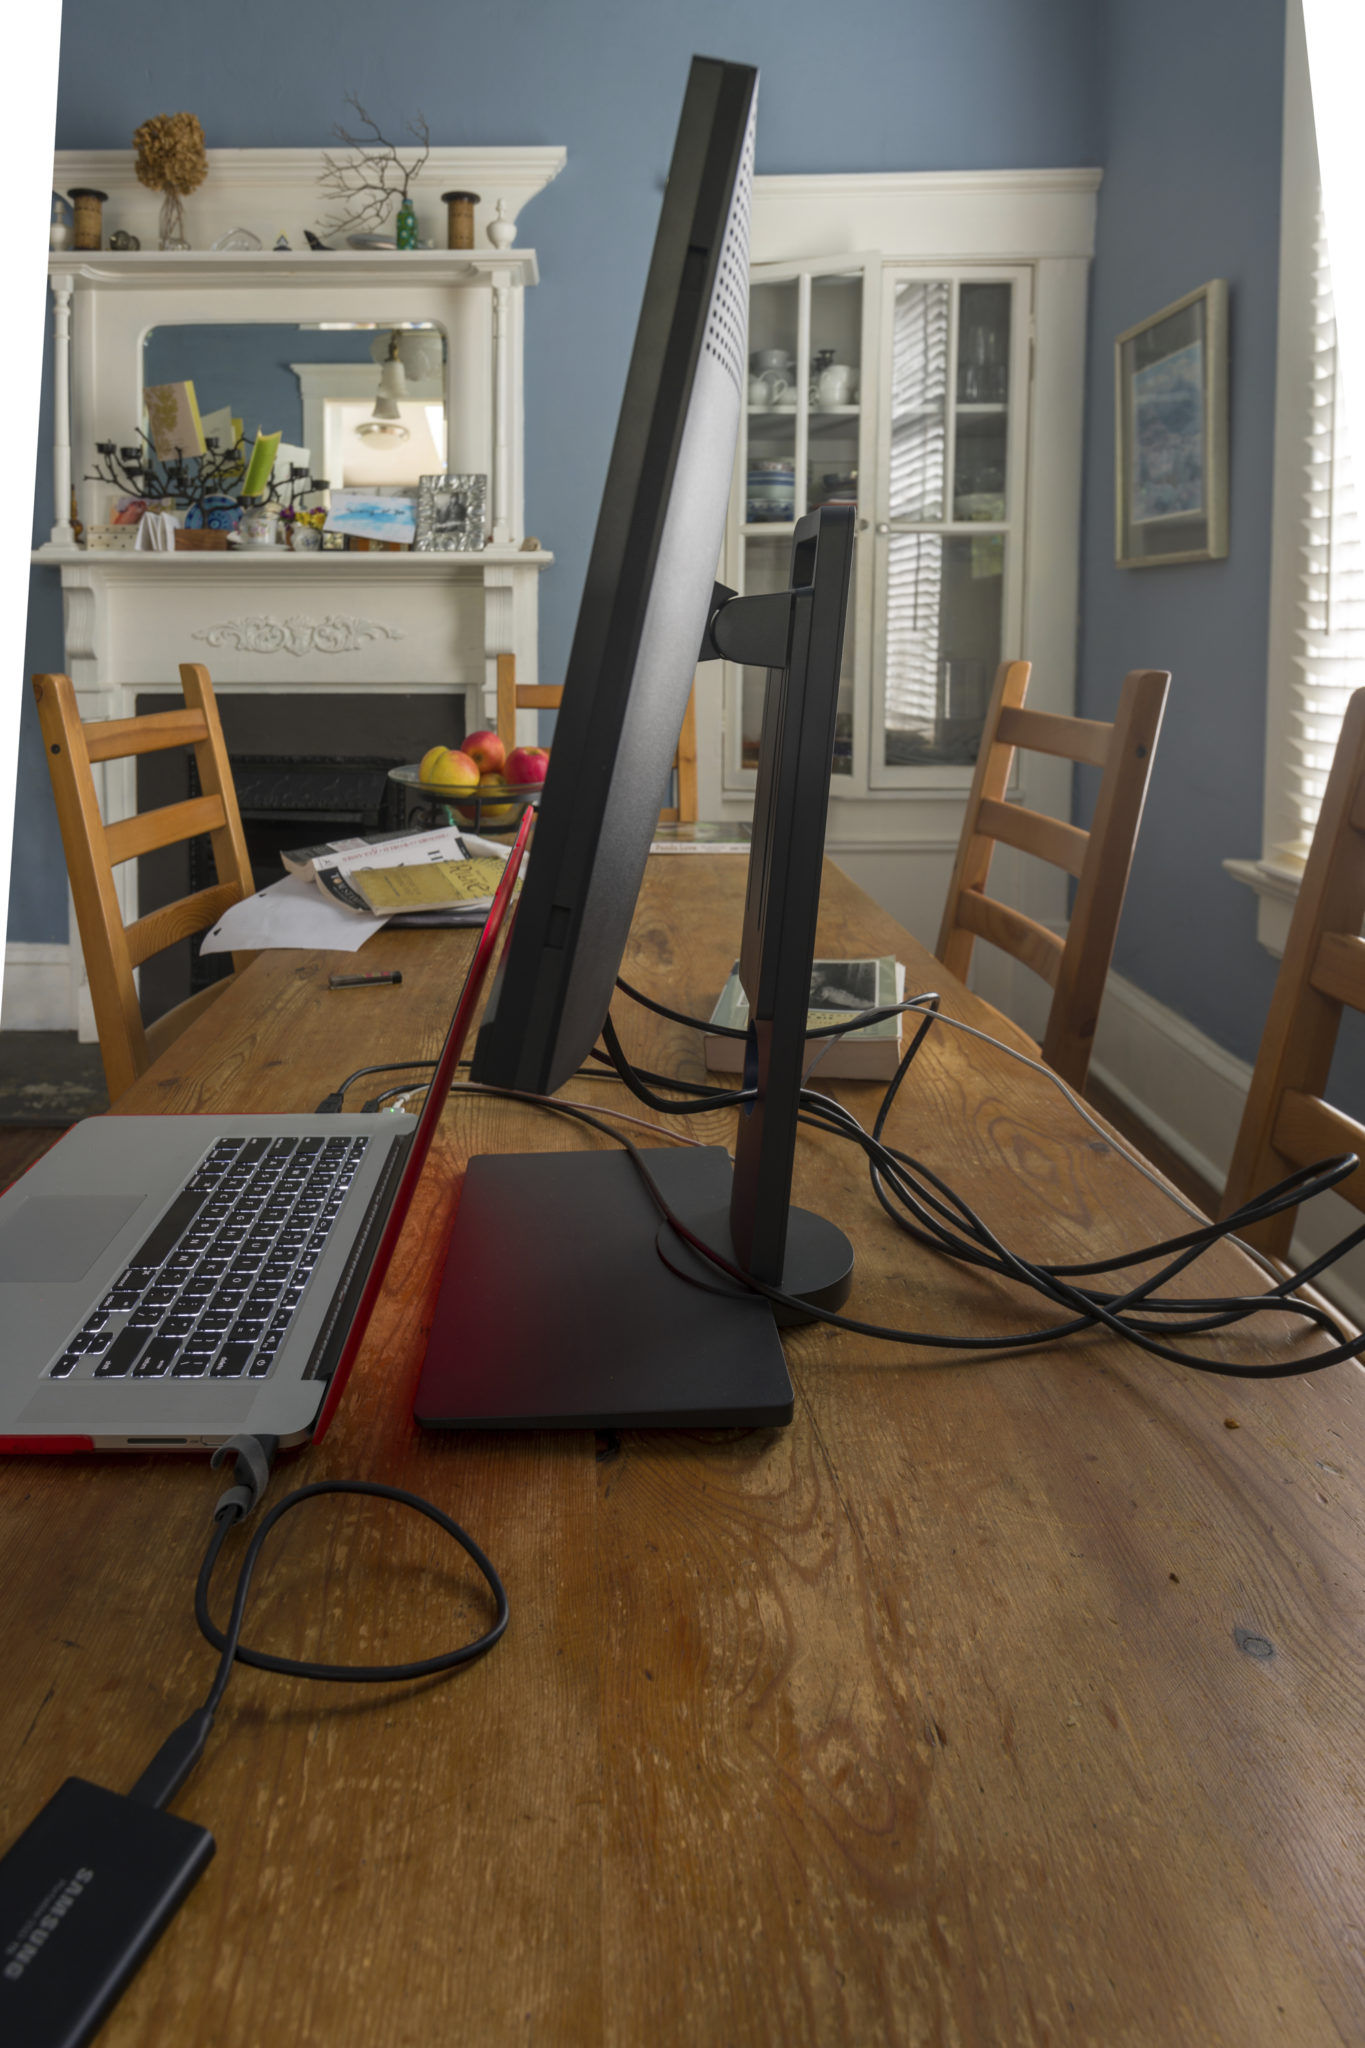
By raising the SW240 to its full height on its stand the 15” MBP just fits below it. I found this arrangement to be an efficient comfortable way of working and the set up takes up less space as well as the computer, external SSD drives and Mo second monitor all fit within the same footprint on a table or desk. In Lightroom CC Classic I use the SW240 for e single images and for A/B comparisons and the 15” MBP screen for the Library grid view. When working in Photoshop the palette windows go on the MBP screen.
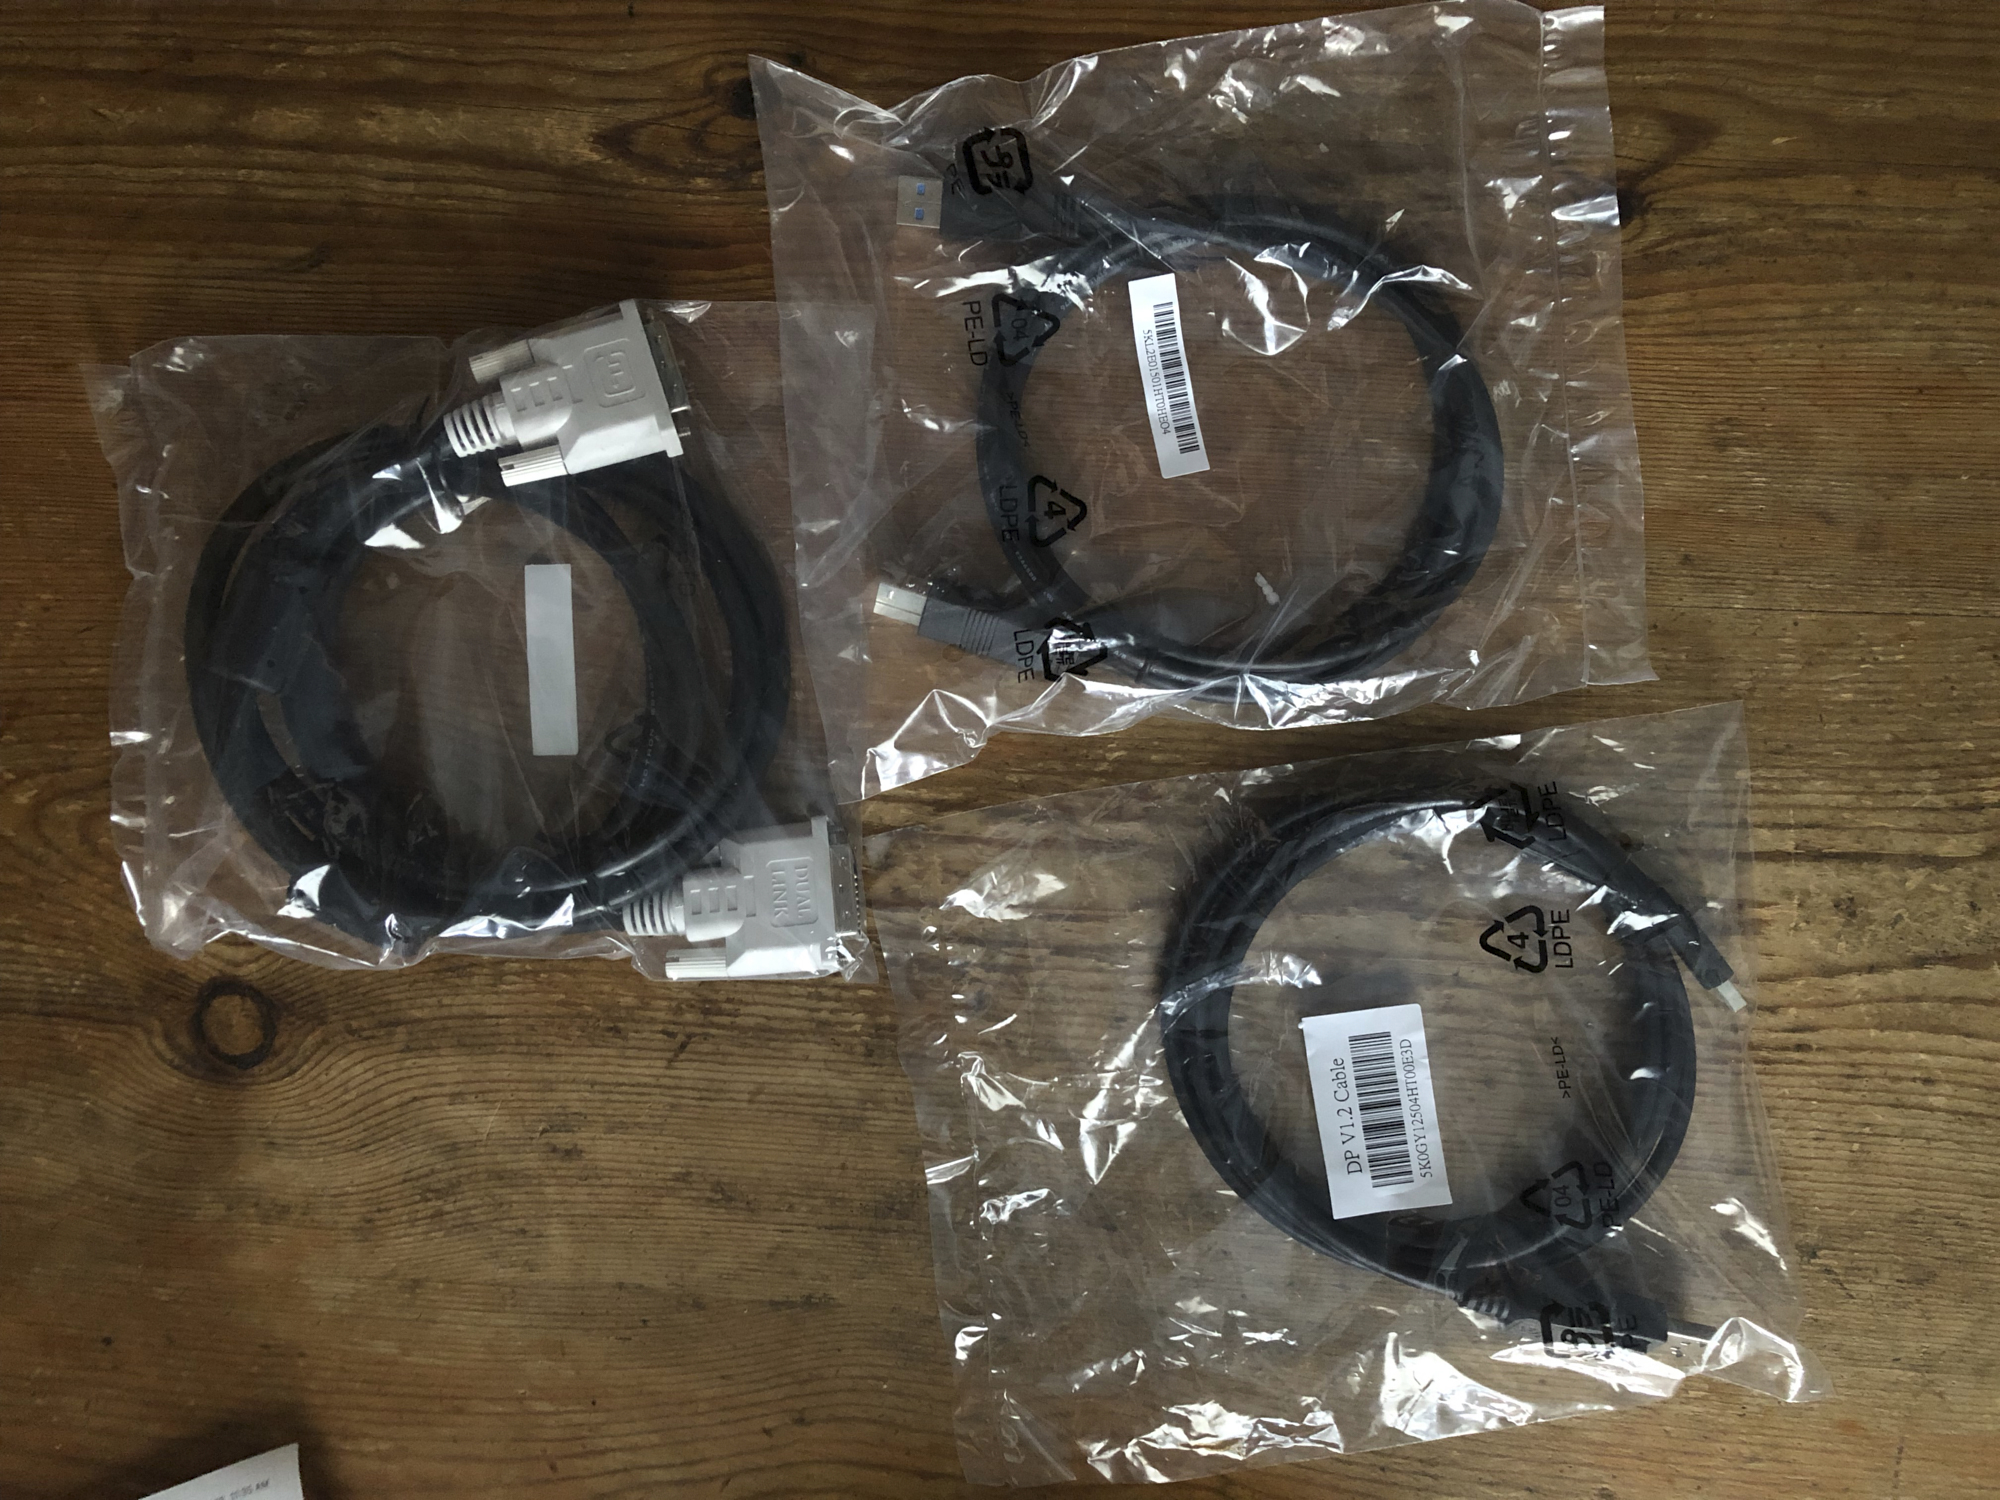
The SW240 comes with three cables: an HDMI to Display Mini-Port (same as Thunderbolt 1/2; a DVI-DL cable, and a USB 3.1 (Gen1) cable. Whether you use the HDMI to Mini-port or the VGA cable you will also need to use the USB 3.0 cable. Sacrificing a USB connection on your computer (My 2015 15” MacBook Pro only has two USB 3.x ports) is compensated by the two USB 3.x type A ports tucked into the rear left side of the monitor. Above these two ports you will find an SDHC card slot as well. The narrow, shallow bezel surrounds the left, right, and top sides of the LCD panel while the bottom edge is about three-quarters of an inch wide and deeper. In the lower right corner of the bezel are the on/off button and 5 buttons controlling operations and settings.
Ease of Use
Unlike the SW271 and SW320, the SW240 does not use a HotKey puck for switching between calibration / profile modes. I don’t often do this, so this is not something miss but if you do have a need to switch between a custom profile, Adobe RGB, sRGB, or B+W modes, pressing the leftmost button of those five buttons is dedicated as a “HotKey” color mode menu.
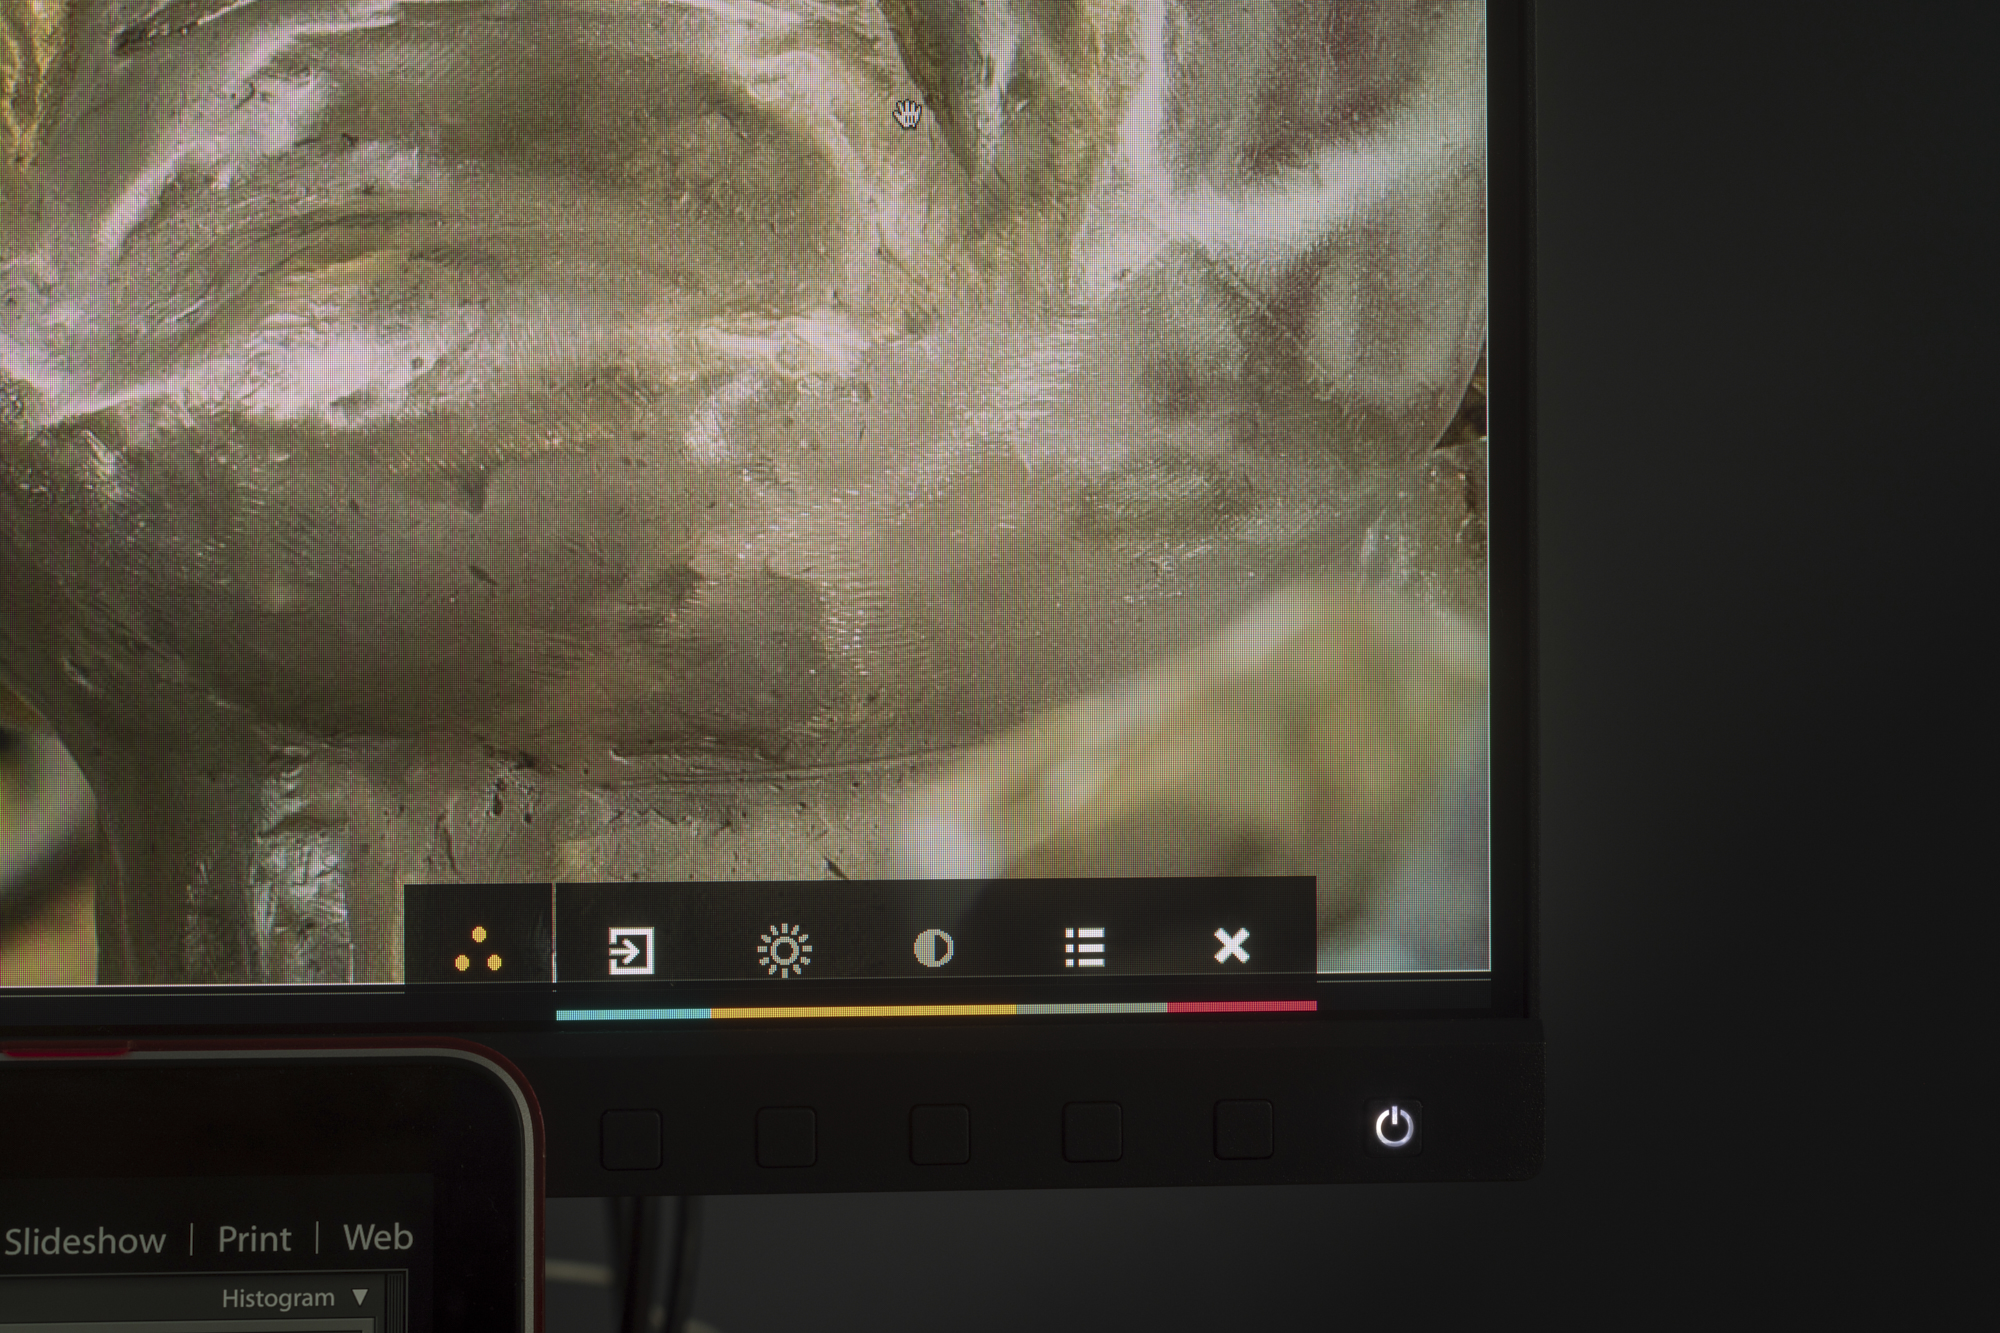
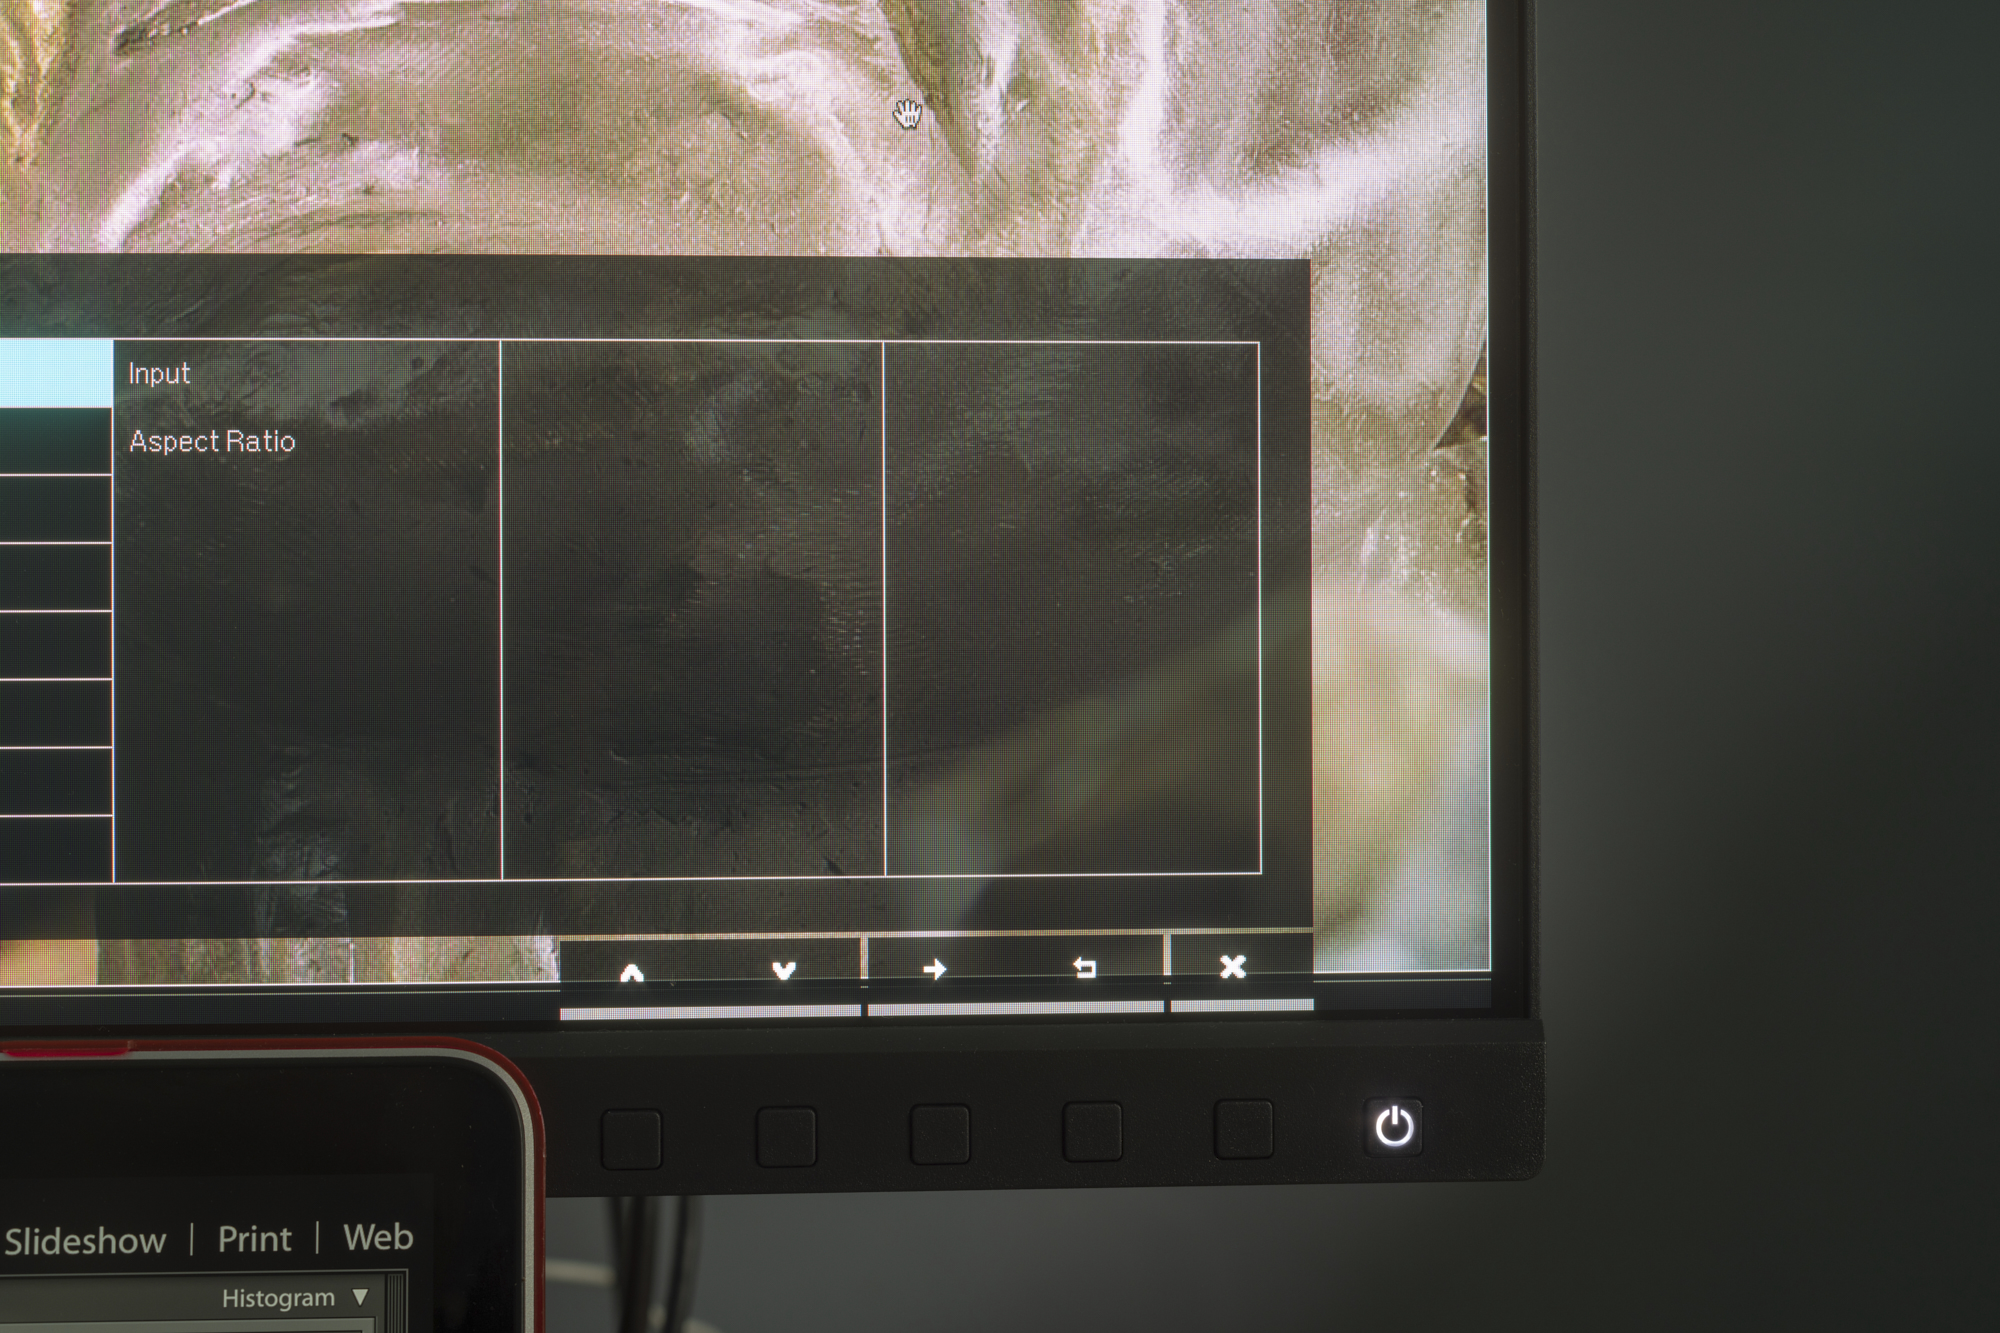
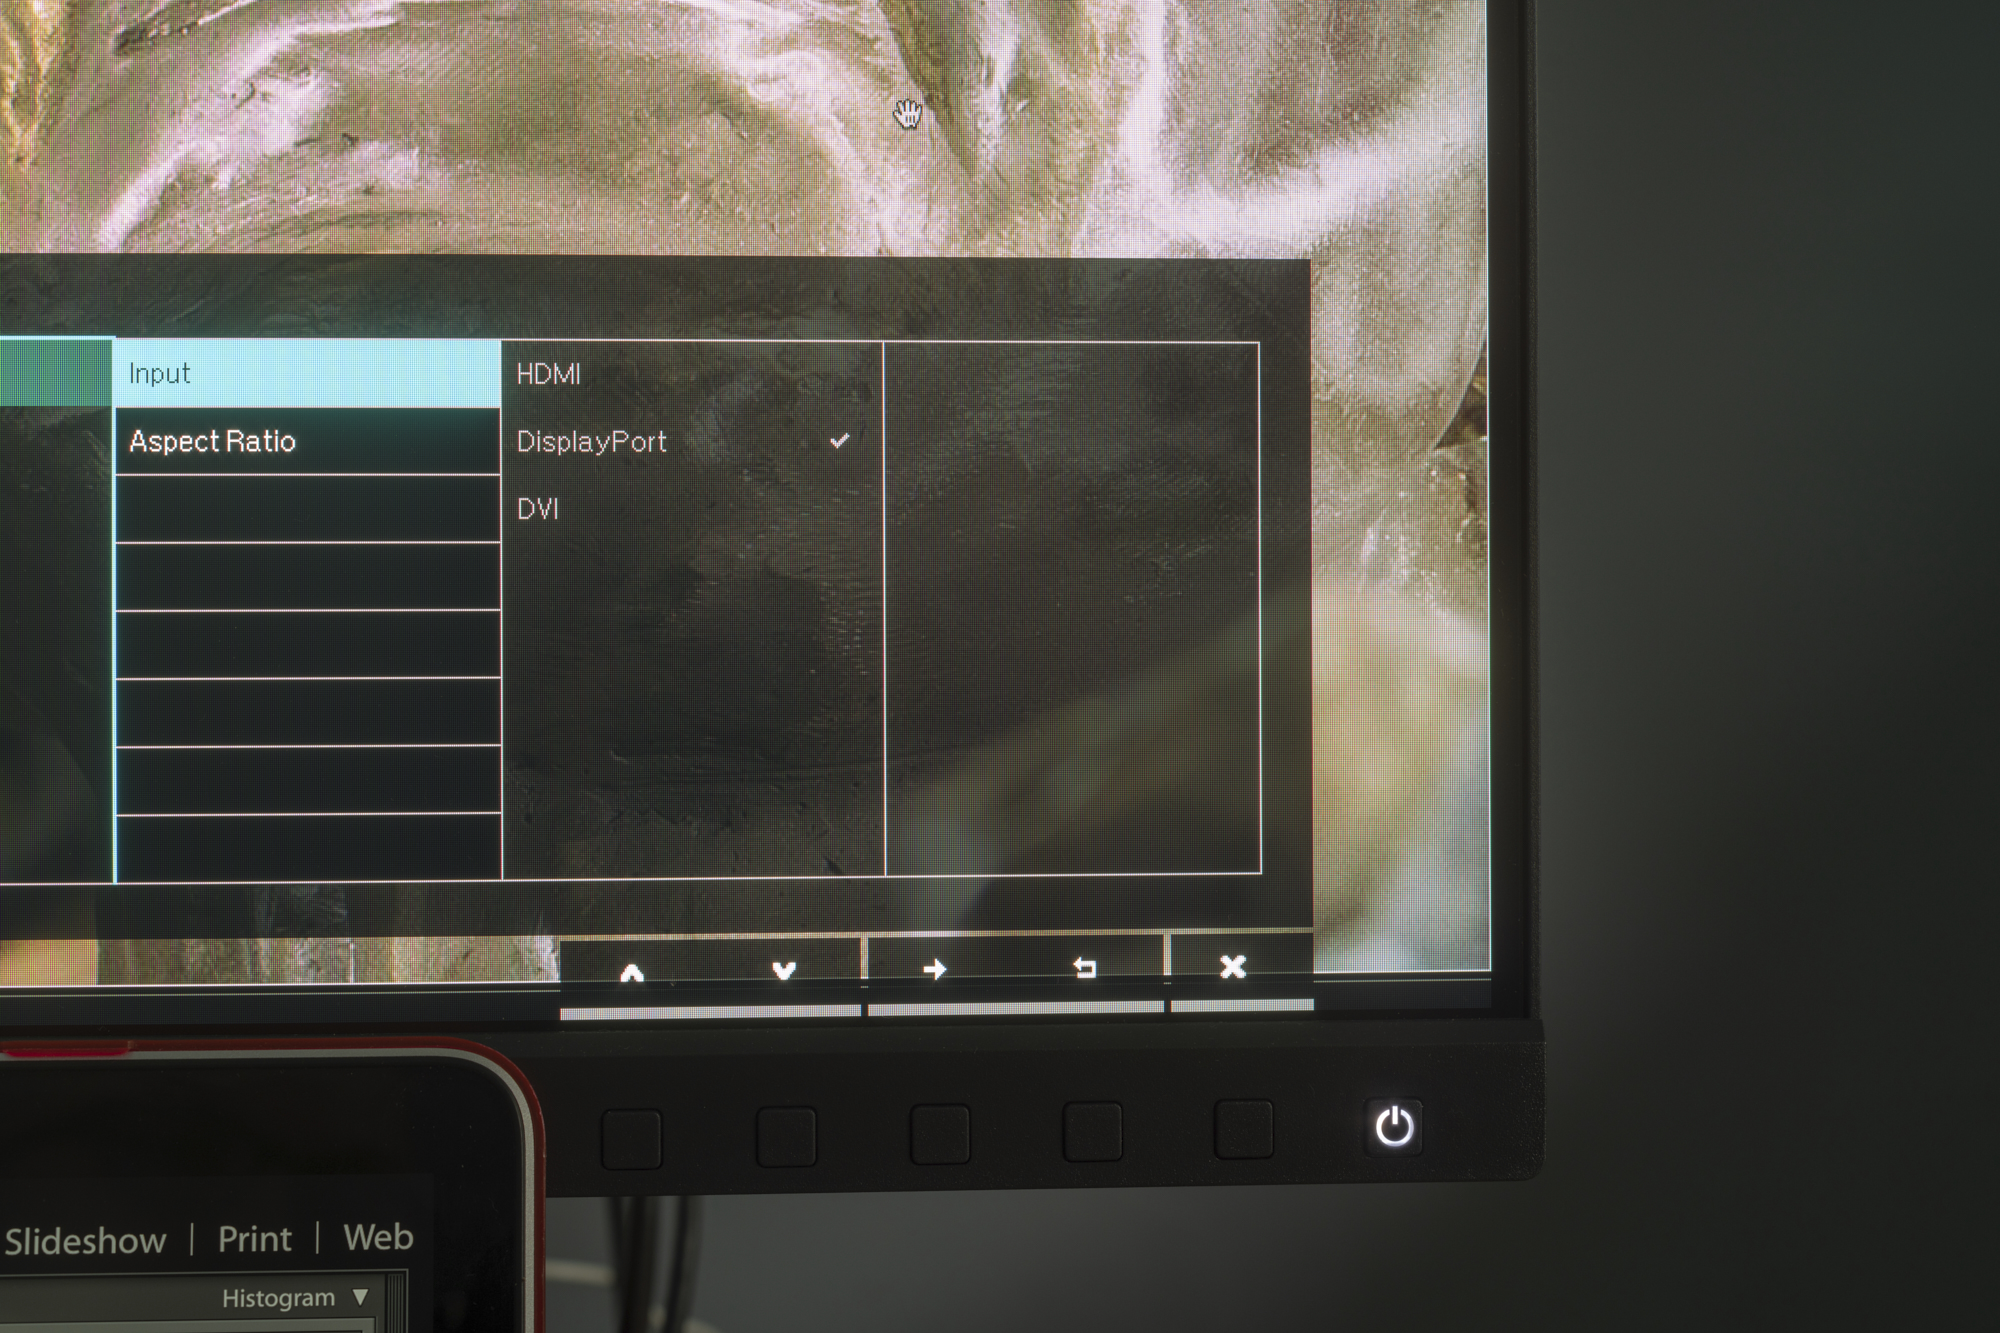
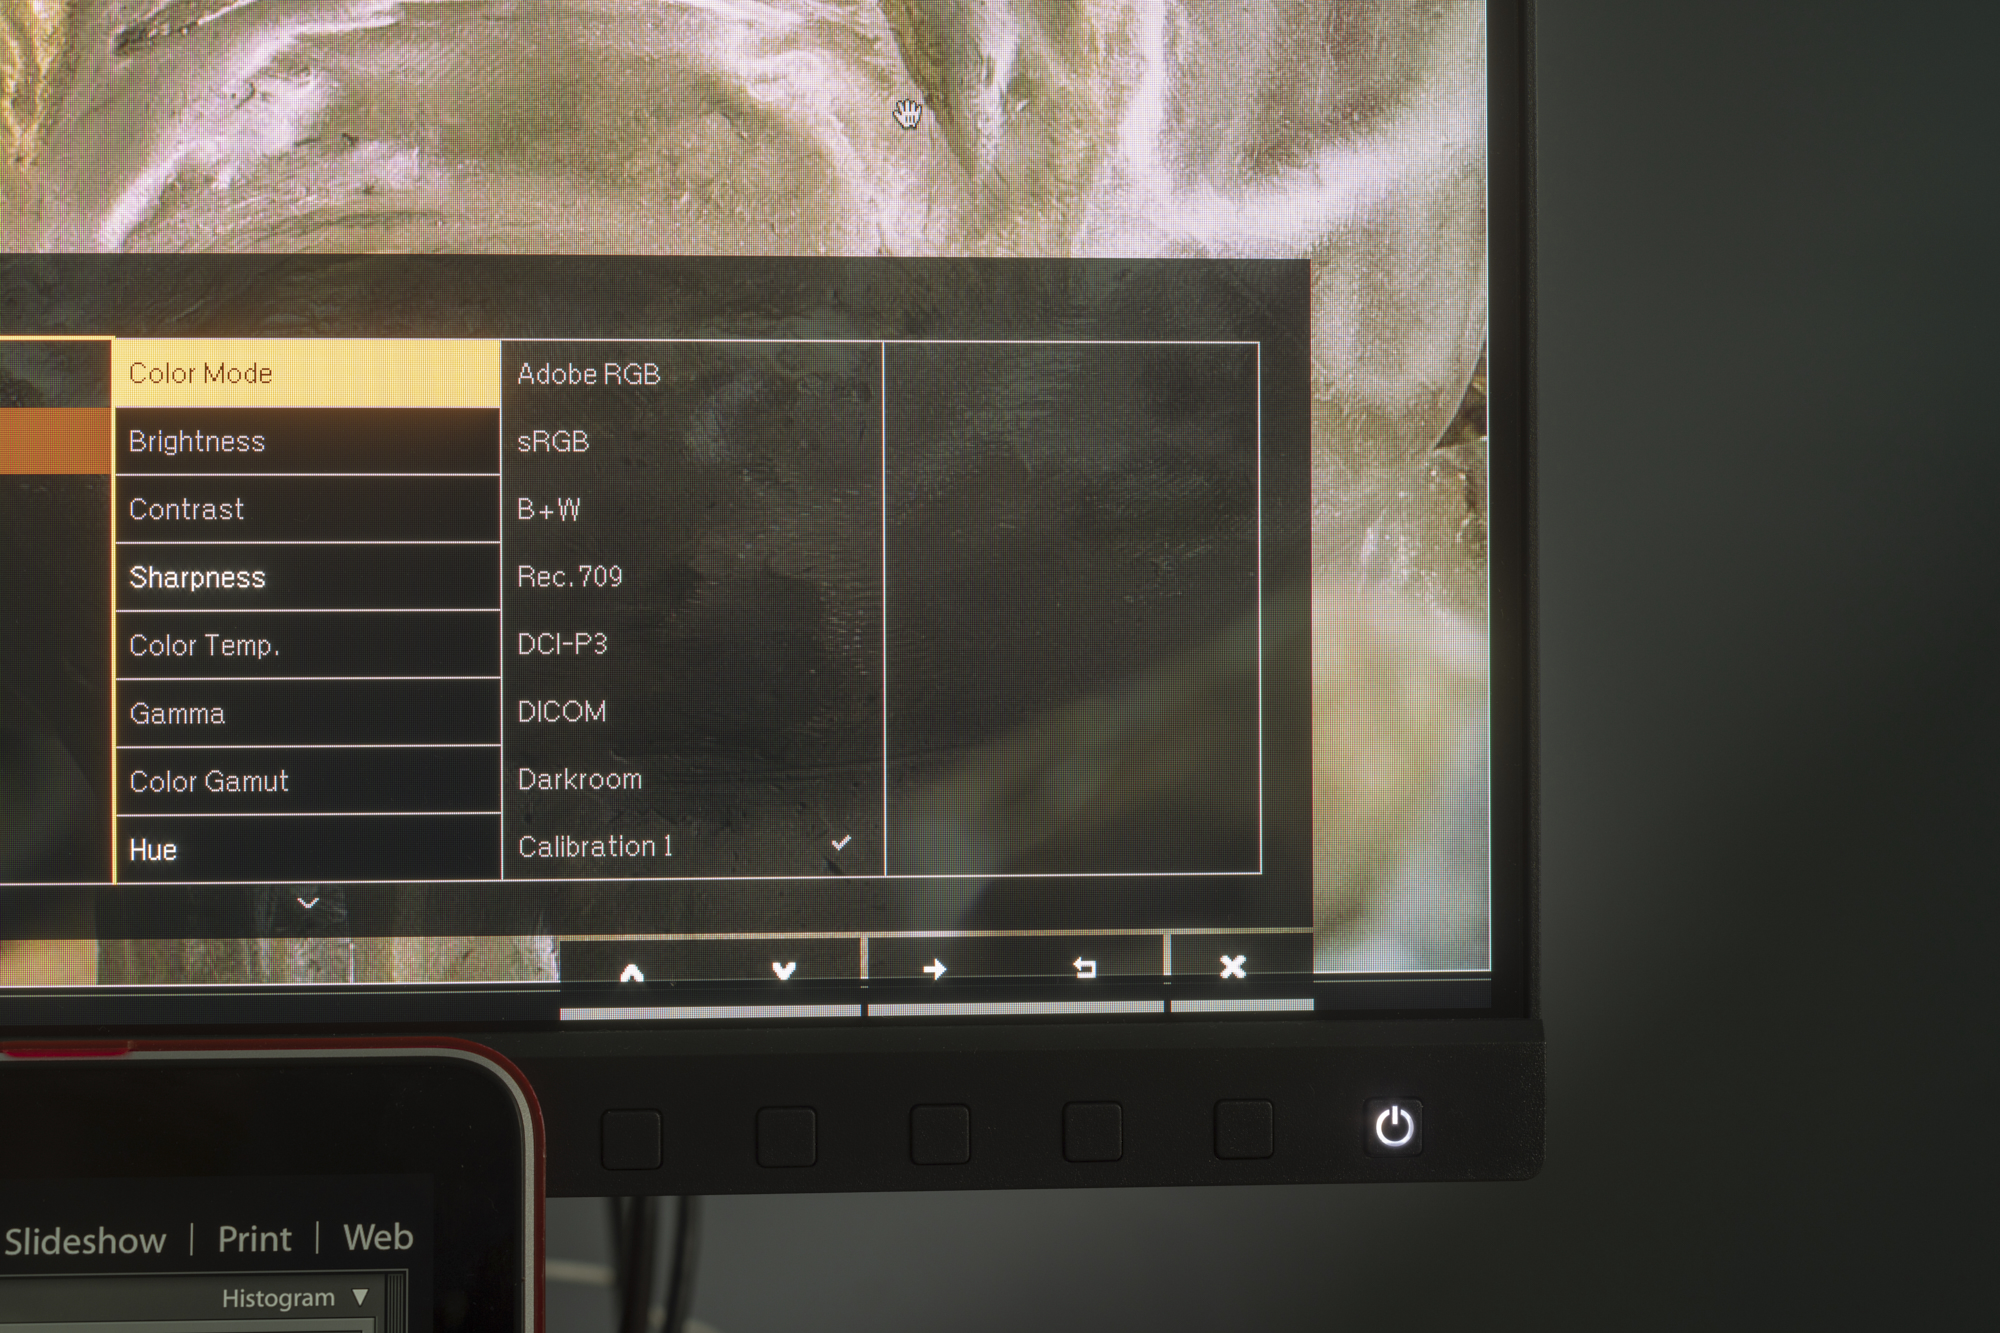

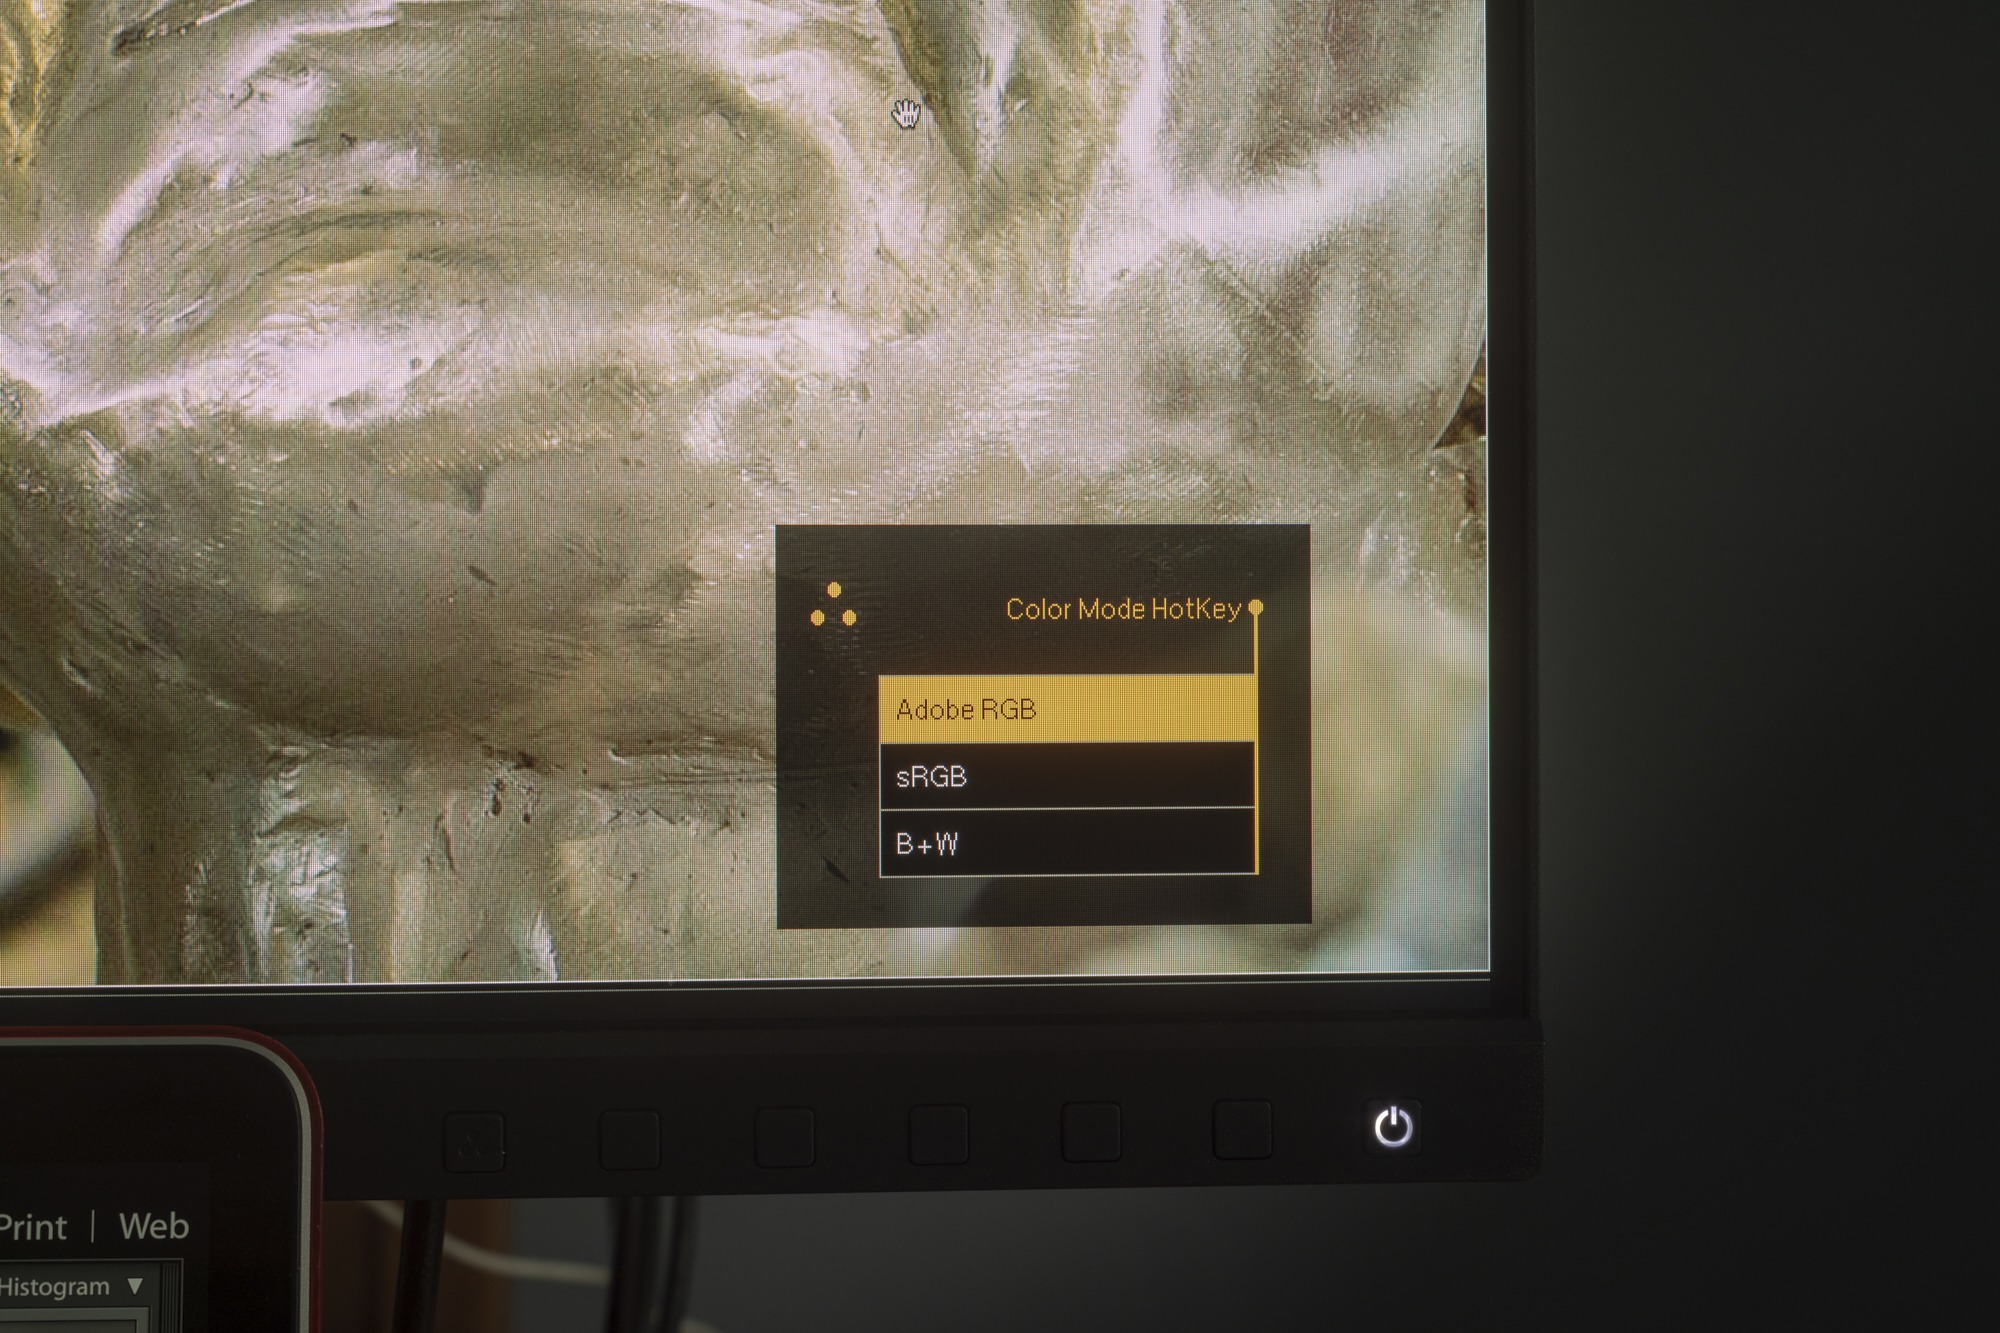
The remaining four buttons open the control menus and submenus and for navigating through them. From left to right these buttons open up a menu for choosing input source; manual screen brightness and contrast settings; the third button’s menu allows for deeper access into controlling the monitor: including aspect ratio, a multitude of color adjustment settings including color mode ( where you manually choose which profile – the choices are Adobe RGB, sRGB, B+W, Rec. 709, DCI-P3, DICOM, Calibration 1,2, and 3, and Custom 1 and 2) you want to use); Brightness, Contrast, Sharpness, Color Temp. ( 5000K, 6500K, Custom and User Define), Gamma (1.6, 1.8, 2.0, 2.2, 2.4, and 2.6); Color Gamut (Adobe RGB, sRGB Rec. 709, and DCI-P3); Hue (individual channel controls for Red, Green, Blue, Cyan, Magenta, and Yellow); Saturation (individual channel controls for Red, Green, Blue, Cyan, Magenta, and Yellow); Black level; Save Color Settings (Custom 1 and 2); and Reset Color to factory defaults.
Color
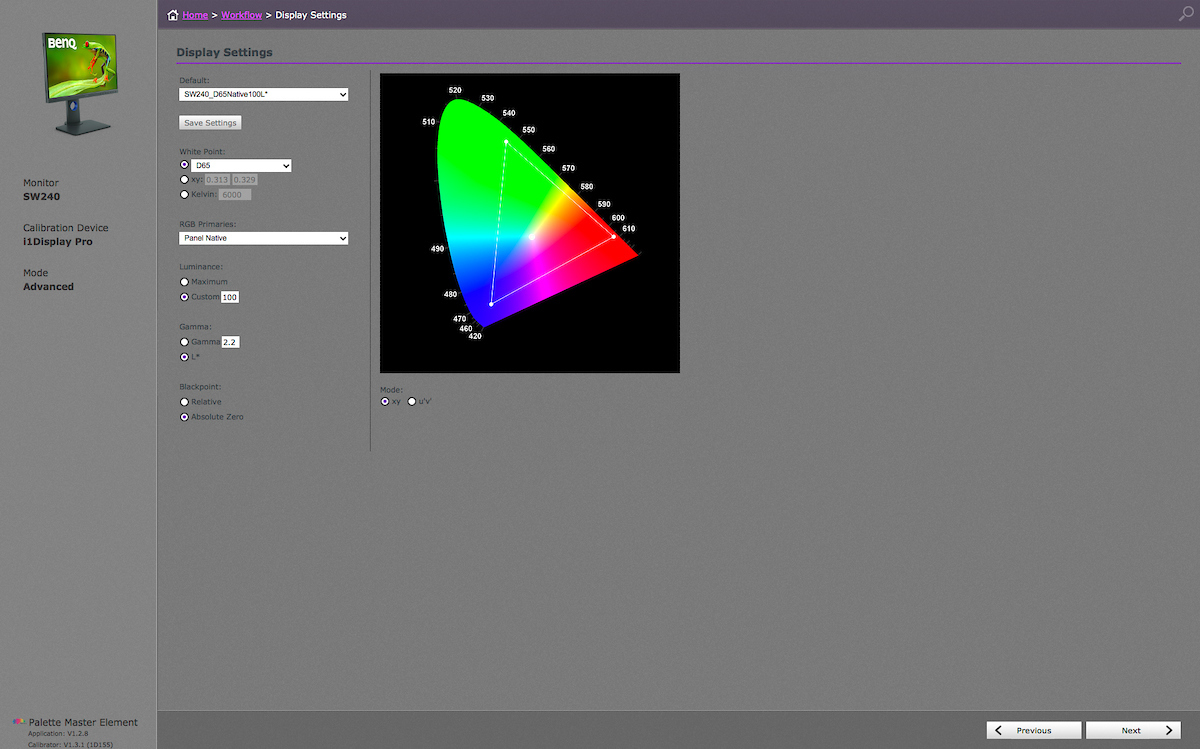
How did BenQ’s color gamut claims (99% of Adobe RGB, 95% of DCI-P3) match up with actual measurements? Using the calibration and profile creation settings which work best for me, once profiled the SW240 comfortably holds the Adobe RGB (1998) gamut and then some, especially in the reds, yellows, and magentas. Using Palette Master Element with an X-rite i1 Display Pro colorimeter, the calibration and profiling process is straight forward. Connect the colorimeter to one of the monitor’s two USB ports and after the monitor has warmed up for a few minutes, turn on PME, set your calibration values and number of patches and let the machines do their magic and then validate the profile. If you use advanced mode, 14-bit LUT, the largest target set, and validate the results, once you have your settings entered into PME, the entire process takes just under 9 minutes.
I use the following settings when calibrating and profiling:
- White Point: D65
- RGB Primaries: Panel Native
- Luminance: Custom (100)
- Gamma: L*
- Blackpoint: Absolute Zero
- Profile Distribution: System level
- Profile Version: v4
- Profile Type: 16 bits LUT
- Patch set size: Large

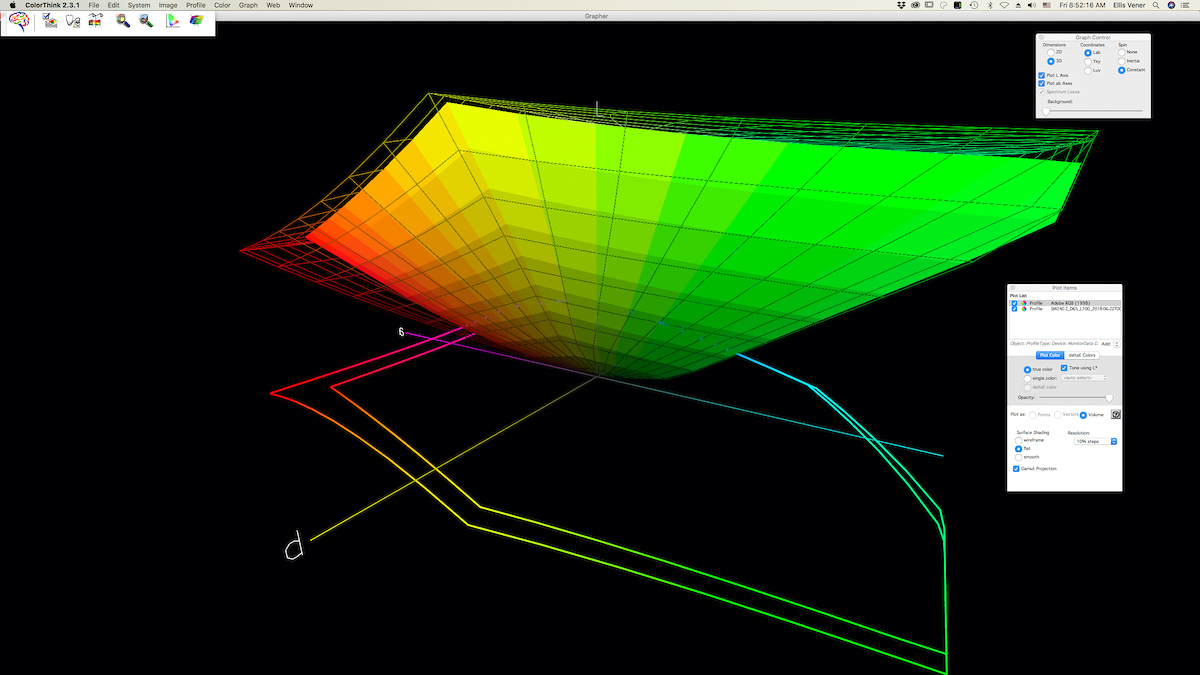
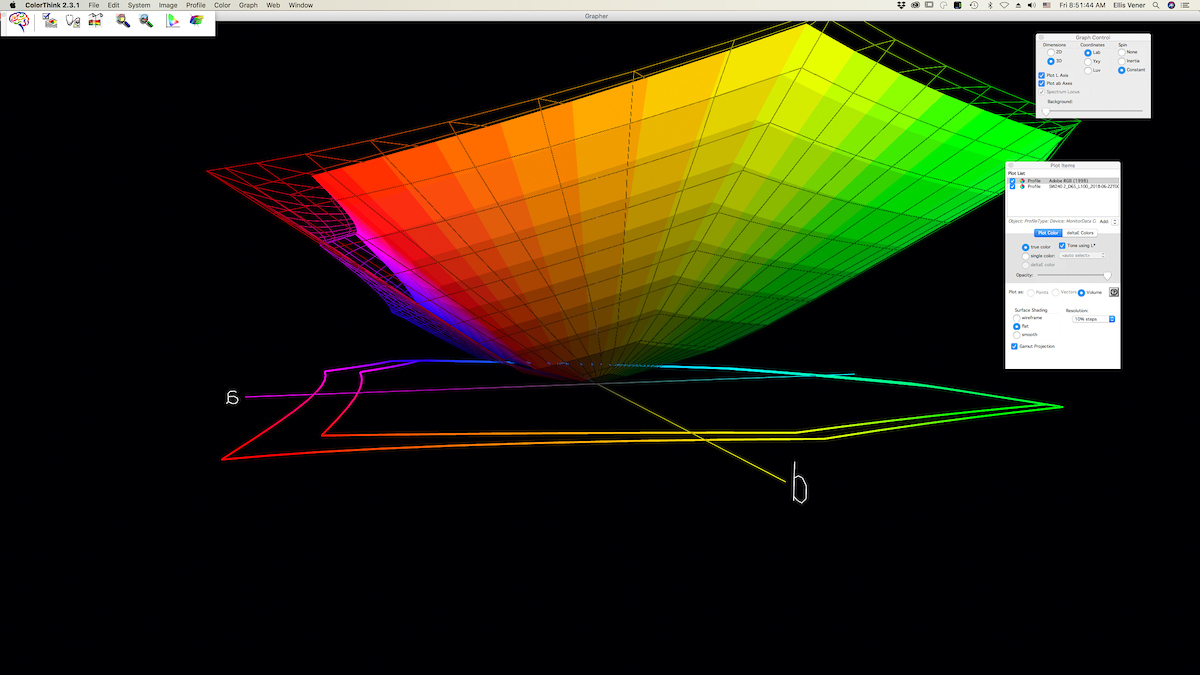
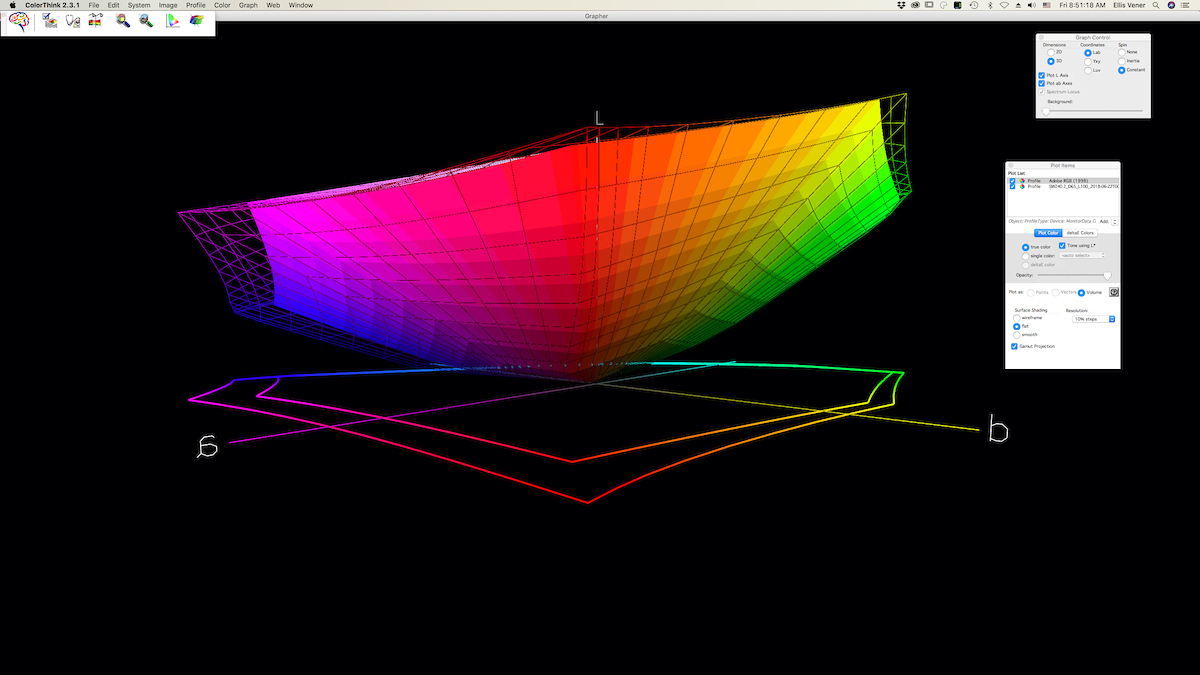
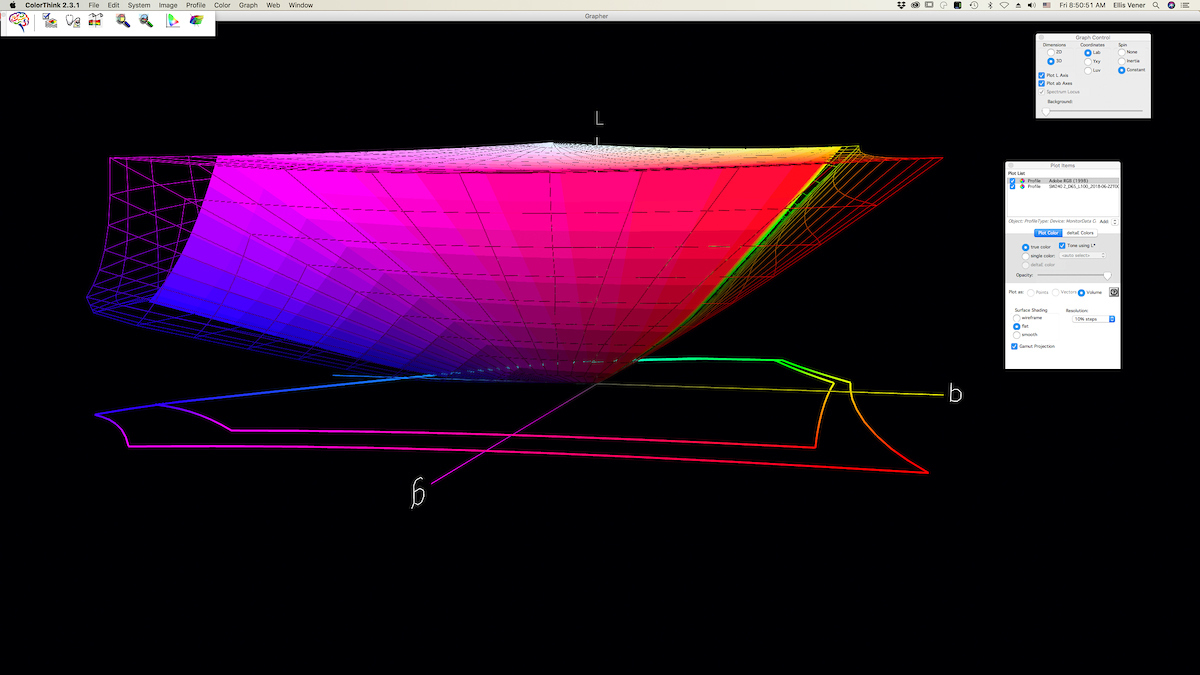

To examine the results I used ColorThink 2.3.11 to look at the profile in a three-dimensional LAB model and to compare it to the Adobe RGB (1998), DCI-P3, and Rec. 709 color spaces. In all but the cyan to blue colors, where the two gamuts matched, the BenQ SW240 had all round larger gamut than Adobe RGB(1998), especially in the mid to dark blues, magentas, and reds. The relationships between the BenQ and the DCI-P3 gamuts is much more complex with the BenQ falling short of the limits of DCI-P3 in the red to yellow to green gamut and the most saturated blues but exceeding it in the greens to cyan mid-tones, and substantially larger in the blues, magentas ,and red dark and middle tones, and the red to yellow highlights. But the BenQ gamut completely swallowed the Rec.709 color space. This was even more true for a generic CMYK profile. Looking at various paper profiles for my Canon imagePROGRAF Pro-1000 and Pro-2000 printers I found that for the most part they also fit within the native gamut of the BenQ SW240 with the exception of very bright, very saturated yellows and moderately dark blue-greens for glossy papers.
What does it mean to have a display with a gamut larger than the color space or output profile you are working in? It means that you’ll be able to see all of your color accurately.
Conclusions
At $399.00 the BenQ SW240 is an excellent value for both space and cost-conscious photographers. If you do not need 4K resolution or a 27” (or larger) display but are looking for a monitor that performs on par with much more expensive options from NEC and Eizo this should definitely be at the top of your list of candidates.

We give the BenQ SW240 four out of five stars.
1) If you are a budding color geek, ColorThink 2.3.1 is a very useful piece of software for evaluating monitor and printing profiles and is useful for comparing the gamut of an image to both device independent RGB color spaces like sRGB, Adobe RGB (1998), and ProPhoto RGB; and to device specific CMYK and printer profiles.
Get rid of the ads!
Did you enjoy reading this article as much as we enjoyed writing it? There's a way to support us and our reporting, getting ad-free navigation and more as a bonus. Subscribe to us for less than a coffee per month —just $3.99— or take advantage of our yearly subscription with a hefty discount for only $25.- An ad-free experience
- A free mystery box for Lightroom or Capture One
- All the books in our store
- 20% discount on Capture One
- 30% discount on Imalume Photo Theft Protection
- 20% off Herbs and Kettle Tea Company.
- 20% off your order from MPIX printing services.
- 5% off Viltrox Products via their eCommerce store.
- 10% off all film developing, printing and scanning services from Blue Moon Camera and Machine
- 15% off 7Artisans products: The lens and accessory maker is offering a sweet discount for Phoblographer's readers.