Last Updated on 02/19/2018 by Mark Beckenbach
All images by Lukas Holas. Used with Creative Commons permission.
Some of the most compelling bodies of work showing the beauty of nature are also the simplest. It works with landscape photography as we’ve recently seen in the impressive works of photographers like Przemyslaw Kruk and George Digalakis. This is certainly more challenging to pull off for other nature-centric genres like wildlife photography, but we’ve found a series that did it, and did so beautifully. Czech graphic designer and photographer Lukas Holas has achieved it with his stunning collection of Portraits of Animals.
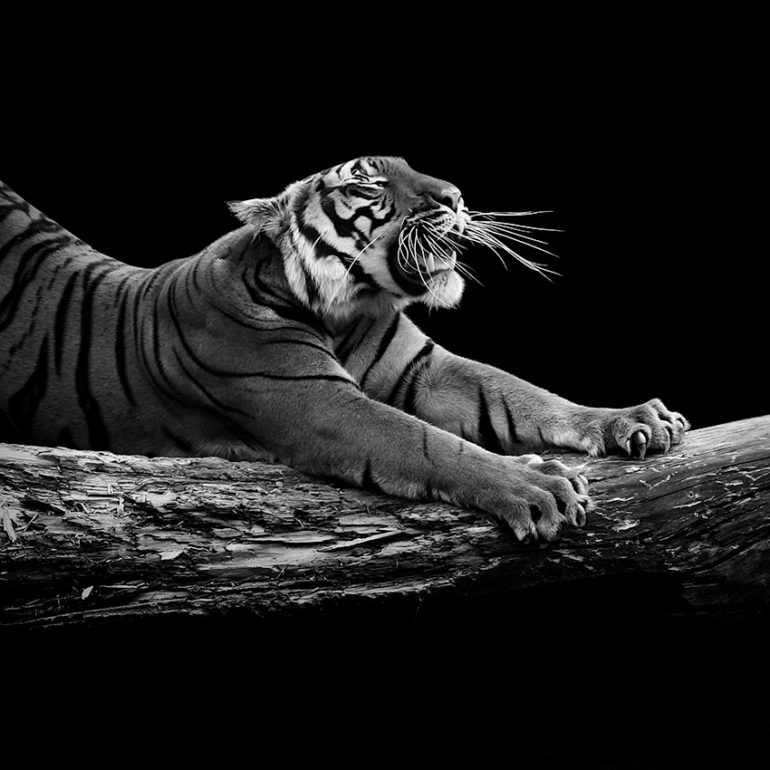
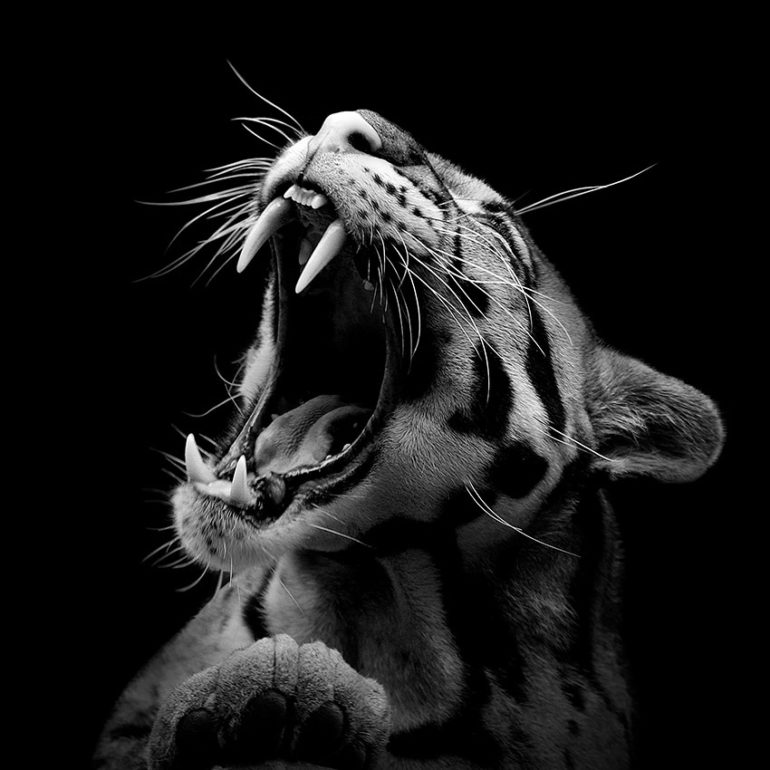
In this two-part series, Lukas gave some of the Animal Kingdom’s most fascinating creatures the royal photography treatment. Unlike the usual way wildlife is photographed, he captured their image in the style of glamour portraiture. It’s done impressively and as if each animal was asked to pose or act in front of Lukas and his camera. From close-ups to action shots, he brings viewers as close as possible to these majestic creatures so we can absorb and appreciate their features and individuality.
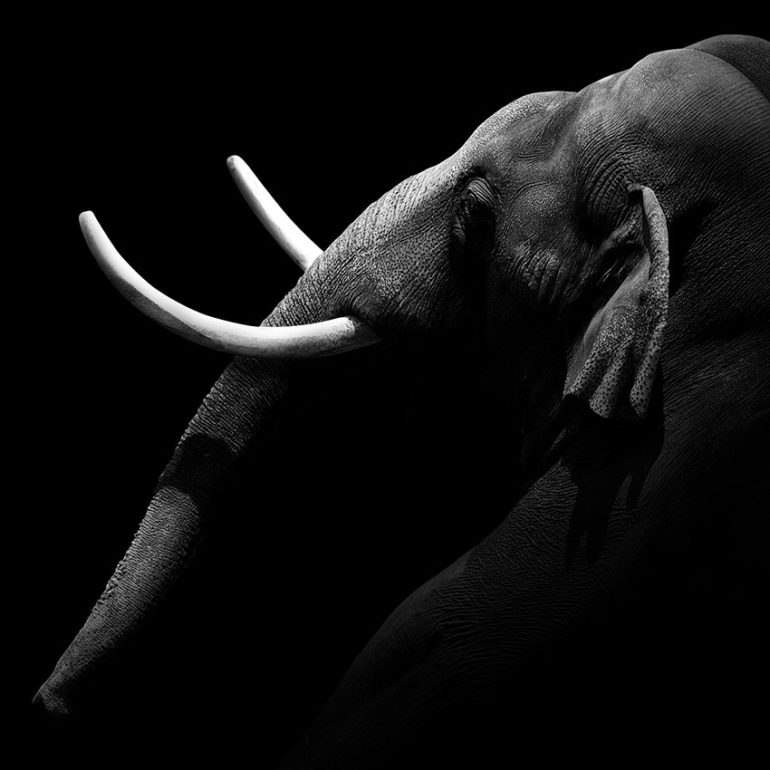
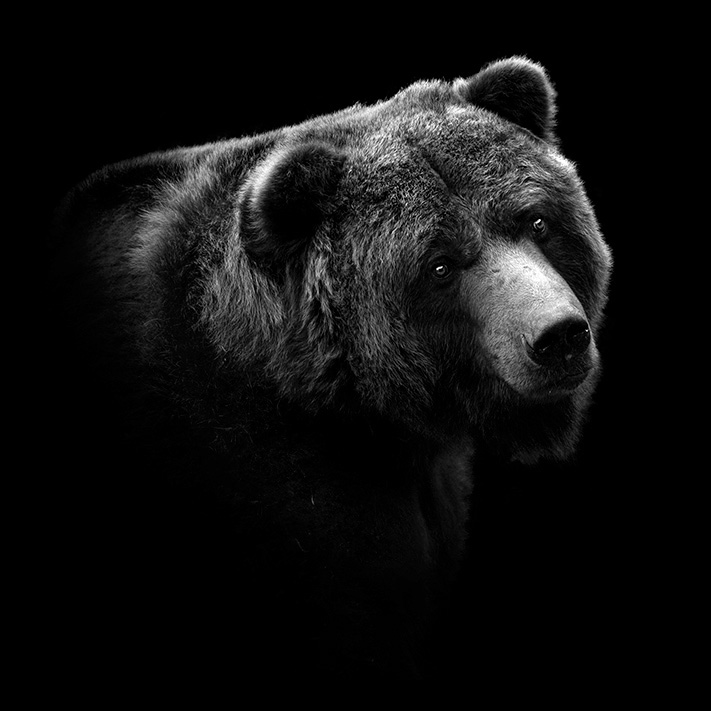

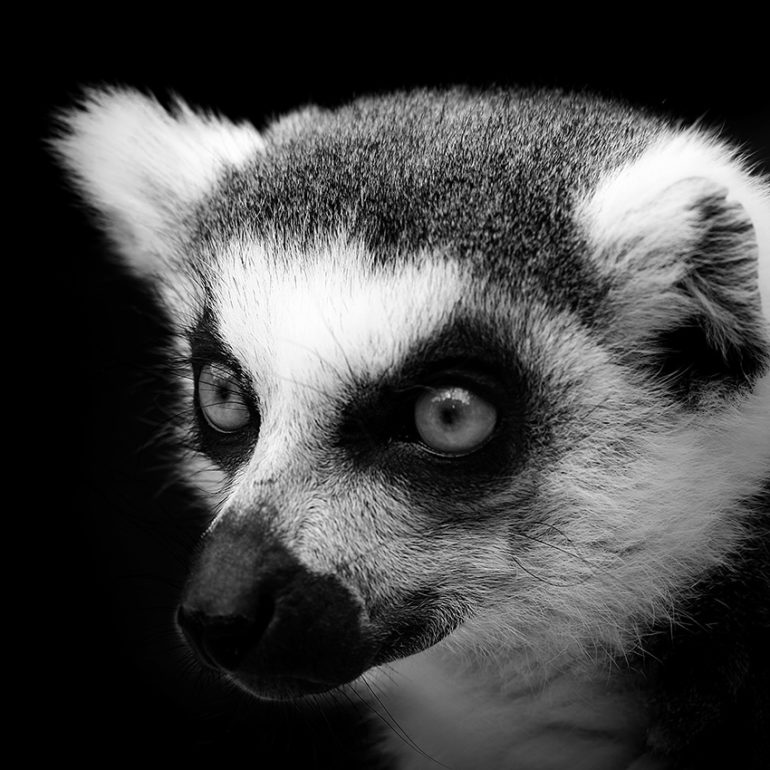
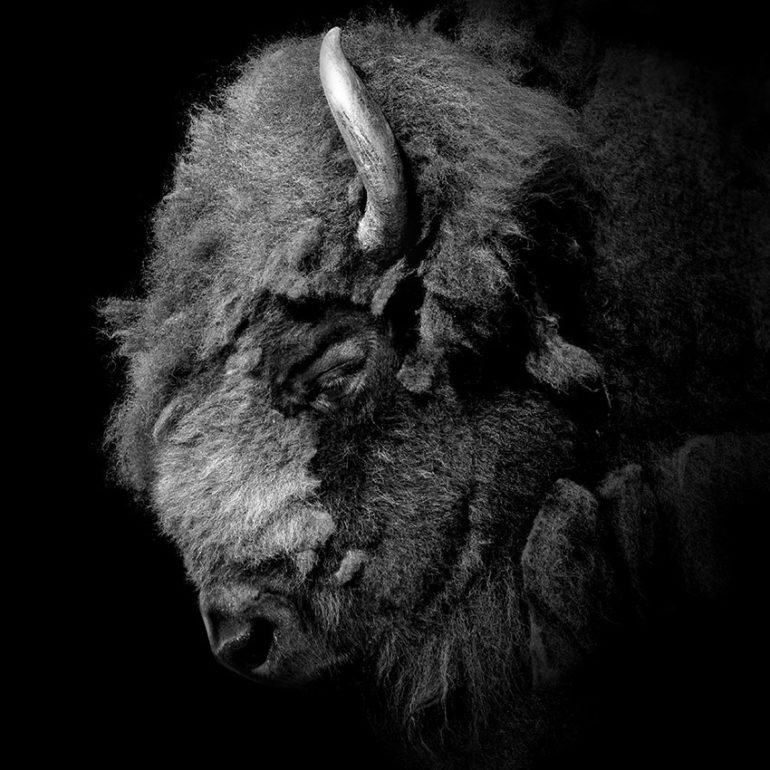
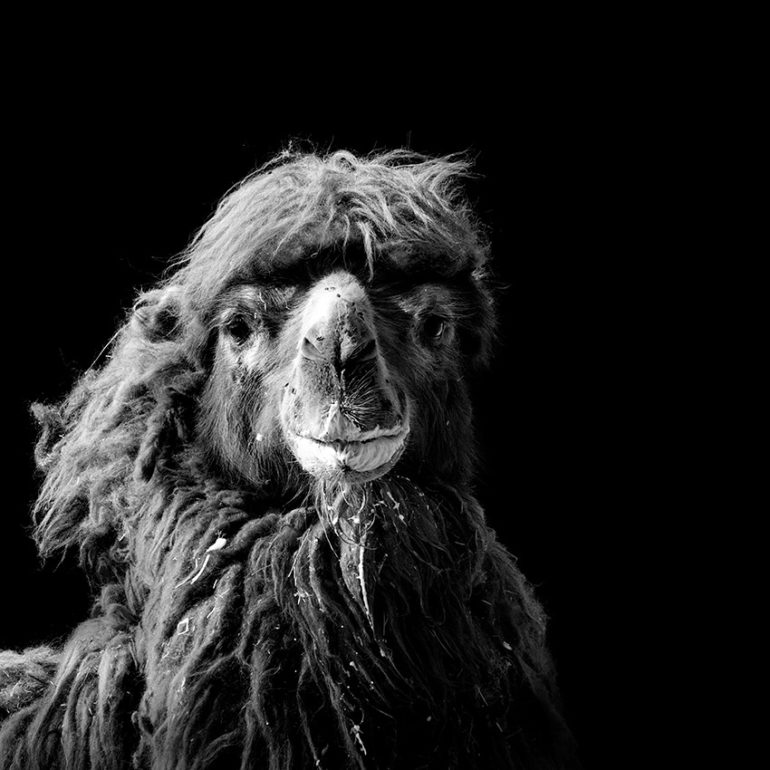
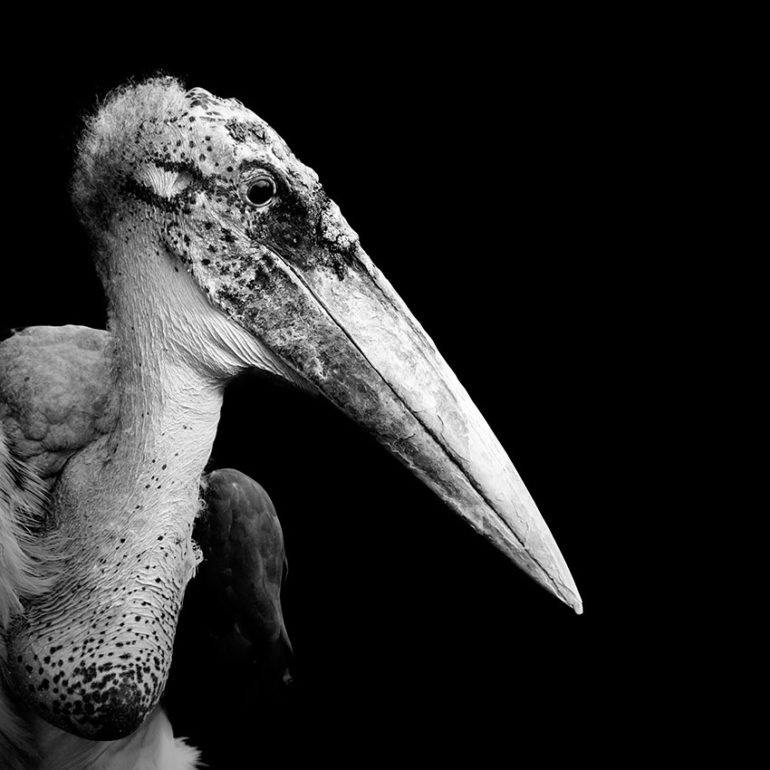
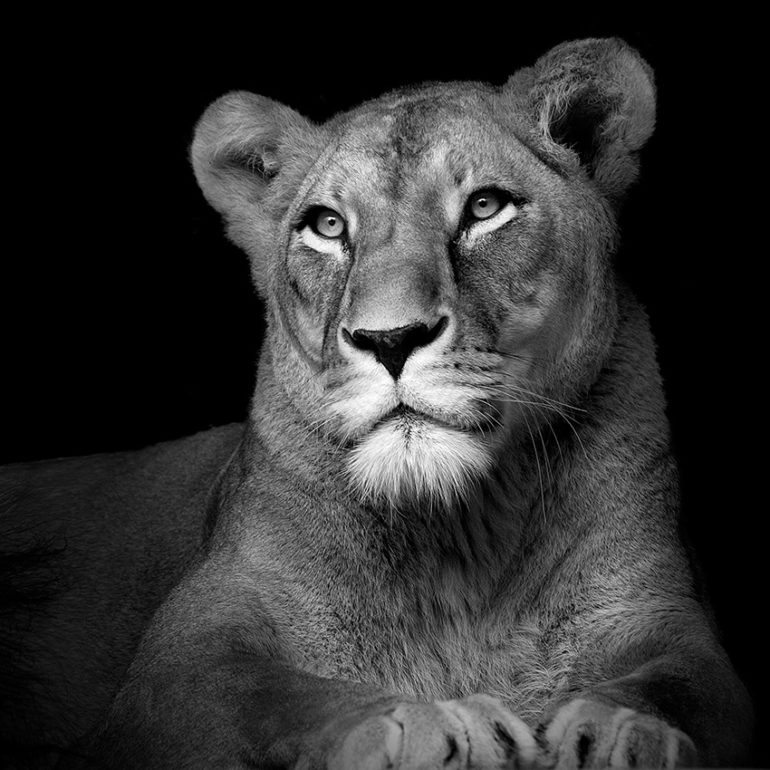
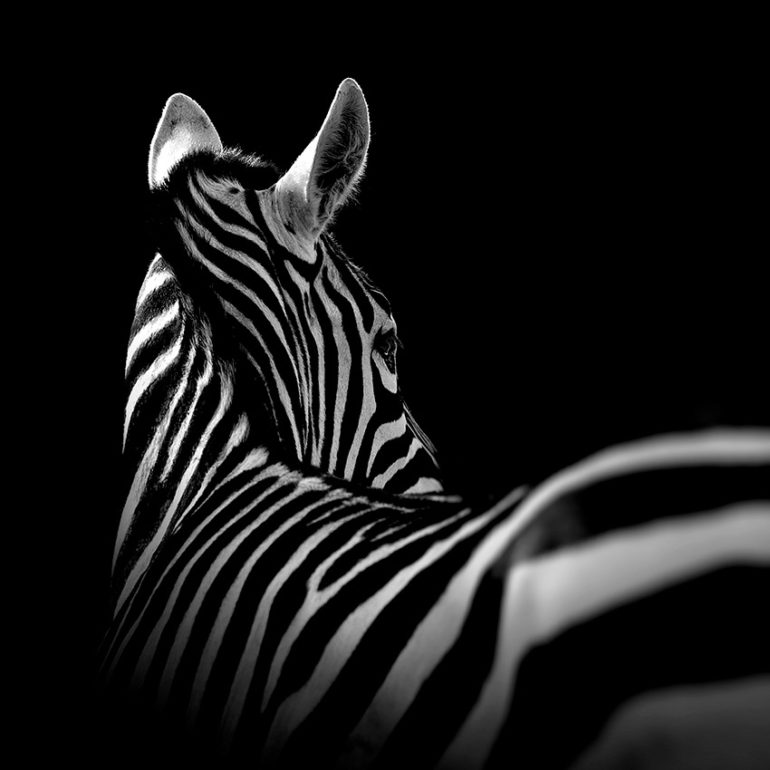
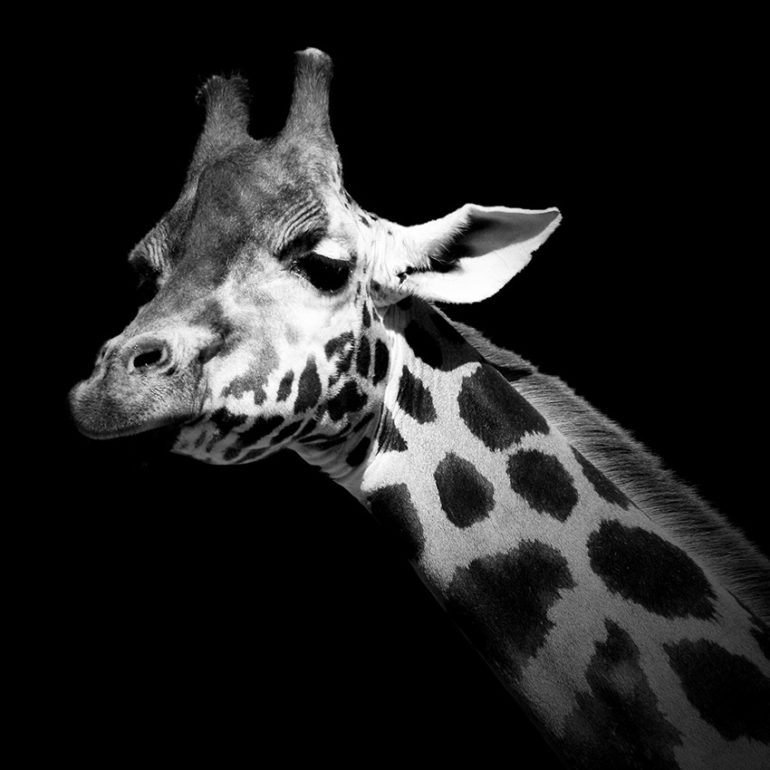
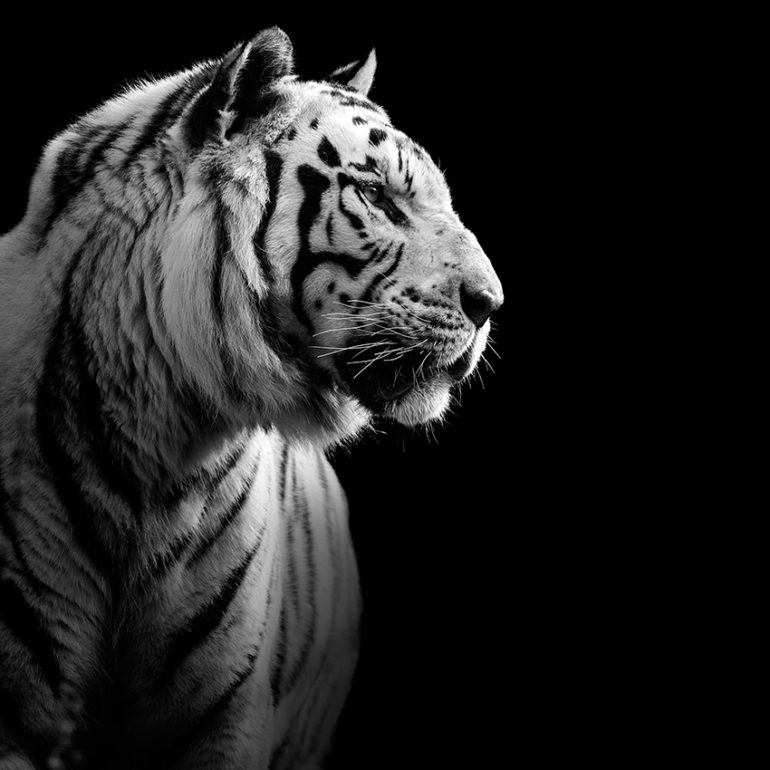
In fact, as with any effective portrait, Lukas has found the most interesting, if not the best angles and features, for each of these subjects. An elephant’s ivory tusk against its wrinkled skin and trunk. A tiger’s powerful display of claws and fangs. A zebra’s hypnotic stripes. A lioness’ regal and pensive facial expression. The list goes on and on.
It’s also worth noting the elements that make this series work. First, Lukas made use of the square format, which is tried and tested for great portraits. This framing style has allowed him to direct the eyes towards certain details, all while maintaining a sense of balance in the frame. Second, he has rendered the images in black and white, further heightening the textures, contrast, and shapes created by his subjects. Lastly, he has placed them against a plain black background, making the variations in the details and contrast stand out. This black background, he said, somehow presents them in a more dignified environment compared to the walls of their enclosures.

In one of his sets for this series, Lukas revealed that he took these photos in a zoo, against smudged glass, steel bars, and “frequent apathy of animals or omnipresent crowds of tourists.” He also mentioned that while his images have no specific message, he believes they encourage personal imagination and “foreshadow a deeper story of animals portrayed.”
Do check out Lukas Holas’ Behance portfolio to see more of his Portrait of Animals and his other photography projects.
Get rid of the ads!
Did you enjoy reading this article as much as we enjoyed writing it? There's a way to support us and our reporting, getting ad-free navigation and more as a bonus. Subscribe to us for less than a coffee per month —just $3.99— or take advantage of our yearly subscription with a hefty discount for only $25.- An ad-free experience
- A free mystery box for Lightroom or Capture One
- All the books in our store
- 20% discount on Capture One
- 30% discount on Imalume Photo Theft Protection
- 20% off Herbs and Kettle Tea Company.
- 20% off your order from MPIX printing services.
- 5% off Viltrox Products via their eCommerce store.
- 10% off all film developing, printing and scanning services from Blue Moon Camera and Machine
- 15% off 7Artisans products: The lens and accessory maker is offering a sweet discount for Phoblographer's readers.