If you’re looking for a way to add an abstract, dreamy, sometimes surreal quality to your photos, you may want to consider trying your hand at shooting reflections. Reflections offer a unique perspective and composition when shooting landscape, urban, or even portrait photography. The possibilities are as limitless as your imagination. Some experimentation is usually involved, but don’t let that scare you. A few of these helpful tips can take out the guesswork.
Water
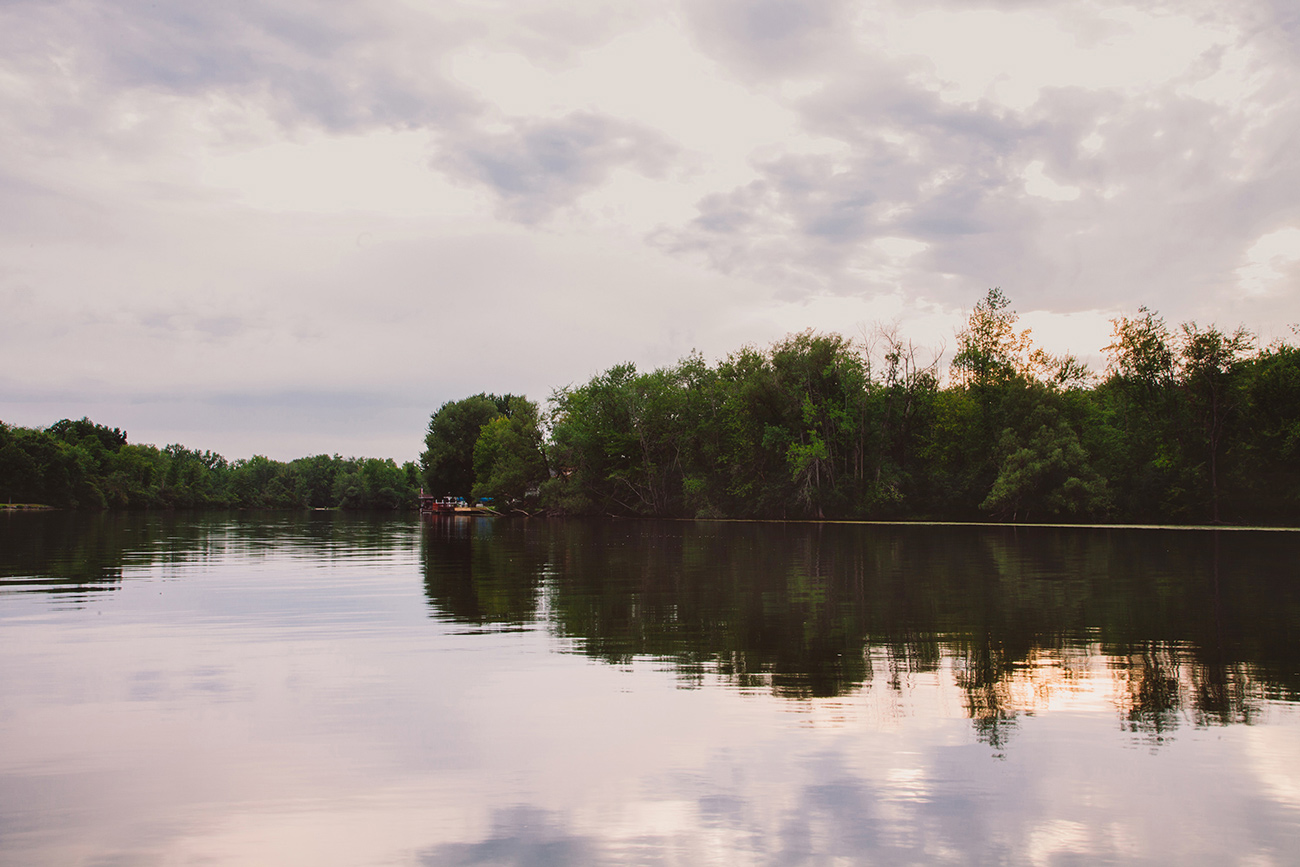
When people think about shooting reflections, water is one of the first things to come to mind. It’s a popular landscape photography tactic because when done right, it can add beautiful drama and majesty to an image. If you want to have a go at it, don’t just head off for the closest body of water and expect great results. There are a few ideal conditions you’ll want to be on the look out for. For starters, light is important. The best lighting conditions to capture reflections in water are pretty much on par with shooting natural light portraiture. Try to head out early morning or evening during the golden hour, or wait for a nice hazy, overcast day. When you’re dealing with bright overhead sun, you’ll often end up with a glittering effect across the water’s surface that ruins any reflection.
Another important factor is weather. Watch the forecast and try to aim for a calm, breezeless day. Wind causes a ripple-effect, and you’ll want as little of that as possible. Shallower bodies of water also tend to work best, so you may have better luck with a pond, quiet river, inlet, or bay with little boat traffic. Puddles are also fantastic for reflecting, and in a pinch you can even make your own. Don’t forget to bring your tripod! If you do end up with a little wind resistance, you can try using a slower shutterspeed to smooth out small ripples on the water’s surface. You’re out of luck with waves, however.
When you review your shots, you may notice that the actual sky is much brighter than its reflection in the water. There are some options here. Either you can make necessary adjustments in post processing, or you can pick up a graduated neutral density filter for a more even exposure. While you’re shooting, aim for a higher fstop to ensure that everything in the image frame stays nice and sharp. Bear in mind that there’s a large distance between the reflection in the water, and the actual object being reflected. If you do opt to play with a wider aperture, try shifting focus between the reflection and the object to see what interesting things you can come up with. Think about your composition, too. It’s fun experimenting with the outcome of different content taking up different parts of the image frame.
At some point, you may find yourself with the opposite problem; how do you get rid of the reflection? A circular polarizer can be your ticket. These filters, which are also commonly used to darken skies, eliminate reflection in non-metallic surfaces. Here, they’ll allow you to photograph what’s beneath the water’s surface at close range.

Glass
Glass can be a lot of fun to work with. Consider all the different ways it serves as a vehicle to add depth and dimension. By allowing natural reflections to occur, you end up with an almost abstract feel that makes for a really interesting shot. Urban or architectural photography can easily become a playground here. Think about how you can use the huge windows on large buildings as tools to reflect subject matter all around you. It has potential to offer a really unique perspective that puts the viewer right in the midst of the action.
Shooting portraits through glass can also be super evocative. It requires some moving around, seeing what vantage point works best. Figure out what angle you need so you capture reflection while allowing some information behind the glass to peek through. Be careful with your focus, though. Remember to keep the subject behind the glass as your focal point, unless you’re purposefully going for an alternative point of view. It’s also easy to lose contrast shooting this way, so you may need to boost it a bit in post. Like with water, a circular polarizer is your friend if you need to altogether eliminate reflections on a glass surface.

Metals, Mirrors, and Other Shiny Things
Shooting metallic or other highly reflective objects can be a little tricky. They involve a certain degree of trial and error, figuring out where you need to stand so light strikes the object in a way that’s flattering rather than distracting. If you can help it, always try to clean the surface before you dive in. Think about mirror shots, for example. They’re a great way to use creative reflection to your advantage, but if the mirror is dirty, your photo winds up looking sloppy.
Learn to embrace distortion, especially in curved objects. A classic example here is Chicago’s famous Cloud Gate sculpture (ie; the “Bean”), where countless photos are taken every single day. Part of the charm in photographing this landmark is the distorted reflection that results from its distinctive shape.
You’ll want to be careful of your own reflection as well. When photographing anything highly reflective, you’ll often end up making a cameo appearance in the shot. Sometimes it’s intentional. Other times, it’s a nuisance. This isn’t always easy to spot in the moment, and removing it in post is a pain, so be sure you’re checking and moving around as necessary. Another way around this is to shoot with a telephoto lens, which will put some distance between you and the shiny object. Metallic surfaces do tend to appear a little dull, but you can always punch up the contrast or play with curves later.
Get rid of the ads!
Did you enjoy reading this article as much as we enjoyed writing it? There's a way to support us and our reporting, getting ad-free navigation and more as a bonus. Subscribe to us for less than a coffee per month —just $3.99— or take advantage of our yearly subscription with a hefty discount for only $25.- An ad-free experience
- A free mystery box for Lightroom or Capture One
- All the books in our store
- 20% discount on Capture One
- 30% discount on Imalume Photo Theft Protection
- 20% off Herbs and Kettle Tea Company.