
In portraiture, the focus is on the eyes–quite literally. While it’s a general rule to get the eyes in focus (if anything), what really makes a portrait stand out is when the eyes attract all the attention. But how, besides getting them in focus, do you achieve that? Adobe Lightroom has the very clever Adjustment Brush tool, which you can use to enhance the look of your subject’s eyes during post-processing. There are a couple of things to keep in mind, though, in order not to overdo it. In this article, we’re showing you how to make eyes pop in Lightroom, step by step.
1. Brighten the Eyes
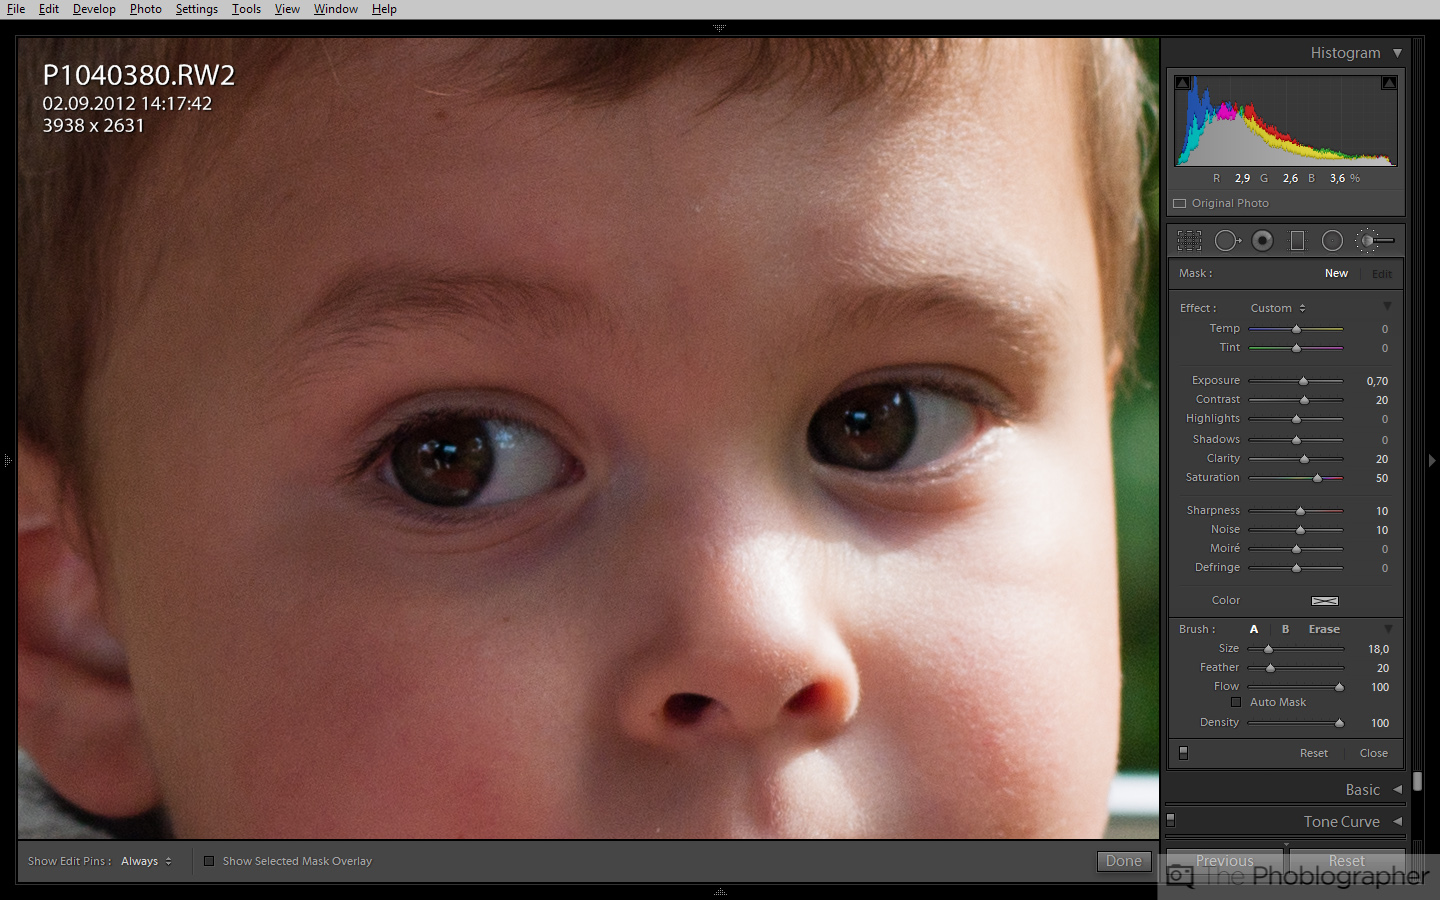
The first step is to choose the correct settings for the Adjustment Brush tool. Usually, what I apply to the eyes is a mix of brightening the exposure, strengthening the contrast, adding some clarity, boosting the saturation, and slight sharpening. The specific values to select depend on the initial brightness of the eyes. In this case, I pushed the exposure by 0.7 EV, since the eyes were pretty dark to begin with. Depending on the picture, sometimes 0.5 EV or even 0.3 EV is already sufficient.

2. Clean Up the Areas Around the Eyes
In the image above, you see how the Adjustment Brush tool covers a perfectly circular area. The iris of the eye, however, is far from being a perfect circle most of the time, and that could be because it’s partially obscured by the eyelids or the eyes aren’t looking straight into the camera. In order not to have bright areas remain outside of the iris, you need to clean up those areas using the ‘Erase’ function of the Adjustment Brush tool.

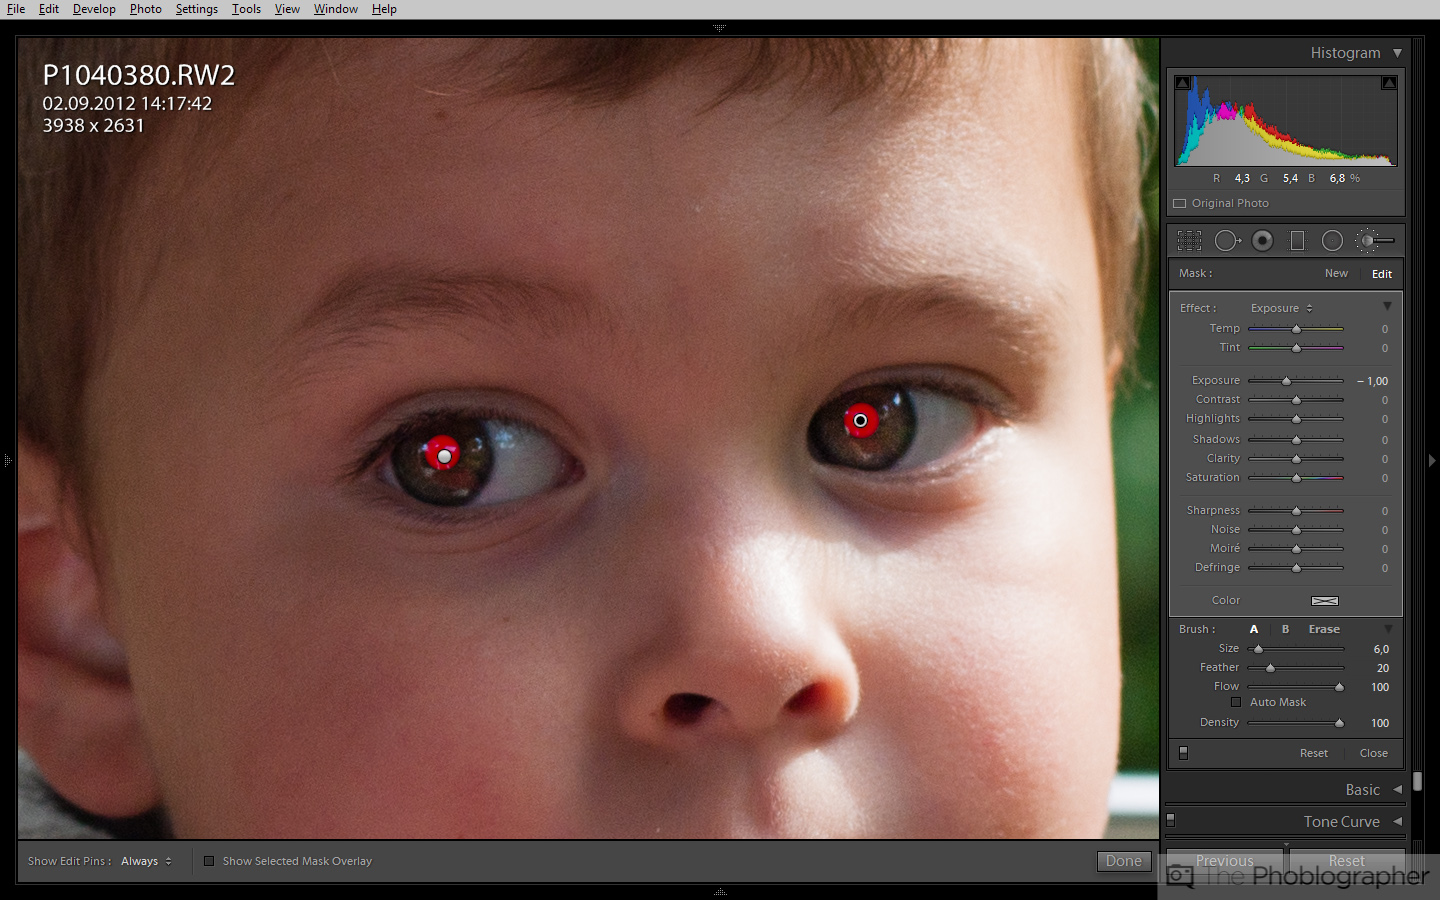
3. Darken the Pupils
Finally, since the pupils have been affected by the brightening action as well, they need to be darkened in order to achieve a more natural look. Keep in mind that for this step it may be entirely sufficient to apply the ‘Erase’ function to the pupils if they’ve been relatively dark from the beginning. In this particular case, there are some strong reflections in the pupils, so adding some additional exposure correction to them will make the eyes stand out even more.
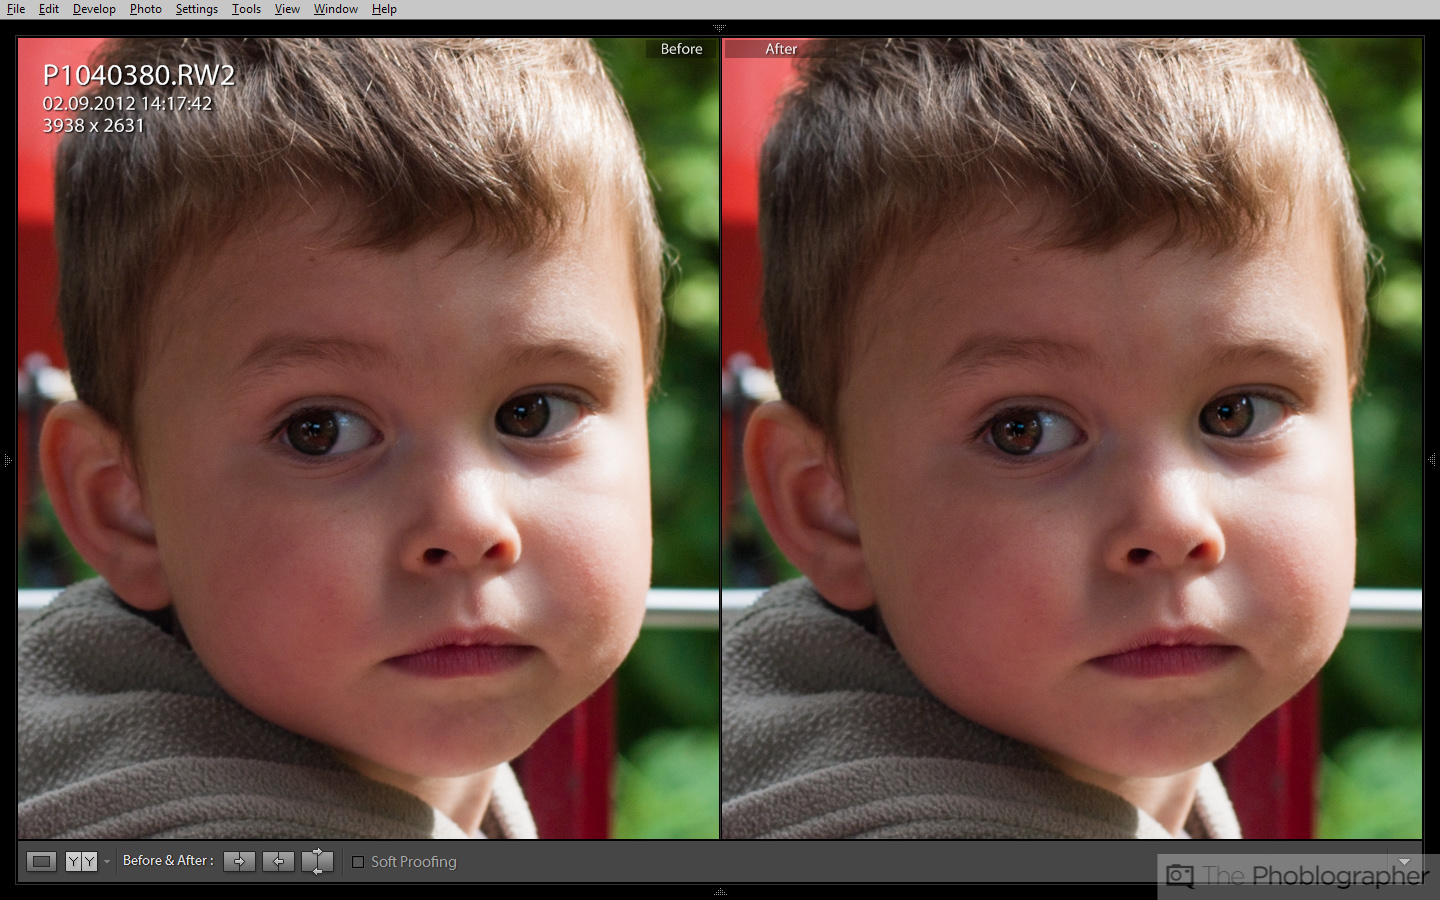
The title image used for this article is the final result of these combined operations. Below is a before-after comparison to see the immediate effect that brightening the iris has, as compared to the original appearance of the eyes (after some general processing had already been applied to the image).
Additional Samples
Below are three more portraits that have been enhanced using this technique. The before-after comparisons demonstrate the effect of the enhancement.
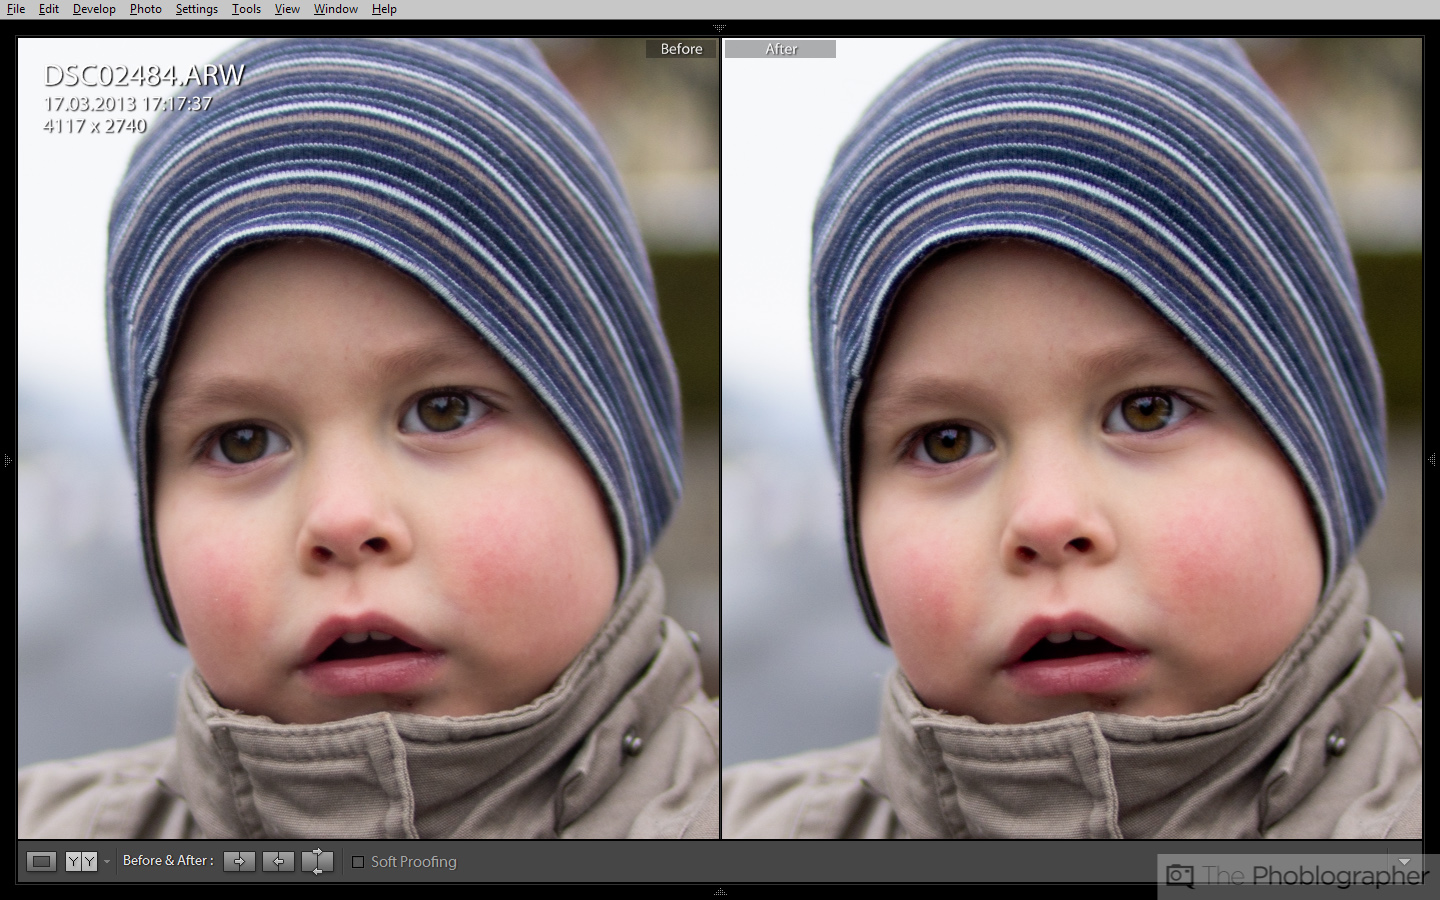
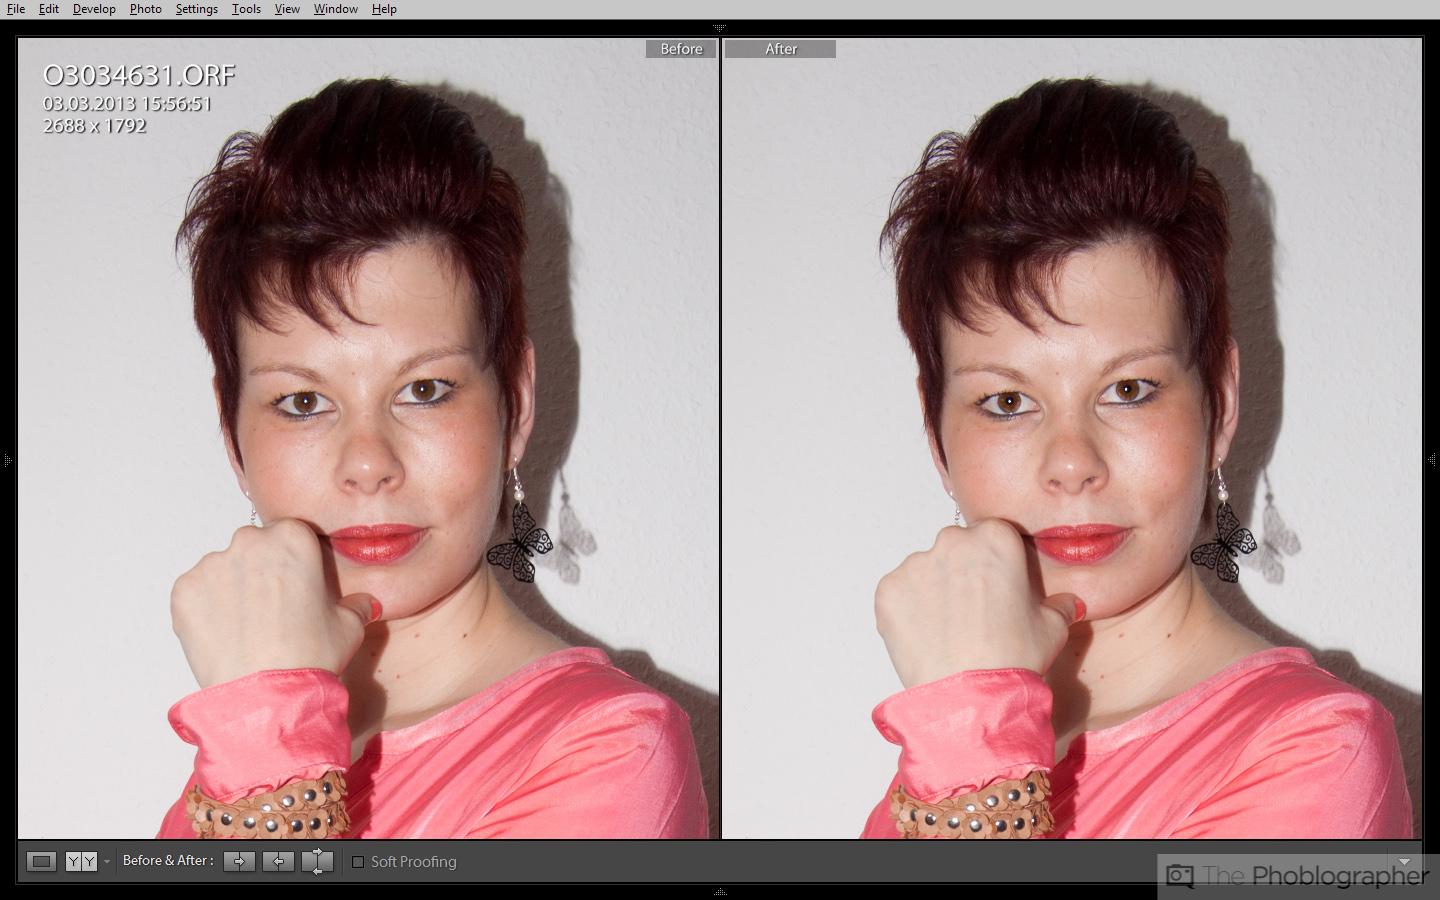
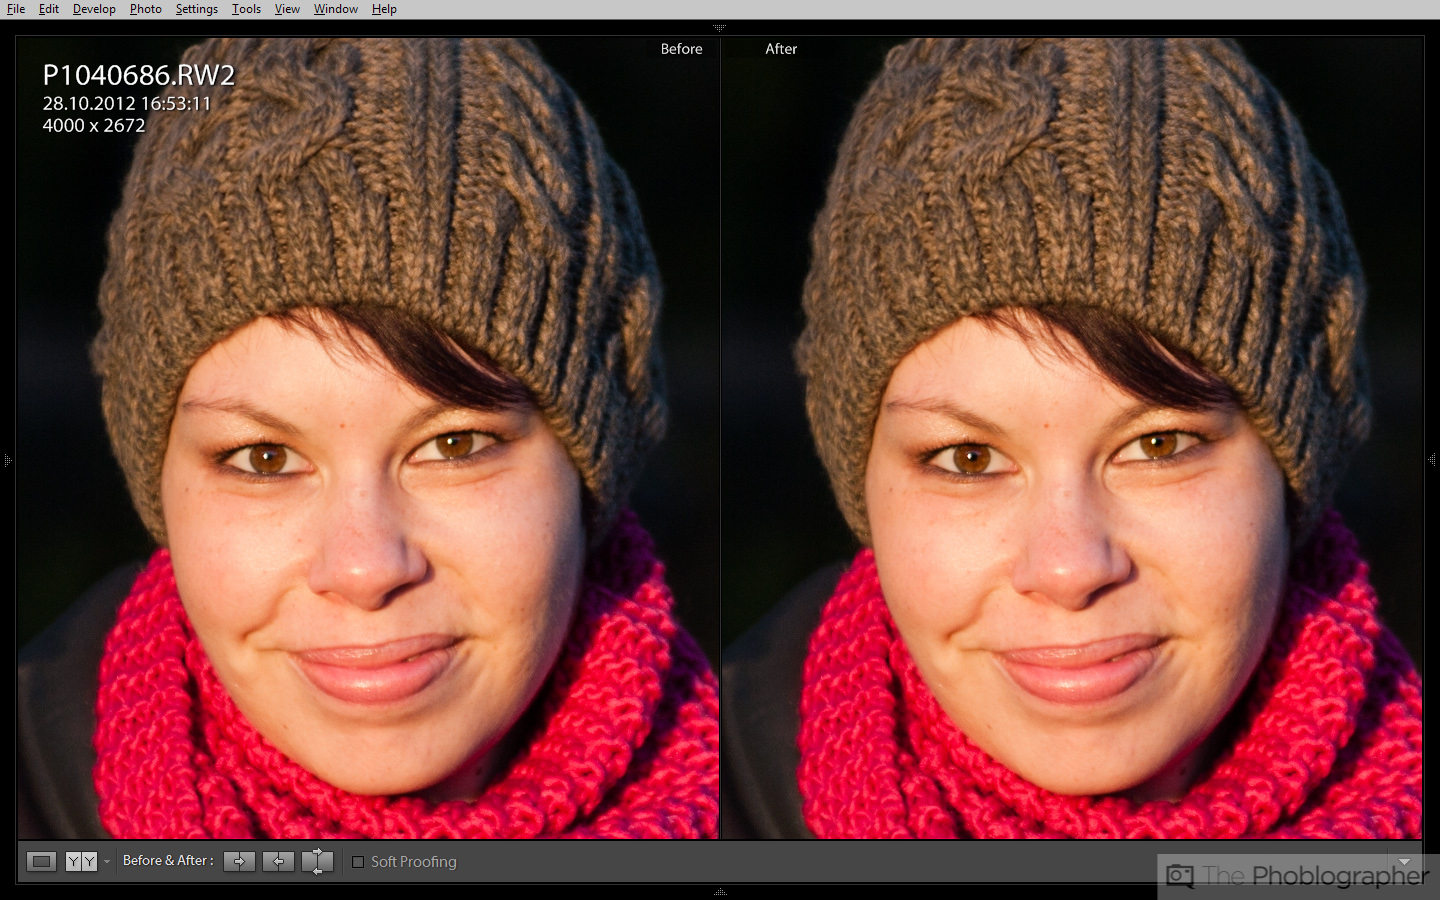
Depending on the particular image, the effect may not always be dramatic. Sometimes it’s just a slight enhancement that only becomes apparent when compared to the original image. But remember, it’s not about overemphasizing the eyes, but about adding clarity and making them look more defined. The goal is to make the eyes stand out only so much that they attract the viewer’s attention, without looking unnatural.
Please Support The Phoblographer
We love to bring you guys the latest and greatest news and gear related stuff. However, we can’t keep doing that unless we have your continued support. If you would like to purchase any of the items mentioned, please do so by clicking our links first and then purchasing the items as we then get a small portion of the sale to help run the website.
Also, please follow us on Facebook, Flickr and Twitter.
Get rid of the ads!
Did you enjoy reading this article as much as we enjoyed writing it? There's a way to support us and our reporting, getting ad-free navigation and more as a bonus. Subscribe to us for less than a coffee per month —just $3.99— or take advantage of our yearly subscription with a hefty discount for only $25.- An ad-free experience
- A free mystery box for Lightroom or Capture One
- All the books in our store
- 20% discount on Capture One
- 30% discount on Imalume Photo Theft Protection
- 20% off Herbs and Kettle Tea Company.
- 20% off your order from MPIX printing services.
- 5% off Viltrox Products via their eCommerce store.
- 10% off all film developing, printing and scanning services from Blue Moon Camera and Machine
- 15% off 7Artisans products: The lens and accessory maker is offering a sweet discount for Phoblographer's readers.