I have one question to ask of you readers, “Do you want to save time on your editing?” If so, read on! What I am going to show you is the sheer brilliance of the “Sync Settings” function of Adobe’s Lightroom software. It is quite easy to use and also very flexible in how you utilize it. Read on to see how it works.
Batch Processing
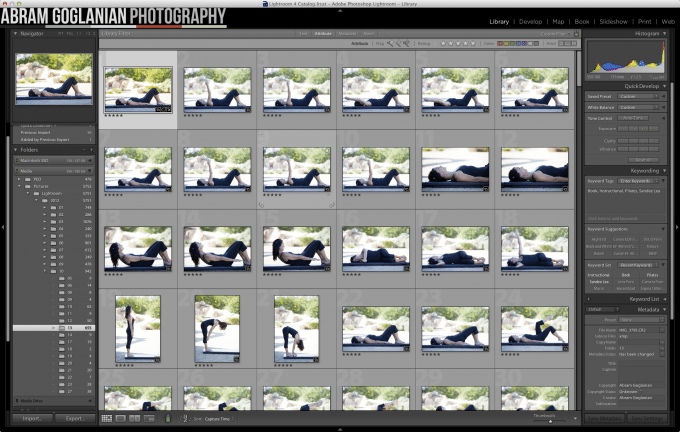
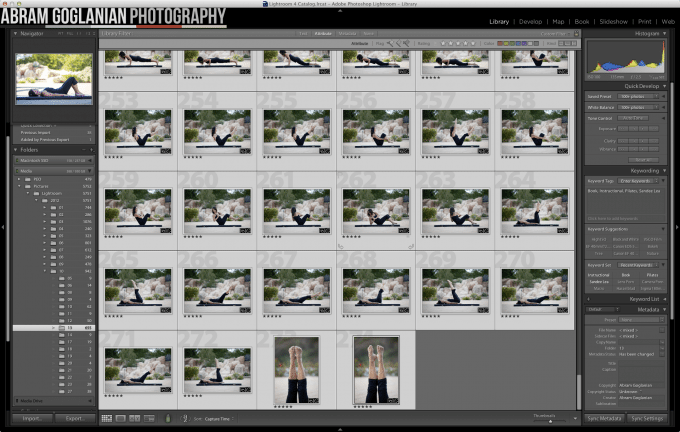
Say you have TONS of photos from a shoot which happen to be in very similar settings or lighting environments and want to quickly edit them all at once rather than one at a time. Thankfully there is an easy way to do this and it is called “Sync Settings” (though I like to call it Batch Processing). If you look at my example above I have several (well over 200) images from a shoot for a Pilates instructor, they are all in the same environment, and while the sun does move during the shoot, it’s a pretty safe bet that what looks right for one image in the set is going to look right for the rest (particularly if the images need to maintain a consistent look & feel as these ones will need to when I’m done. To get started edit the first photo in your series however you like, then return to the library module once you are finished.
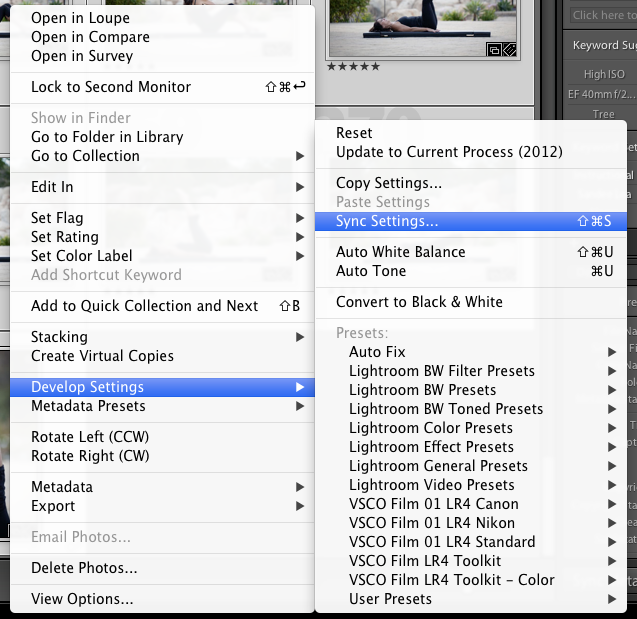
Next what you need to do is scroll to the bottom of your photos and select them all (or just use a “Select-All” command shortcut on your keyboard). Once you do this you will see on the bottom right-hand corner of the application that a button has become available saying “Sync Settings”, click this button once. You can also achieve the same thing by right clicking any photo and highlighting “Develop Settings” and then selecting “Sync Settings” from the pop up menu.
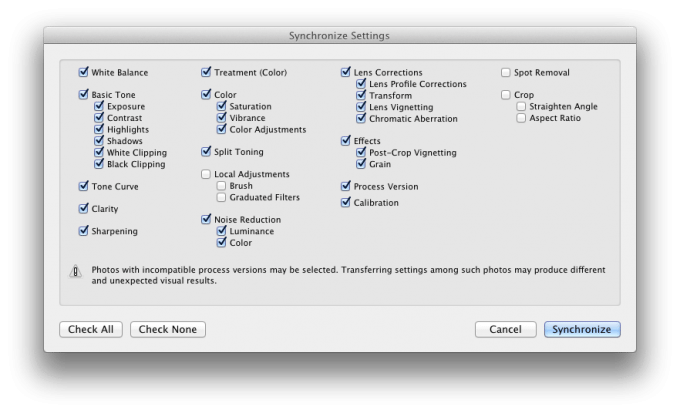
Once you choose this option you will get a new dialog box that looks like this:
All you have to do here is check the boxes for the settings you would like to have applied across the board. I typically recommend unchecking Local Adjustments, Spot Removal and Crop because it is often unlikely that one setting would be universally correct for all of your images. Once you are happy with the options you have chosen simply press “Synchronize” at the bottom right and let Lightroom do the rest. Depending on the speed of your computer and how many images you’ve chosen to sync it could take a few minutes, but the process is entirely automated. The result is that you will have matched all of the editing parameters you chose from your first image into however many other images you selected, and in the long run this saves you a HUGE amount of editing time. I hope you will find this tip as useful as I do, it’s something I utilize on almost every project I do.
If you don’t already have Adobe Lightroom 4, you can always purchase it from a place like Amazon (currently $118 for regular customers and $72 for students)
Please Support The Phoblographer
We love to bring you guys the latest and greatest news and gear related stuff. However, we can’t keep doing that unless we have your continued support. If you would like to purchase any of the items mentioned, please do so by clicking our links first and then purchasing the items as we then get a small portion of the sale to help run the website.


