Last Updated on 04/01/2011 by Julius Motal

There are many dangers when working with studio equipment. Here is a list of some of the more common dangers and what you can do to minimize these risks. In addition to the specific recommendations, almost all of these issues can be avoided simply by taking your time and thinking about what you’re doing—but some of these mistakes can be made by other people around you that are inexperienced in the studio. You have to pay attention to their actions as well. Use common sense, every shoot is different. I include a safety checklist that should be followed every time you are using studio lights and equipment whether in a professional studio, a home studio or on location.
ELECTRICITY
By far the biggest danger in the studio, mishandling of it can have dire consequences. 110/220 volts is already a lot of electricity, and if you are using any type of strobes they include large capacitors that can store up enormous amounts of electricity and disperse it in a fraction of a second.
The risks:
Overheating of equipment, arcing of the pack or light. This occurs when a plug is close enough to the unit to allow a spark to travel between them.
The fallout:
Best case scenario is equipment that can be completely ruined or require costly repairs. Explosions and fires can also result, while worst case scenario is electrocution and death.
If things go wrong:
If things go wrong anyway, make sure you have a fire extinguisher handy. Have a way of contacting emergency services in case this isn’t enough. For most of us this just means having a working cell phone, knowing the address where you are and 911 (or whatever your country’s emergency number is).
Required:
- * Properly rated, grounded and length extension cords
- Heat resistant gloves
- Gaffer Tape
- Isopropyl Alcohol
- Fire extinguisher for when it goes wrong anyway
1. Plugging and Unplugging
Always make sure all power packs and monolights are switched off and discharged before plugging or unplugging lights or power.
Note: all modern strobes discharge automatically on power-down. It’s still not a bad habit to hit the test button after switching it off.
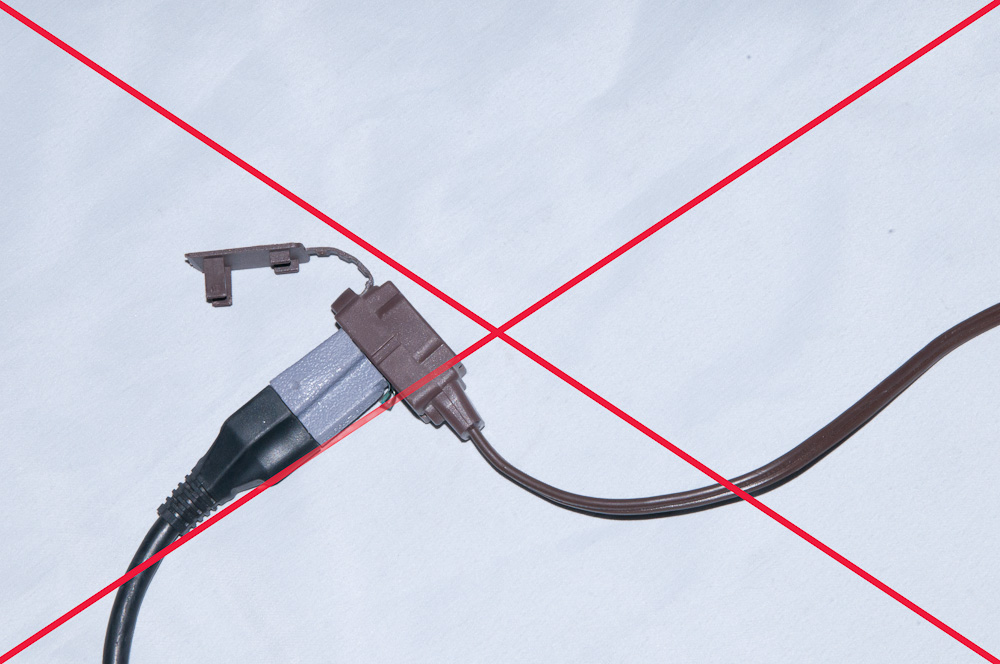
2. Safety knots, taped cables, properly rated electric
Any time you connect two cables together whether it is a power cable or a light to an extension cord or anything else, use a safety knot. Never add extension cords unless you have to. Tape down any cables that might cross traffic patterns and tape light cables to the bottoms of your stands.
These are simple habits that greatly reduce the chances that a plug will come lose or out or a light will fall over if someone trips over a cable. Safety knots reduce strain on the connectors. Taping cables makes it less likely someone will trip on them. Taping a light cable to the bottom of the stand means that usually if someone does it will slide the whole stand instead of pulling it over.
At every point in the chain of electricity you want to make sure that your ratings are appropriate for your needs. Start with the fuse box and make sure that it is accessible during the shoot and that you are plugging into fuses that are rated high enough for the lights you are plugging in. When possible, distribute packs over separate fuses. Avoid using extension cables. When necessary make sure they are not worn, are grounded and rated high enough to handle the electricity going through them. When in doubt, go higher than you need to. Keep in mind that chaining extension cords lowers the rating so make sure you have one long enough to get where you need to without chaining multiple cords together.

4. Never touch a bulb with bare hands (or any other skin)
Even if the light is off and at room temperature you never want to touch a bulb with your skin. If it is hot, the burns can be severe but if it isn’t it could be worse. The natural oils will remain on the bulb and when the bulb is used the oils will heat up. This can cause a bulb to explode. Best case scenario is having to replace the bulb (most strobe bulbs are over $100), but think flying shards of glass, fire and electrocution here as worse scenarios. A good pair of heat resistant gloves is essential in any studio kit. If you do accidentally touch a bulb wipe the glass down with a bit of isopropyl alcohol and let it dry before using it again.
5. Be careful with liquids
Keep liquids away from electricity. This should be super obvious and again is more about remembering to pay attention than that I’m trying to state an obvious lesson we should have all learned at a pretty young age.
PERSONAL INJURY
If you take photos on any regular basis, at some point someone is going to get hurt. It’s not a question of if, but when. Safety knots and taped cables from the section on electricity are a big way to reduce this risk. Here are a few others.
The risks:
Cuts, bruises, trips and falls will be most common but there’s no way to list or limit what could happen. Food poisoning or allergies is something to consider as well.
The fallout:
The best case scenario is a minor cut that needs a band-aid, a splinter that can be pulled with tweezers or a muscle strain that will bother you for a while. Worst case are obviously death or other severe and permanent injuries. Worst case for you is a lawsuit.
If things goes wrong:
When it does happen hopefully it will be minor – for these times have a first aid kit handy. For worse scenarios, make sure you have a way to call emergency services. For most of us this just means having a working cell phone, knowing the address where you are and 911 (or whatever your country’s emergency number is).
Required:
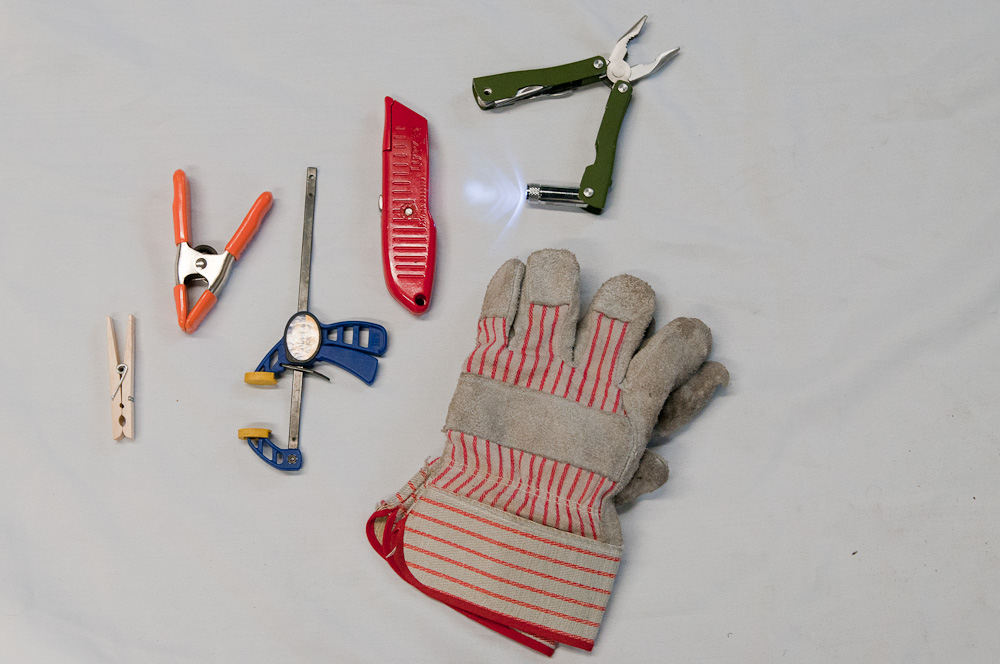
- First Aid kit
- Gaffer Tape
- Various clamps
- quality stands
- sandbags or other weights
- Ladder
- liability insurance
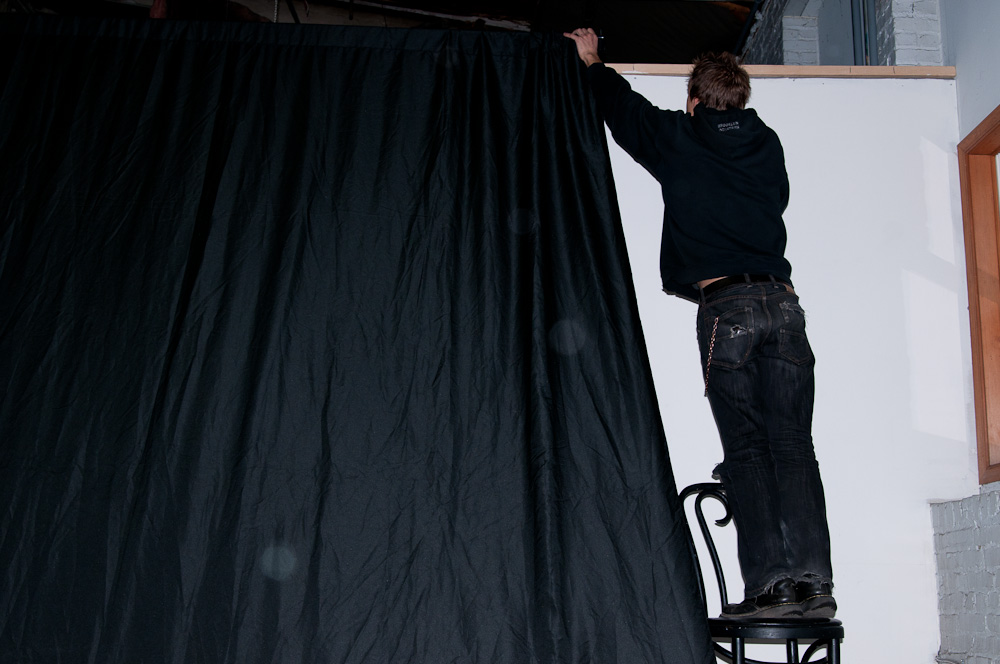
1. Use a Ladder
Don’t stand on chairs, tables or any other unstable object when you have to get above your head, which will happen often. Use a stable Ladder that’s tall enough for your needs, and pay attention while climbing up and down. An 8 foot ladder works in most environments and for most scenarios, but use your judgment. If you photograph products a stepladder might be fine, while in other cases you might need a 10 or 12 foot ladder.
2. Stabilize stands, tripods and other equipment
Use stands and tripods capable of handling the weight and size requirements for your equipment. Tape cables to stands and the floor. If you have a heavier side to something (such as a softbox on a light making it front heavy), place one leg under it (usually forward). Use weights as necessary either as a counterweight or at the base. Clamp or tape loose or unstable items to more stable objects. When there is heat or electricity sometimes clothespins can be useful.
3. Keep track of gear
Don’t leave things around in places people can trip on them. Don’t leave a utility knife open. Make sure neither you nor others put things in stupid places that will increase the chances of a problem.
4. Caution with food
I have had members of my team get sick from food poisoning including myself. When possible, use a reputable catering company for your craft service. Not only does their business rely on providing safe food but you transfer some of the risk to them. When this is not an option order from places you know and trust. If you are providing your own food and drink for the shoot, ensure you have proper refrigeration and heating options. Find out in advance whether anyone at the shoot has food allergies or restrictions and respect them. If none of these are possible don’t provide craft service.
5. Have liability insurance
Photographers’ insurance is not that expensive. Liability insurance is affordable and essential. See information at the end of the article on contacting Hill & Usher for a quote.
THEFT AND DESTRUCTION OF EQUIPMENT
Your gear might be stolen. Someone could drop your camera or knock over a light or other equipment. Sometimes things just break.
The risks:
You put your camera bag down, turn around and its’ gone. A client realizes that the $400 shoot they hired you for can more than be paid for by hawking your $3000 camera to a pawn shop. A strap breaks and you watch if fall into the Grand Canyon. A hard drive fails and you lost your last five years of work.
The fallout:
Best case scenario is the day gets held up or completely lost because you can’t finish the job. Worst case is you can’t replace lost gear and can’t work in the future. You never want to have to make that call to cancel a shoot because you don’t have a camera.
Required:
- TSA approved lock
- Street smarts
- Equipment Insurance
1. Use a lock
Whenever in public areas with your equipment, use a lock. If you fly make sure it’s a TSA approved lock so that you can leave it on your case.
2. Be street smart.
Understand the risks of your current situation and act appropriately. One thing I commonly do if I can’t keep my eyes on my bag at every moment is put my leg through the strap on my bag. If someone grabs my bag I’ll know it. That’s just one example.
3. Add equipment coverage to your insurance.
Adding equipment coverage for your gear to a liability plan does not increase the premium by that much. How much depends on what you need to cover and where you generally work so I can’t quote it.
Hill & Usher
Hill & Usher has been providing insurance to the photography industry for 13 years and has a wide variety of options to fit your needs. Call at 866-977-4725 x134 to get a quote today. Remember to mention Sander-Martijn at The Phoblographer sent you.
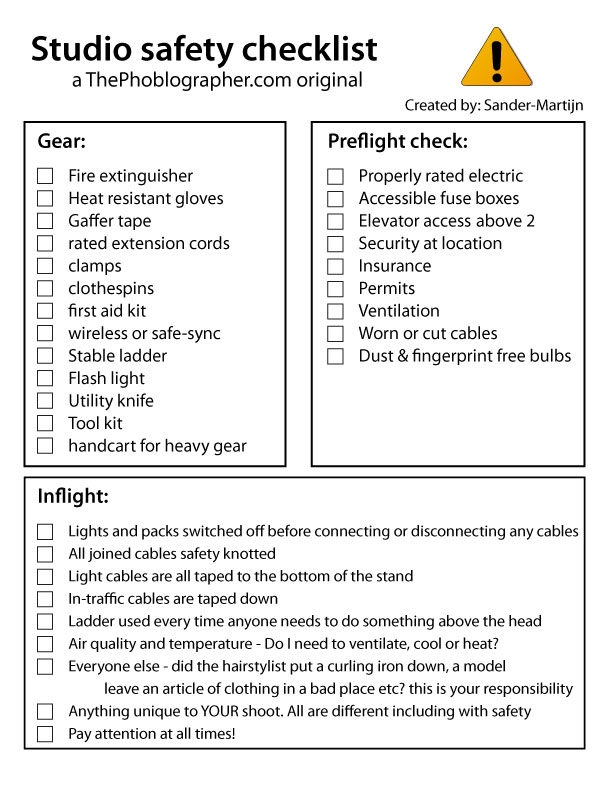
Studio safety checklist
Finally, here is the studio safety checklist to remind you of all the things you should consider. Download and print it off:
Sidenote: The girl in the intro was not dead. This was a rejected photo from a shoot. For the final image and a description of what was wrong with this one and how I ultimately got what I was looking for, see my personal blog post The importance of bringing music to your shoot.
Have any questions? Let us know in the comments below and feel free to share this checklist with your friends, family, co-workers, etc.
Please Support The Phoblographer
We love to bring you guys the latest and greatest news and gear related stuff. However, we can’t keep doing that unless we have your continued support. If you would like to purchase any of the items mentioned, please do so by clicking our links first and then purchasing the items as we then get a small portion of the sale to help run the website.
Also, please follow us on Facebook, Flickr and Twitter.
Get rid of the ads!
Did you enjoy reading this article as much as we enjoyed writing it? There's a way to support us and our reporting, getting ad-free navigation and more as a bonus. Subscribe to us for less than a coffee per month —just $3.99— or take advantage of our yearly subscription with a hefty discount for only $25.- An ad-free experience
- A free mystery box for Lightroom or Capture One
- All the books in our store
- 20% discount on Capture One
- 30% discount on Imalume Photo Theft Protection
- 20% off Herbs and Kettle Tea Company.
- 20% off your order from MPIX printing services.
- 5% off Viltrox Products via their eCommerce store.
- 10% off all film developing, printing and scanning services from Blue Moon Camera and Machine
- 15% off 7Artisans products: The lens and accessory maker is offering a sweet discount for Phoblographer's readers.