Last Updated on 03/04/2016 by Chris Gampat
Creating the Photograph is an original series where photographers teach you about how they concepted an image, shot it, and edited it. The series has a heavy emphasis on teaching readers how to light. Want to be featured? Email chrisgampat[at]thephoblographer[dot]com.
Cory Parris is a wedding and portrait photographer in Seattle. “I love all the technical aspects and artistic challenges.” he tells us. “The think I love most about photography is telling stories.” Indeed, that’s what part of enviromental portraiture is about–which is what he aimed for with his image “The Scientist.”
“Whether it is a collection of hundreds of images or a single image, I think the image should portray some aspect of their personality, explain who the person is, or document a feeling at that moment.” says Cory. “I feel like I’ve done my job when I can look at an image and see how it illustrates the subject in some way.”
Here’s his story.
The Concept
Environmental portraiture is one of my favorite things to do. I try to use a location that helps tell a story about the subject of the portrait in an creative and visually interesting way.
The Gear
- Canon 5D Mk III
- Canon 16-35mm f2.8 L
- Canon 600 RT
- SMDV softbox
- Canon ST-E3 RT
The Shoot

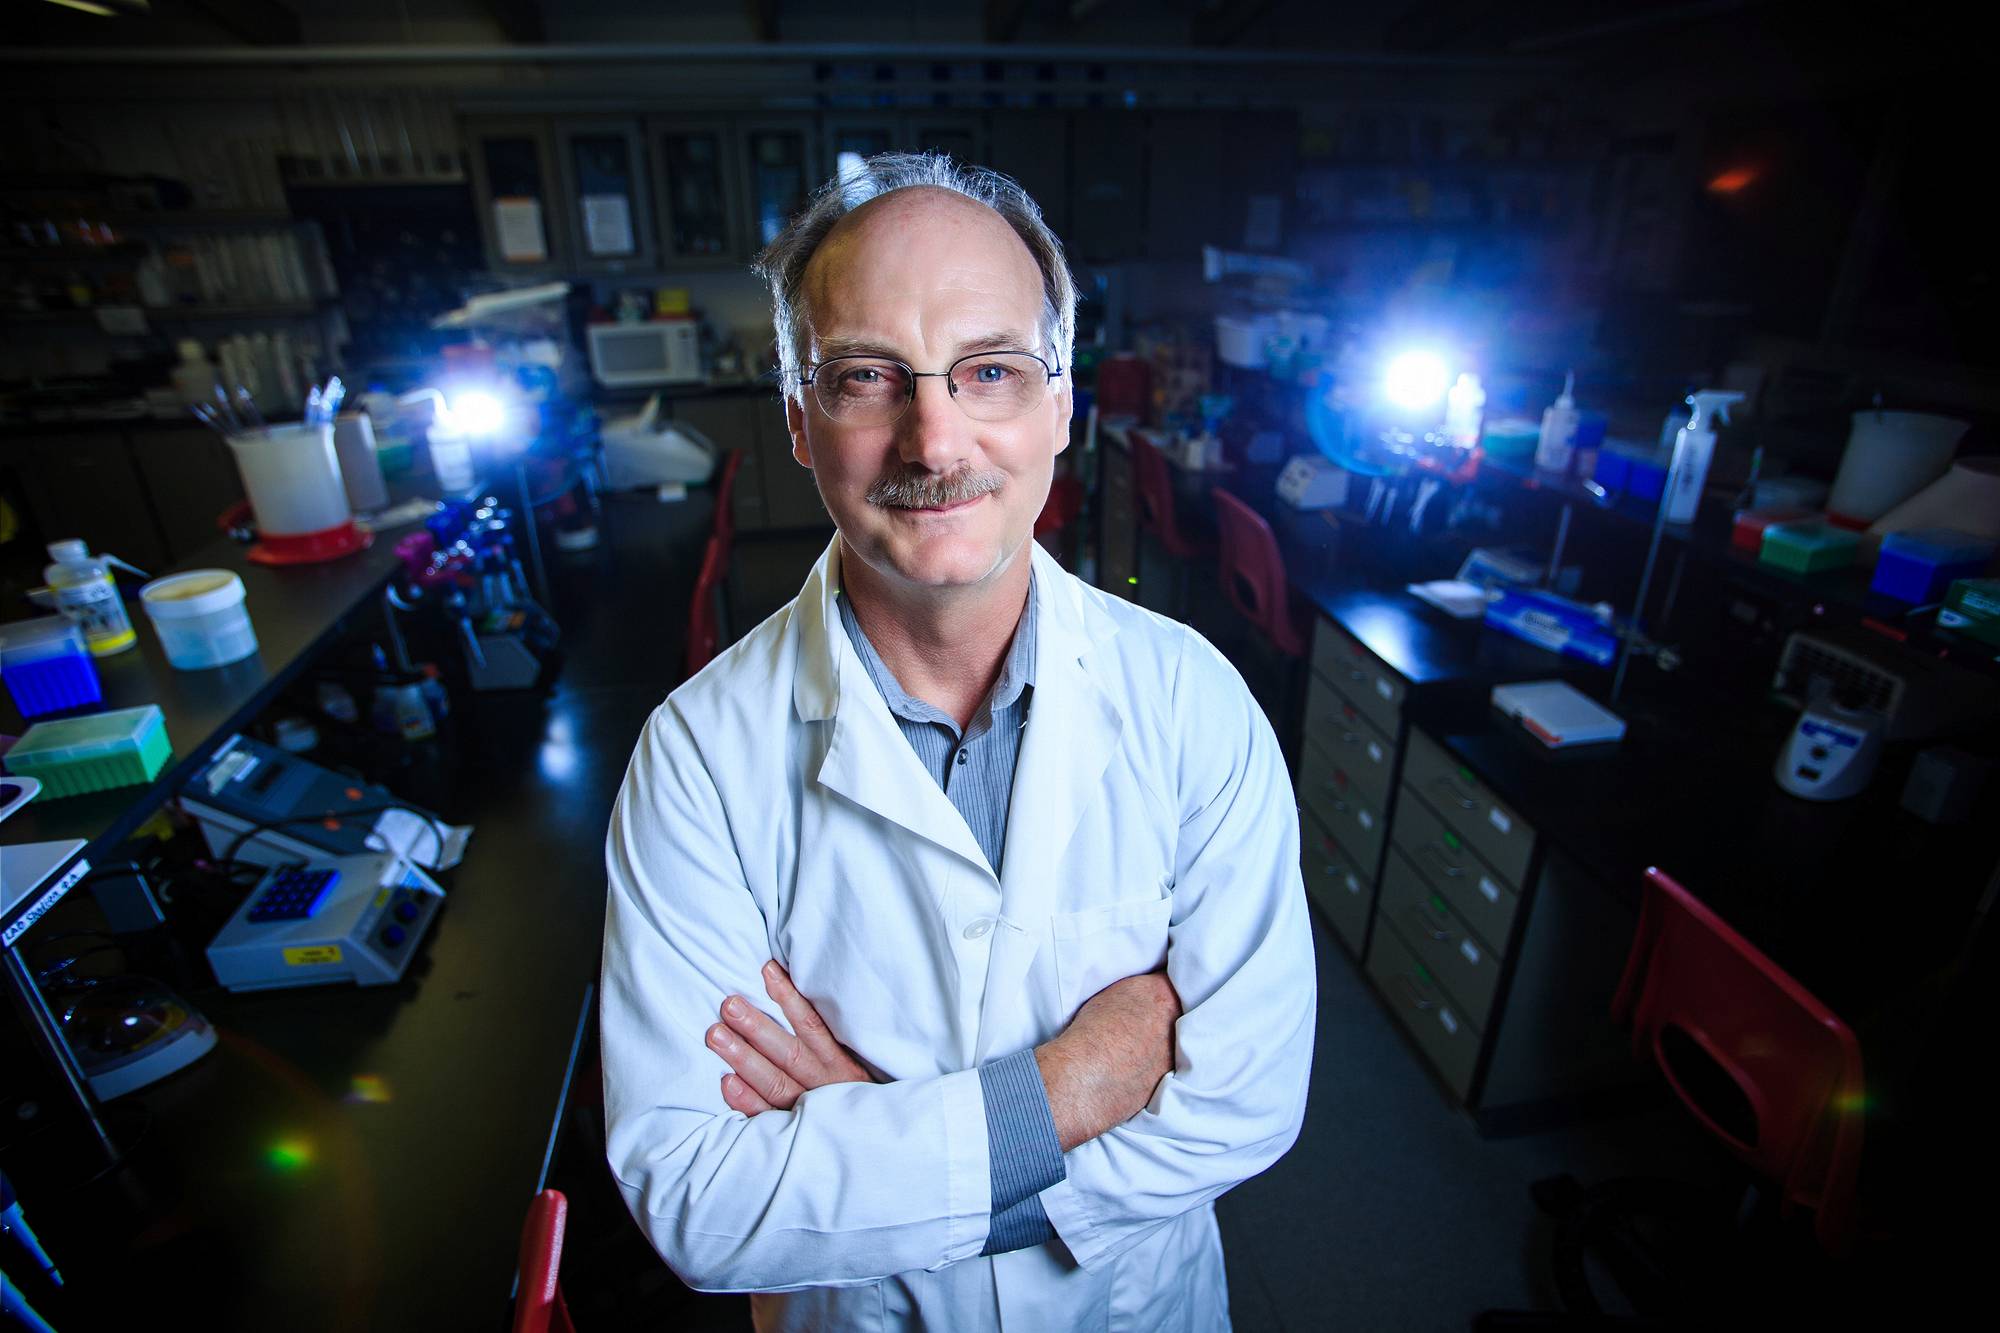
This image is of Robert. He is a teacher, grant-writer and scientist. I wanted to make his lab as cool and interesting as I could. This was a bit more of a challenge than I thought it would be. Since the lab itself was not quite as inspiring as I was expecting, I wanted to add some visual interest to the image with lighting. I decided on making the lighting blue in the back. However, I don’t normally love how the lights look when I put blue gels on them, as they are not blue enough in comparison to the daylight balanced flash units. So, when I want blue in the background, I cheat.
I always start with setting up the background exposure before I place my subject and light them. For this image, I didn’t want much of the existing light in the room to show through, so I set the ISO to 200, the shutter to 1/80 and the aperture to f2.8. I was using my Canon 5D Mark III with my Canon 16-35mm f2.8L at 18mm to exaggerate the perspective and increase the size of the background. The f2.8 aperture also limited the depth of field a bit to make him pop off the background a bit.

I set the two Canon 600EX RT in the background in the frame on shelves so they were high enough to hit the back of his head. I kept them pretty tight to his shoulders, so they wouldn’t hit the sides of his face too much.
Once everything else was set, I placed a final 600EX RT, into an SMDV softbox. I placed the softbox pretty close to Robert just out of frame camera right. I prefer the SMDV softbox over others that I have used because it is quick to set up and is a bit deeper than others which results in less undirected light spray. I was using a Canon ST-E3 RT to fire and adjust the flash units.
And now for the tricky part. When I want blue in the background, instead of putting blue gels on the flash units in the back, I use an orange gel on the flash unit illuminating my subject. Then, I set the camera’s white balance to Tungsten to approximate the final effect, and to make it closer to white balance that I will end up using in Lightroom. When you set the camera white balance (and/or lightroom), it is about 3200 Kelvin in color. With the Canon flash units being more in the 5500 Kelvin range, it makes them appear blue. Very similar but opposite effect as when you balance for orange lighting in a home and have a window turn blue.
On a bit of a tangent, real tungsten style light bulbs produce a beautiful orange color in the background when you are using flash set to 5500ish Kelvin. While better for the environment, newer styles of light bulbs do not have the same rich burnt orange color.
Once all the lighting was set, it was just a matter of placing my scientist. I stepped onto the bottom rung of my little stepladder to get more of the table tops into the photographs. I had him fold his arms and smile. Since he doesn’t really smile for photographs, this took some cajoling and a couple minutes of me making comments and trying to entertain him.
Post-Production
Once I had this and whole bunch of other portraits of him, I took them back to my office. For my workflow, I download the images and immediately burn a backup blu-ray of the images. Then, I import into Lightroom. The 3200K was too blue, so I moved that to 4500 and made some very minor adjustments. Then I exported it and sent it out to a retouching service, since I was busy. I usually retouch my own, but for this one, I was under a time crunch.
There you have it. This took about ten minutes to set up and about another five to shoot it. I also did a few other setups with slightly different lighting, but following the same order of operation. Figure out how I want the background to look, set up lights for the background, then place the subject and light him.