All images in this story used with permission. Lead photo by Betty Liu.
With America’s Thanksgiving Day happening today, you’re bound to be taking loads and loads of images that you’ll enjoy and share on social media with many others. To create those better images, the Phoblographer has pooled a few American food photographers that have been interviewed on the site before. Here, they all give you insightful, artistic and technical tips on creating images of the big meal.
Nikki Gardner
All images by Nikki Gardner
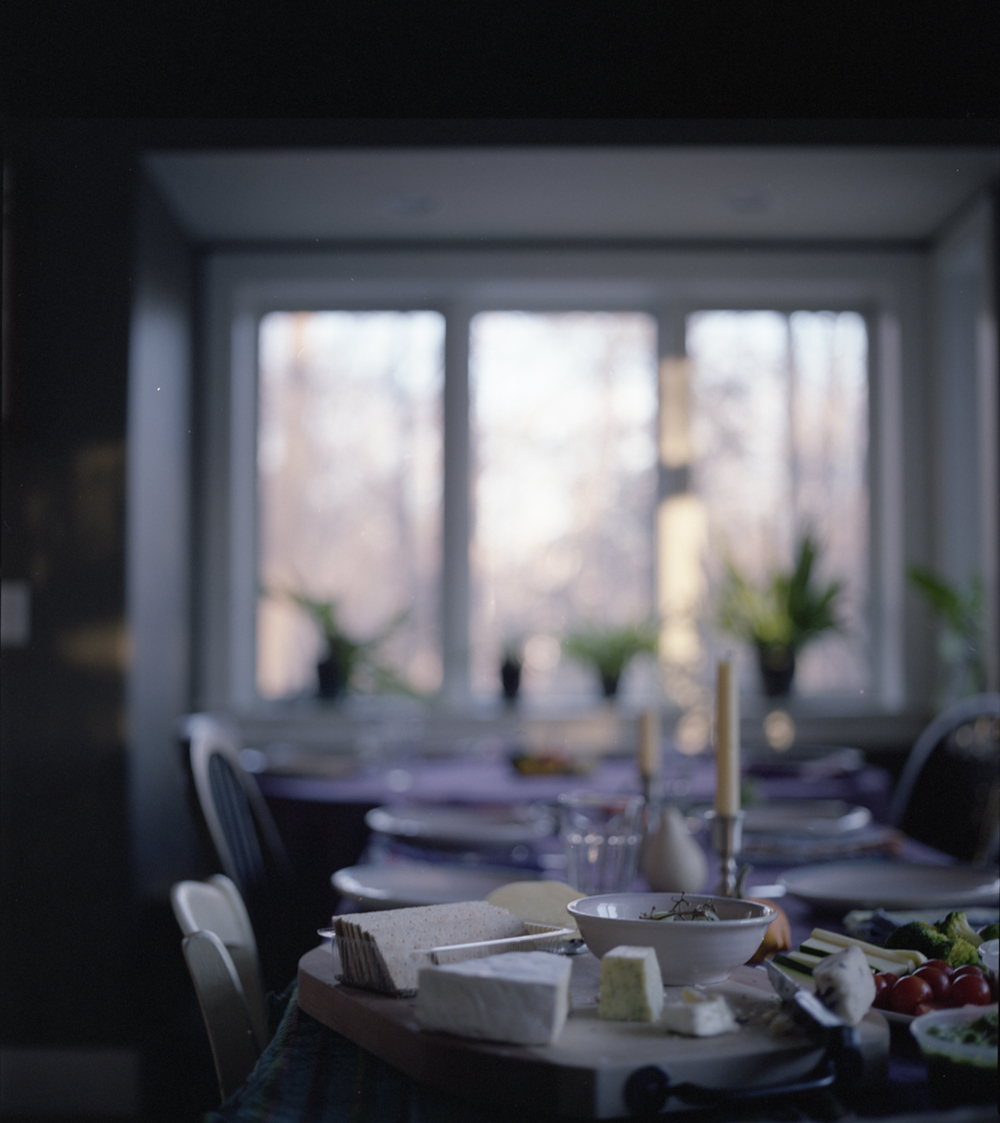
Look for mood, light, and ambiance to tell a story. Have your camera set and ready. Dial in your ISO and shutter speed. Find the details and think about how you could tell a story in a single frame. Slow down and study the scene. I shot this photo on Thanksgiving right before the feast began. My sister in law set the cheese plate on the table. The late afternoon light and how everything had a place at the table struck me so I pulled out my Hasselblad, metered the scene, and captured the quiet side of the holiday. Think about photographing how the scene feels as well as what’s actually there. This photo reminds me of a quiet afternoon in southern Vermont, fire roaring in the next room, the smell of pumpkin, Brussels Sprouts, and turkey luring us all to the table in minutes.
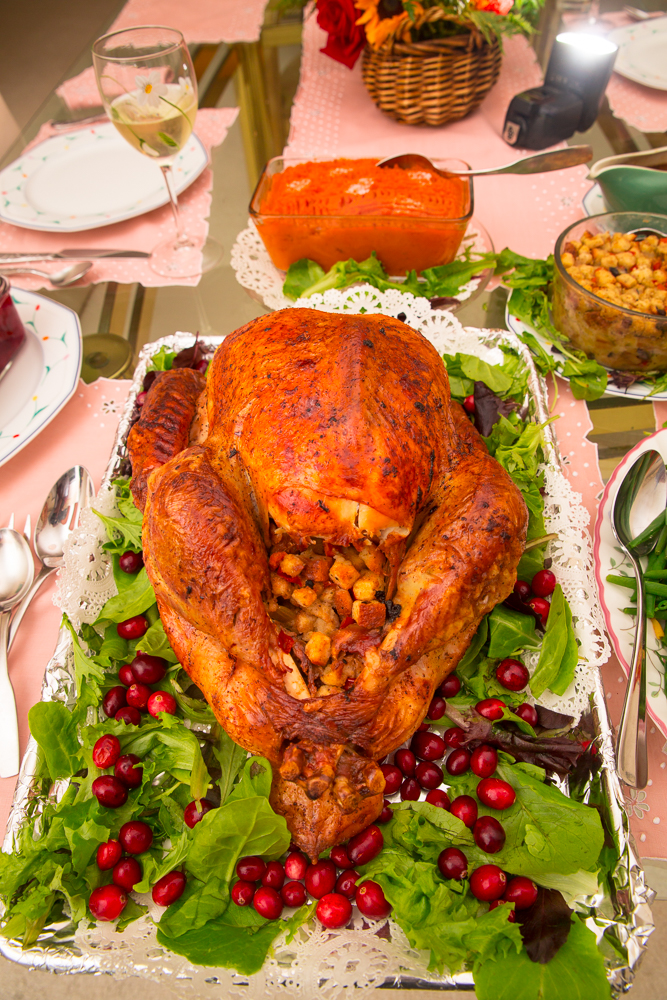
Bill Wisser
All images by Bill Wisser

My tip for tasty photos of your Thanksgiving turkey is: Keep your equipment footprint small. The dining room is probably going to be crowded. Here’s my recipe:
- Mount one speedlight to your camera and aim it to bounce off the ceiling a little behind you, turning the ceiling into a large, soft, but slightly directional light source.
- Take a second speedlight (optically or electronically triggered by the first) and — bonus tip — don’t mount it on a light-stand, which would just get in everybody’s way, and could easily be knocked over. Instead lay the second speedlight on the table pointed straight up to give a nice general fill.’
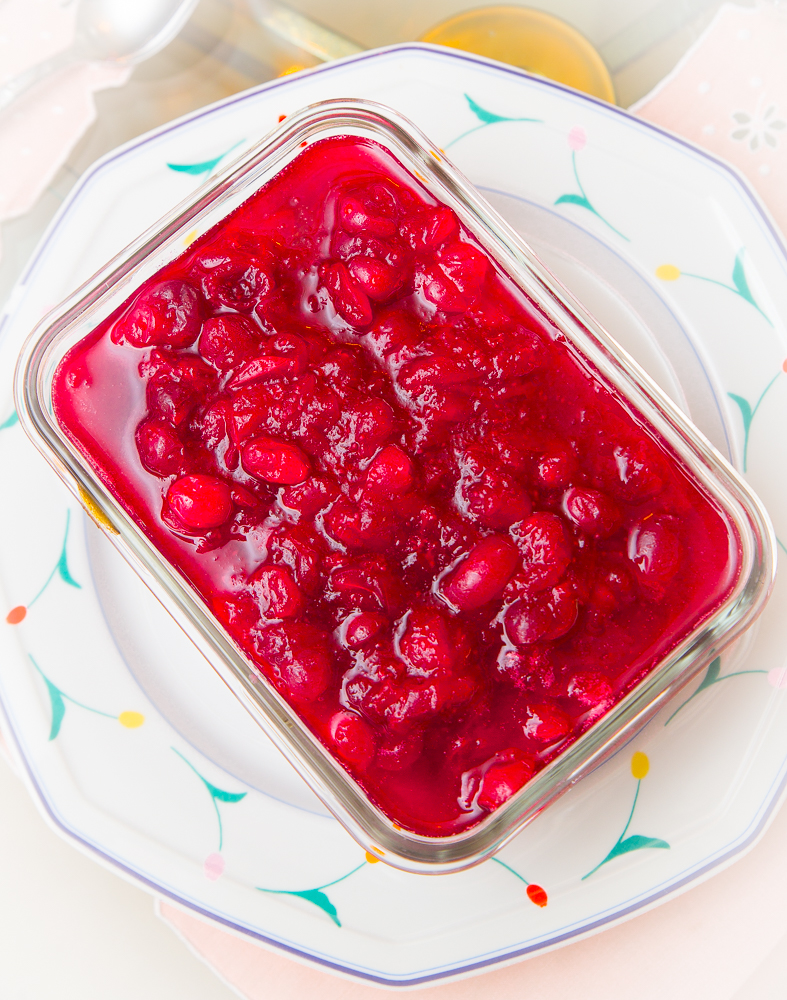
And don’t forget the homemade cranberry sauce:
Yvonne Cornell
All images by Yvonne Cornell.
A Bird’s-Eye View of Thanksgiving
Do you find it difficult, sometimes, to see your Thanksgiving for the food that obscures the view? Norman Rockwell’s famous 1943 painting entitled Freedom from Want features a huge roasted turkey beautifully displayed on a platter in the center of the image. However, it’s not the turkey that makes this timeless image so captivating. Instead it’s the faces of people engaging with one another that truly brings the story to life. Thanksgiving images should feature your family and friends sharing authentic interactions amidst the food, including Aunt Martha’s wonky imitation of a hip-hop dance moves or boisterous Grandpa Louis tipping back one too many. The turkey merely plays a supporting role in your unique holiday drama.
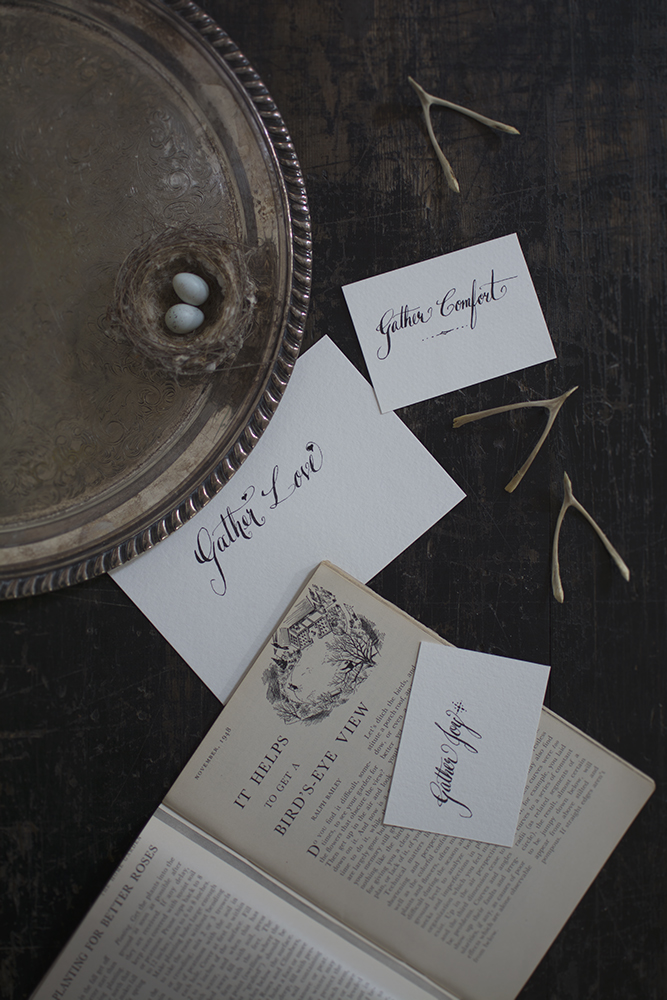
Find playful opportunities to photograph the children around the turkey with large hungry eyes peeking over the top. Or use a tall step stool to capture a bird’s-eye view of the gathering. If your turkey dries out while you’re staging your own Norman Rockwell portrait, use a pastry brush dipped in olive oil to moisten the skin. Plate the whole turkey on a platter with rosemary twigs, aromatic herbs or sliced citrus, but let your family and friends dress as they choose. We’re keeping it real here, remember? Thanksgiving is a coming together of so much more than the feast and the threads. Look for those authentic moments that tell the story of how we gather to share stories, wisdom, hope, joy, sadness, grace, comfort, love, humor and gratitude.
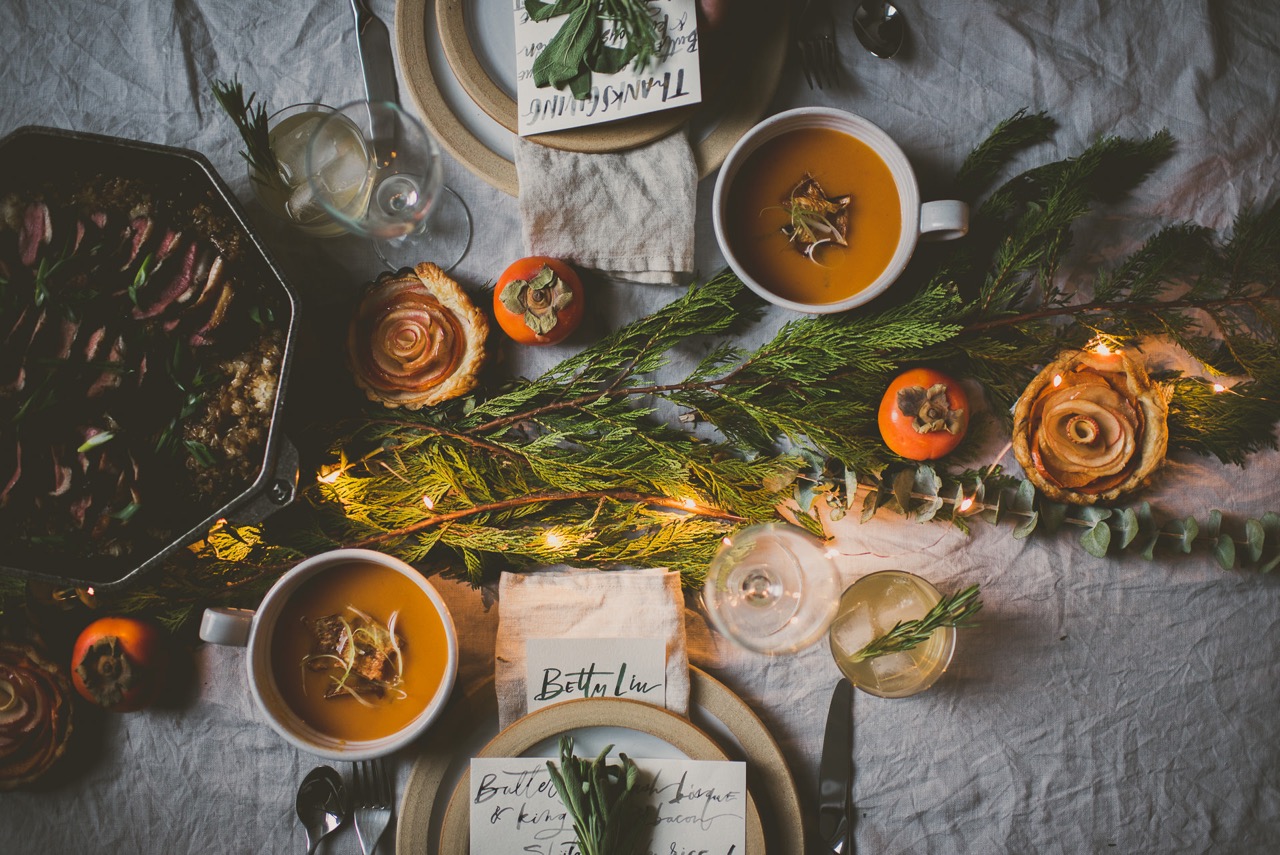
Betty Liu
All images by Betty Liu
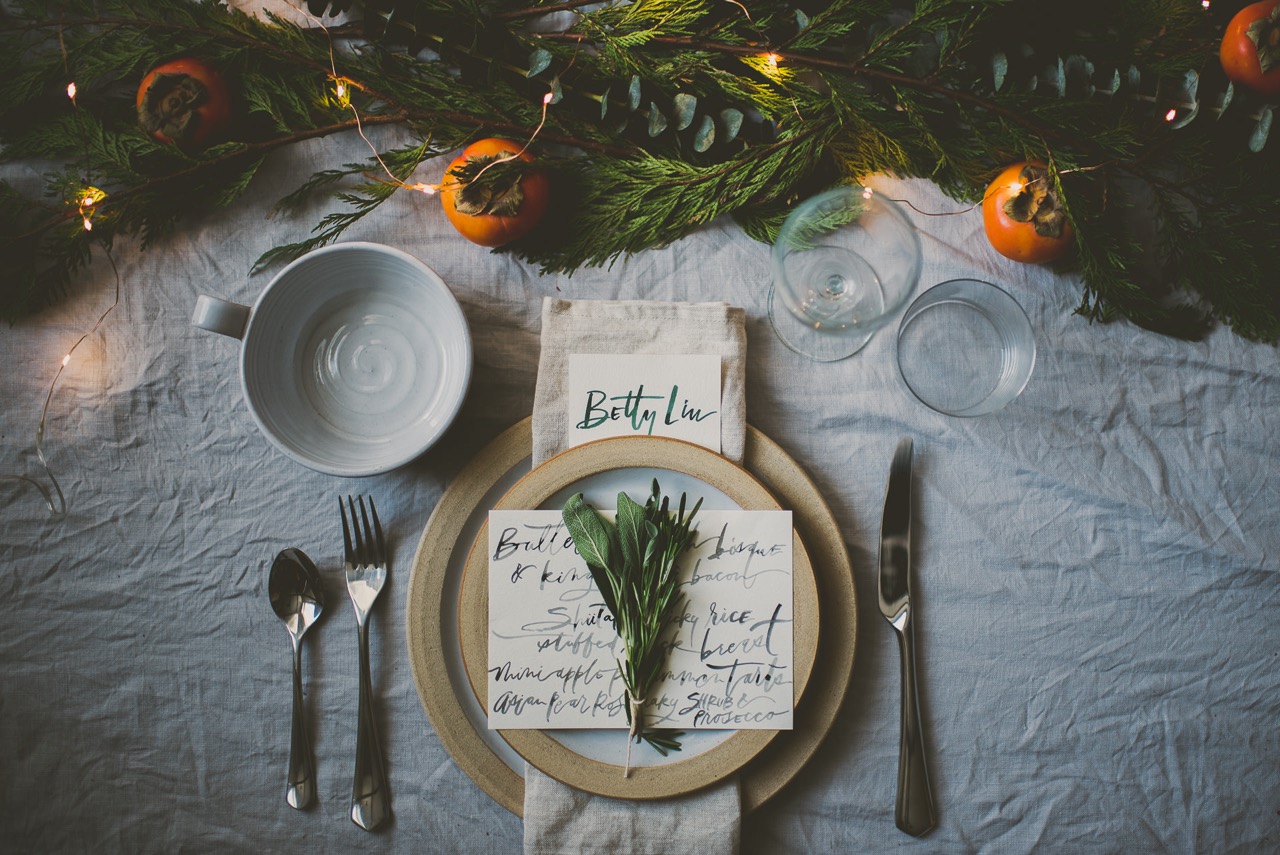
Photographing a Thanksgiving table scape, whether it’s for an intimate cozy dinner for two or a larger gathering of twenty, can seem daunting, but if you see every element of a Thanksgiving table scape as an opportunity for styling, the process can become a dynamic, fun process to express your personal style. Styling can help bring a photo to life – thoughtful styling can add movement, atmosphere, mood, and most of all, personality. I tend to lean towards muted, neutral tones accented by select color accents. I find that having a mostly neutral palette (notice the tablecloth, tableware, dinnerware, napkin, and menu are all of neutral tones) allows the shapes and color of the food to shine and draw attention. A simple garland of cedar and eucalyptus, accented by bright persimmons and a delicate string of lights is stretched across the table to provide an earthy, holiday cheer to the table scape.
Take note of your color palette, be aware of the details, and have fun with your Thanksgiving table scape!!
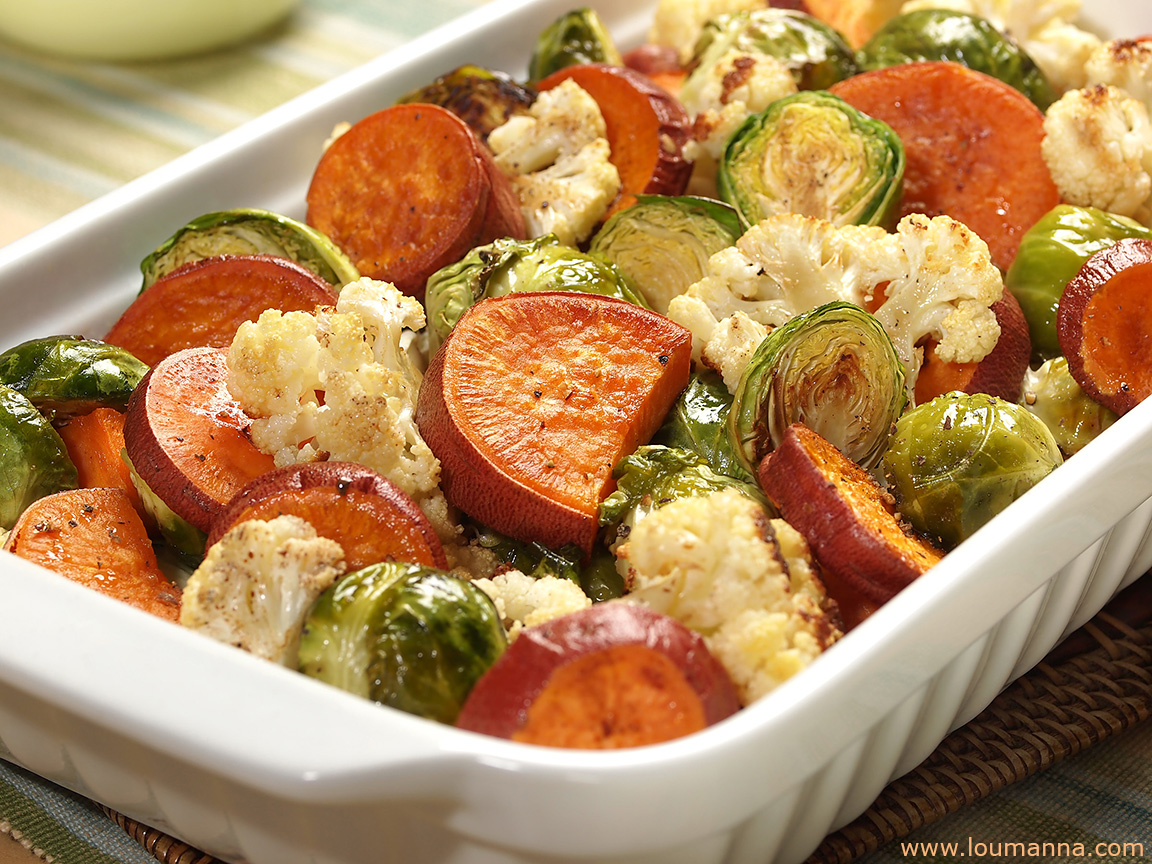
Lou Manna
All images by Lou Manna
Food Photography Tips for Thanksgiving
CAMERA TIPS:
- ISO: When shooting indoors without a flash, the ISO setting should be set to 800 or 1600 so that the camera sensor is more sensitive to the ambient light.
- Exposure Compensation: View your photograph on the LCD screen to see if the image is too light or too dark. If you did not have the right exposure, adjust the exposure compensation to lighten (+) or darken (-) the photo when using AUTO mode.
- White Balance: The auto white balance setting in your camera normally does a good job for most lighting situations. If you are shooting indoors with household lamps, (i.e., usually under incandescent or tungsten lighting), use the camera preset for tungsten white balance. If the lighting is fluorescent, then the fluorescent white balance setting will work better. The best method is to take a custom white balance reading off of a white or grey card for a more accurate color rendition in your photo. For more information, consult your camera manual.
- Scene Modes: If your camera has Scene Modes, try the Cuisine or Food Mode, Indoor or Party Mode, and Candlelight Mode to explore the different effects. You may like one better than the others for your subject.
- Art Filters: Experiment with colors and moods by using the in-camera creative filters found on many cameras. Your holiday shot could look even more festive and colorful by using the Pop Art filter. The saturated color reproduction will enhance your beautiful food and setting. Try the Soft Focus filter to capture the mood of a romantic dinner.
- Macro Mode or Lens: To shoot food close up, use the macro setting on a point and shoot camera, which is typically indicated with a flower icon. Use a macro or a close focusing lens on a camera with interchangeable lenses to get closer to your subject.
- Tripod: A tripod helps to avoid camera shake under low light conditions and with slow shutter speeds (below 1/60).
- Two-Second Self Timer: To reduce camera shake, set your camera to take the picture a few seconds after pressing the shutter release button. This will reduce the movement your hand might cause when taking the picture. With a DSLR, try the mirror-lock up feature to further reduce camera shake.
LIGHTING TIPS:
- Built-In Flash: Try to avoid using your camera’s built-in flash since this direct light flattens the subject and reduces texture and depth. It is better to use the available light from lamps and lighting fixtures in the room or natural daylight from a window.
- External Flash: If you are using an external flash unit and not a built-in flash, bounce the light from the flash into a neutral colored ceiling or a side wall to give your subject more dimension and create some shadow for depth.
- Reflectors/Diffusers: Use household items such as aluminum foil, makeup mirrors and white napkins to reflect the light source into the shadow areas of the photo and capture more detail. To soften the light source, try diffusing it with wax paper or a sheer white cloth to achieve more detail in the bright portions of the photo.
COMPOSITION TIPS:
- Subject: Try to have a main point of interest in your image. Avoid using too many objects that crowd the space and distract attention from the main subject. Keep it simple since less is more when it comes to food photography.
- Placement: Whatever your subject, compose your photograph to draw the viewer’s eye to it. Keep in mind the “Rule of Thirds” in which you divide the frame into a tic-tac-toe design and place your subject at one of the intersecting points. A spiral composition leads your eye clockwise into the food and works well also.
- View: Lower and raise the camera to obtain unique perspectives. Get closer and crop into the subject to create a unique view and a dramatic effect.
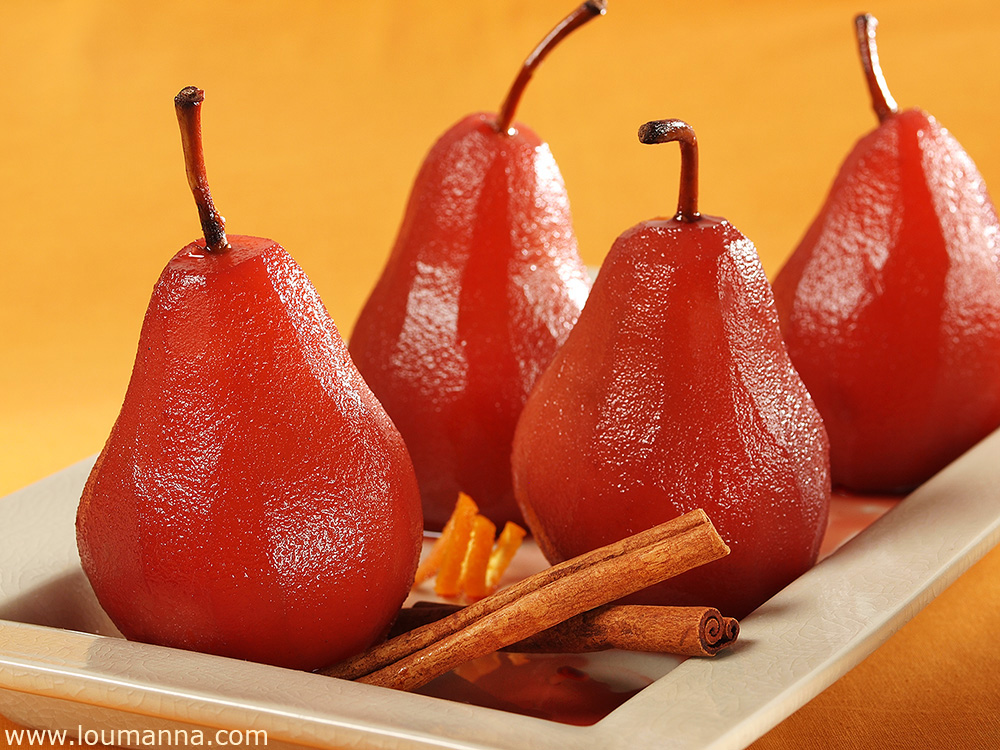
FOOD STYLING:
- Contrast: Strive to obtain contrasting colors, shapes and height of the food items.
- Highlights: Be prepared to shoot as soon as the food is ready so that it looks fresh, moist, hot, etc. Lightly brush the food with vegetable oil to add shine and highlights.
- Tools: Manipulate small food elements with tweezers. Clean up crumbs and food particles on the plates or elsewhere with Q-tips and paper towels.